This article provides step-by-step instructions for viewing detailed DriverReach billing statements as well as for purchasing or auto-refilling SMS credits.
Step 1
From any page within the DriverReach platform, select the white cog icon located on the upper right-hand side of the screen within the blue main navigation menu.
Step 2
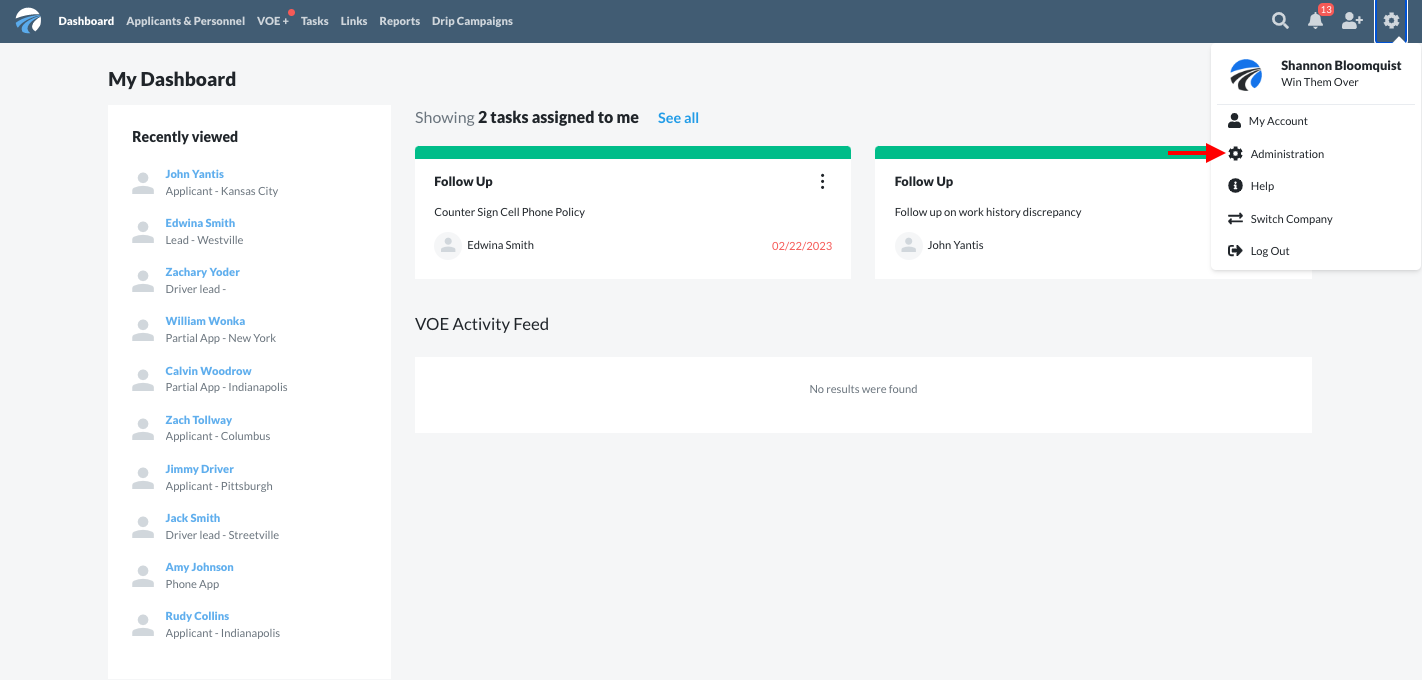
Select "Administration" from the drop-down menu that appears.
Step 3
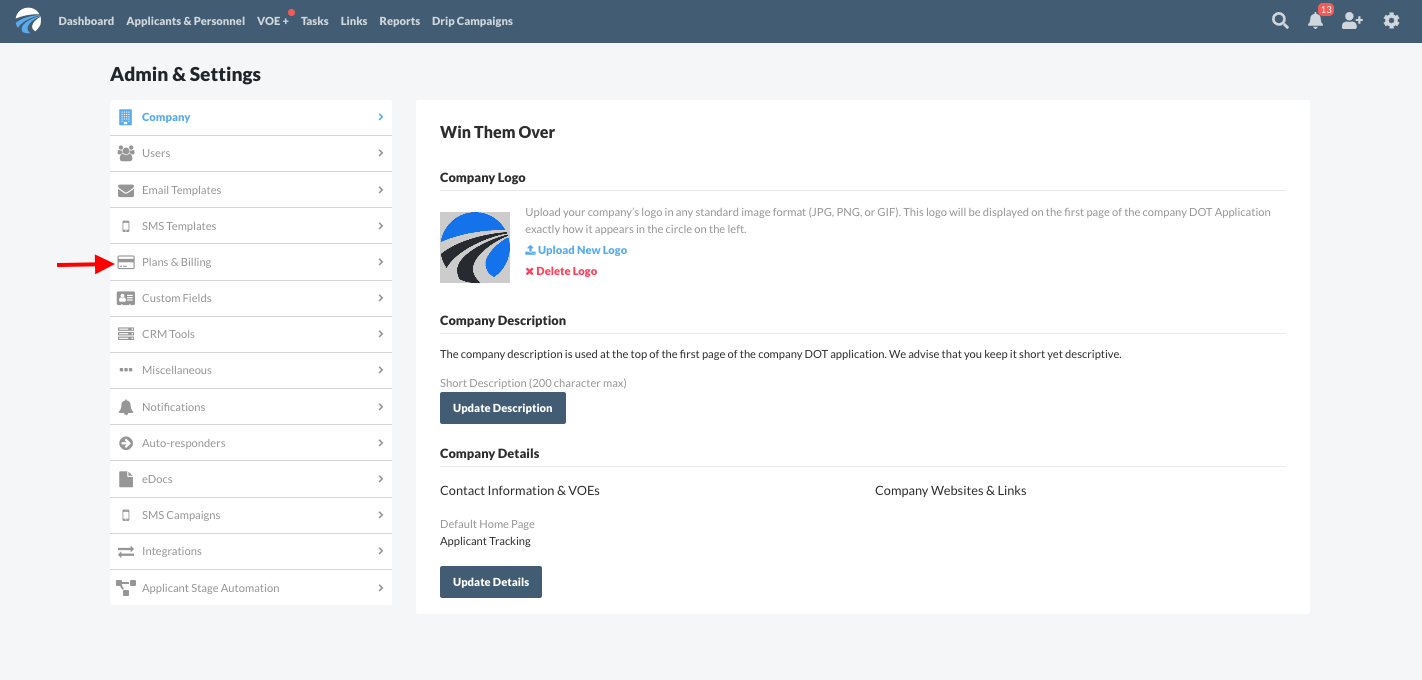
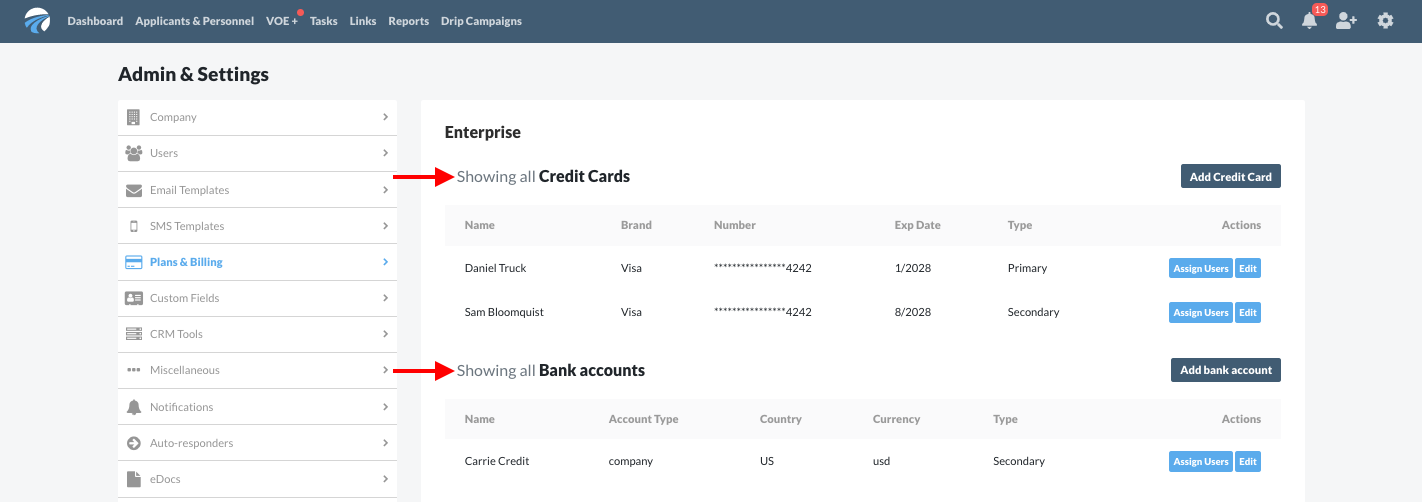
Underneath the "Admin & Settings" menu along the left side of the screen, select "Plans & Billing".
Step 4
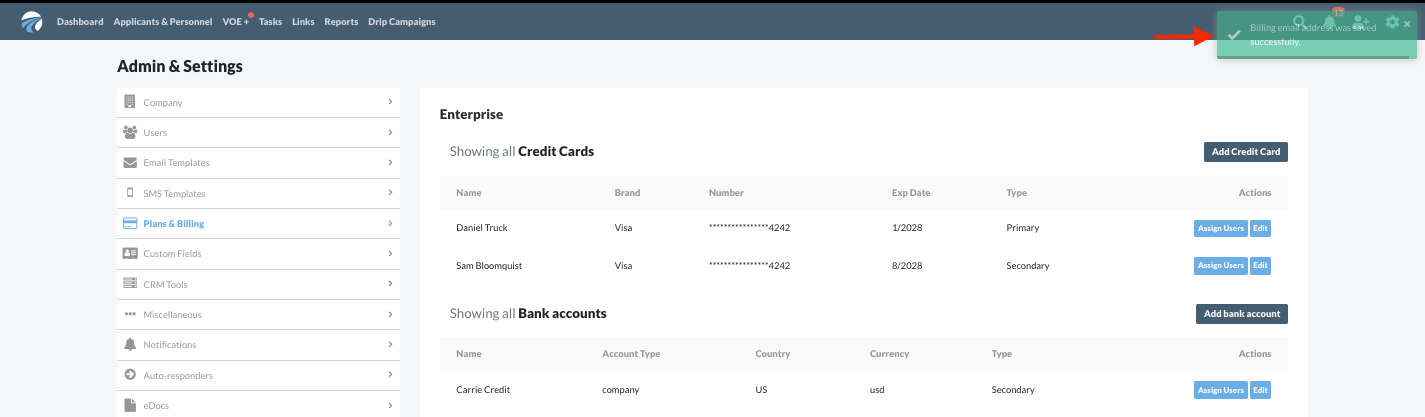
The plan type your organization has chosen is listed as the bold heading at the top of the page--in the example below, the organization subscribes to an "Enterprise" plan.
Step 5
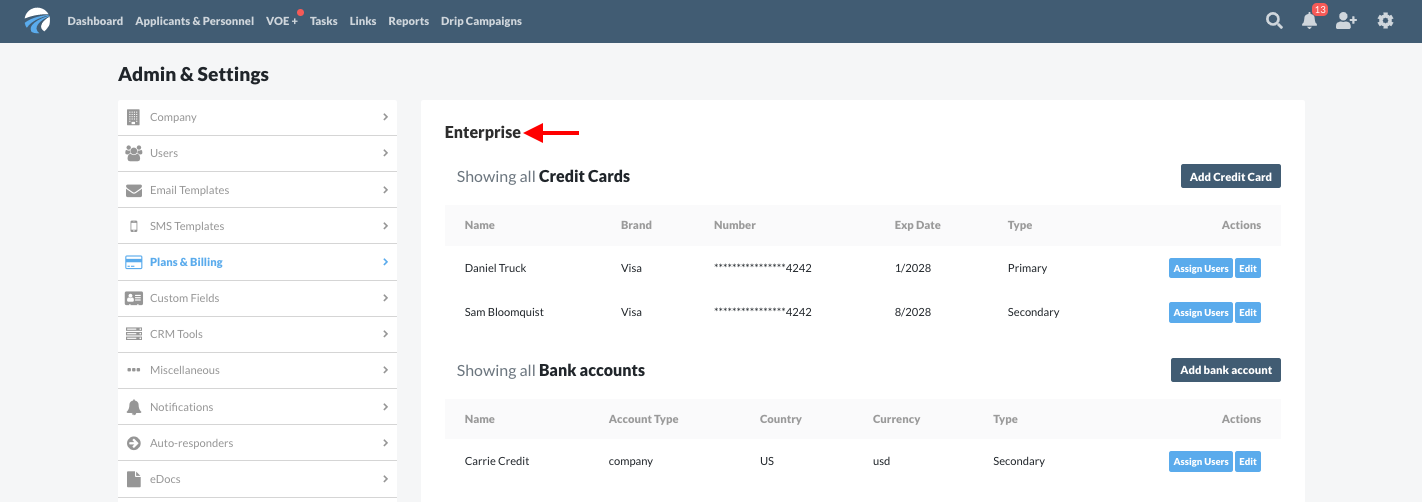
Under the account type heading, two sections will display:
- "Credit Cards": This is a list of all credit cards saved for billing in the DriverReach system. For more information about adding, deleting, or managing credit cards and user permissions related to them, please refer to Managing Credit Card Information.
- "Bank accounts": This is a list of all bank accounts saved for billing in the DriverReach system. For more information on adding, deleting, or managing bank accounts and user permissions related to them, please refer to Setting Up ACH Payments.
Step 6
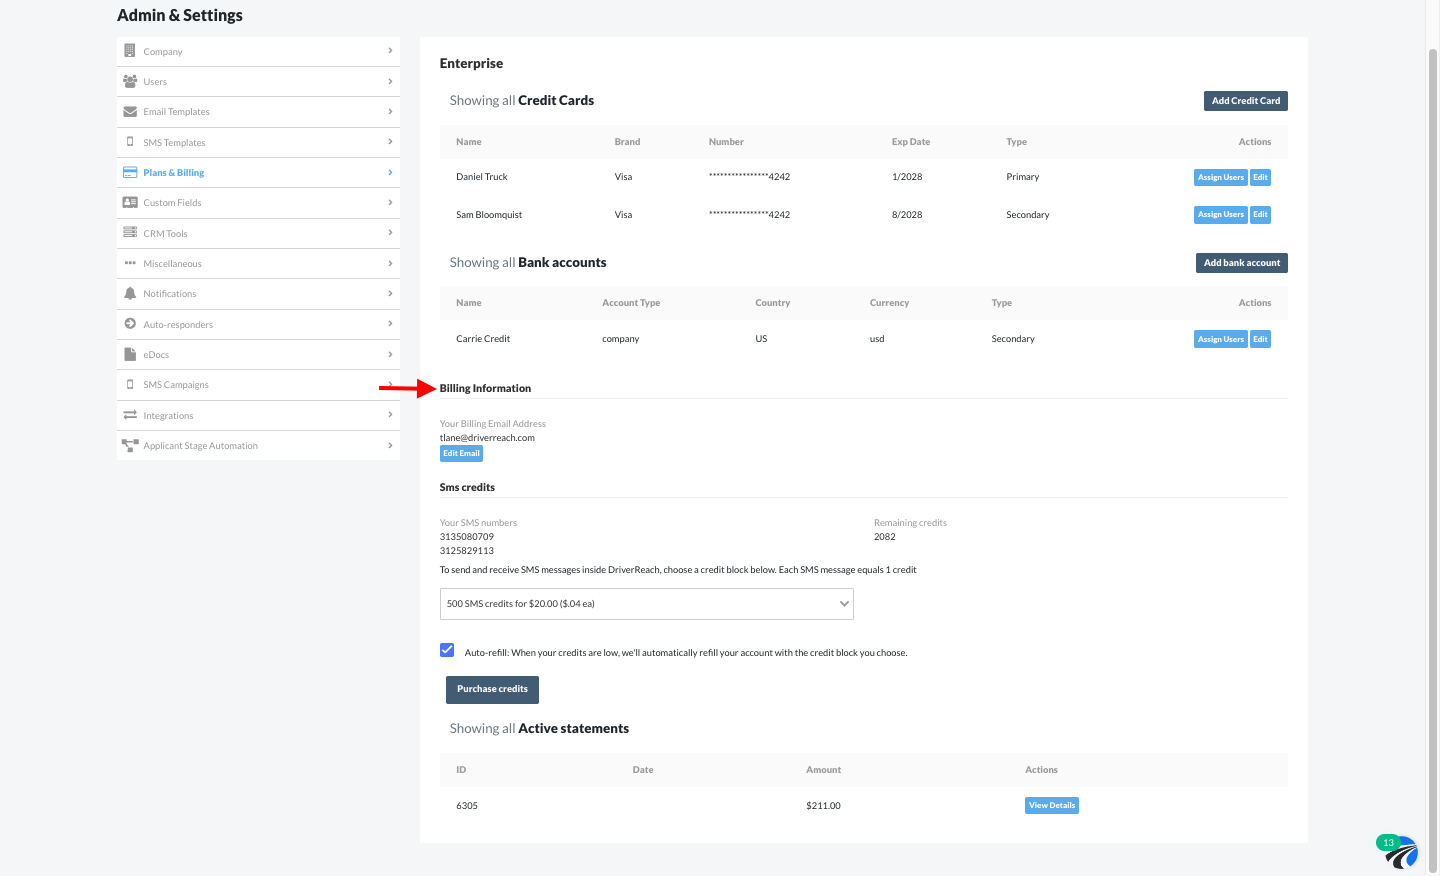
Scroll down to find the "Billing information" section, located just below the "Bank accounts" section. We will explore this section in Steps 7-11. To skip past these steps and find out how to view billing statement details, click here.
 Step 7
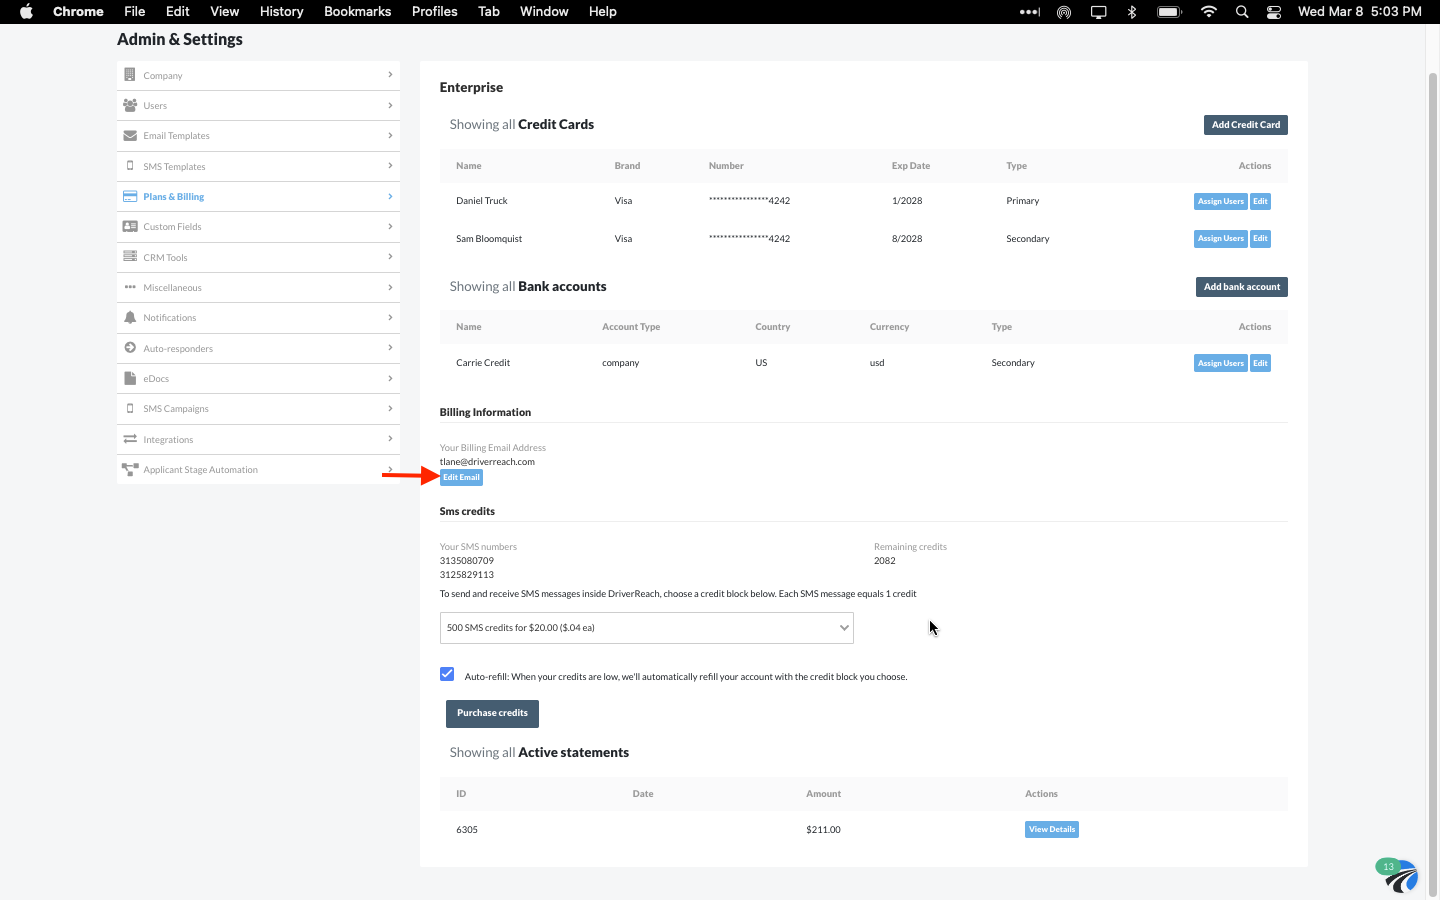
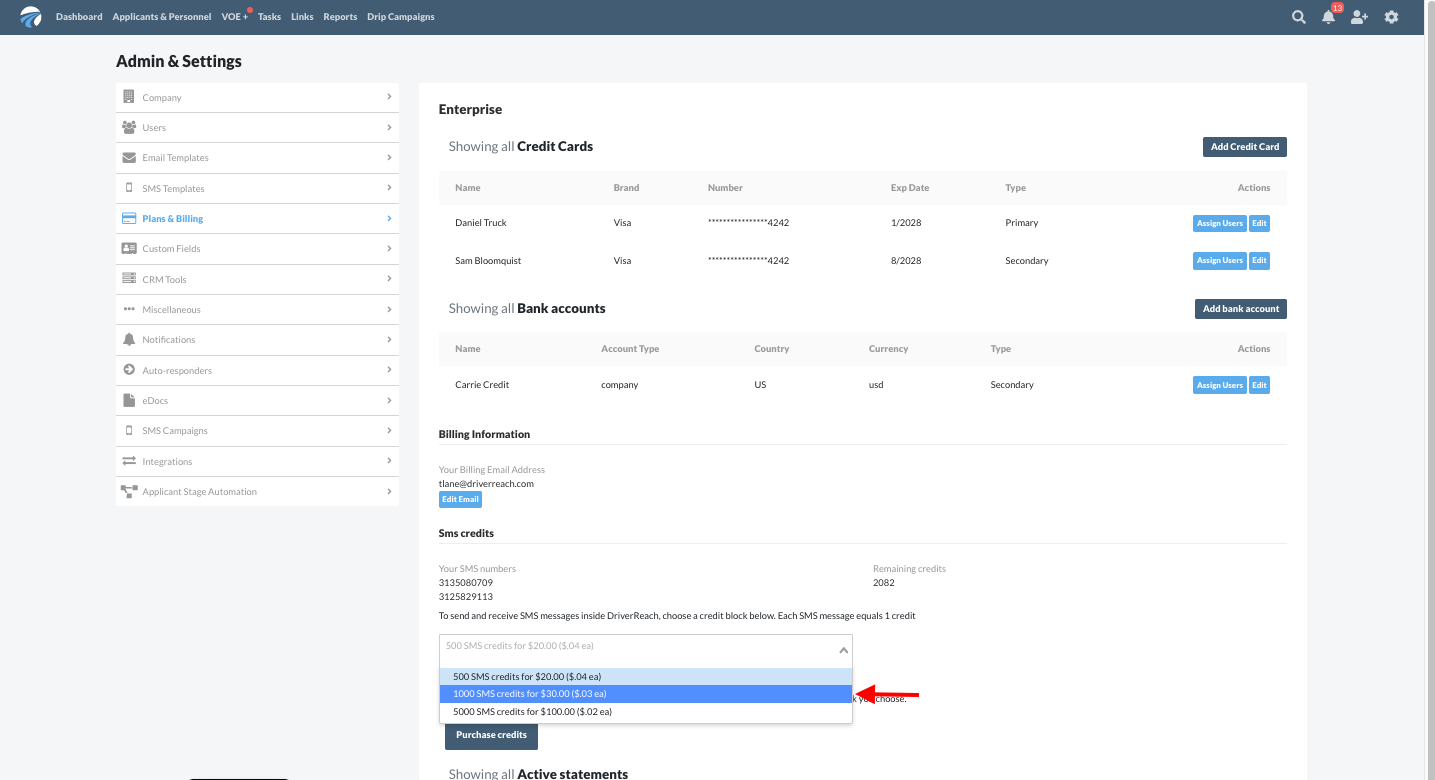
The email address associated with DriverReach billing is listed under the "Billing information" section--please check to make sure your organization's billing information should be sent to that address. If the email address listed requires edits, click on the blue "Edit Email" button underneath the address.
Step 8
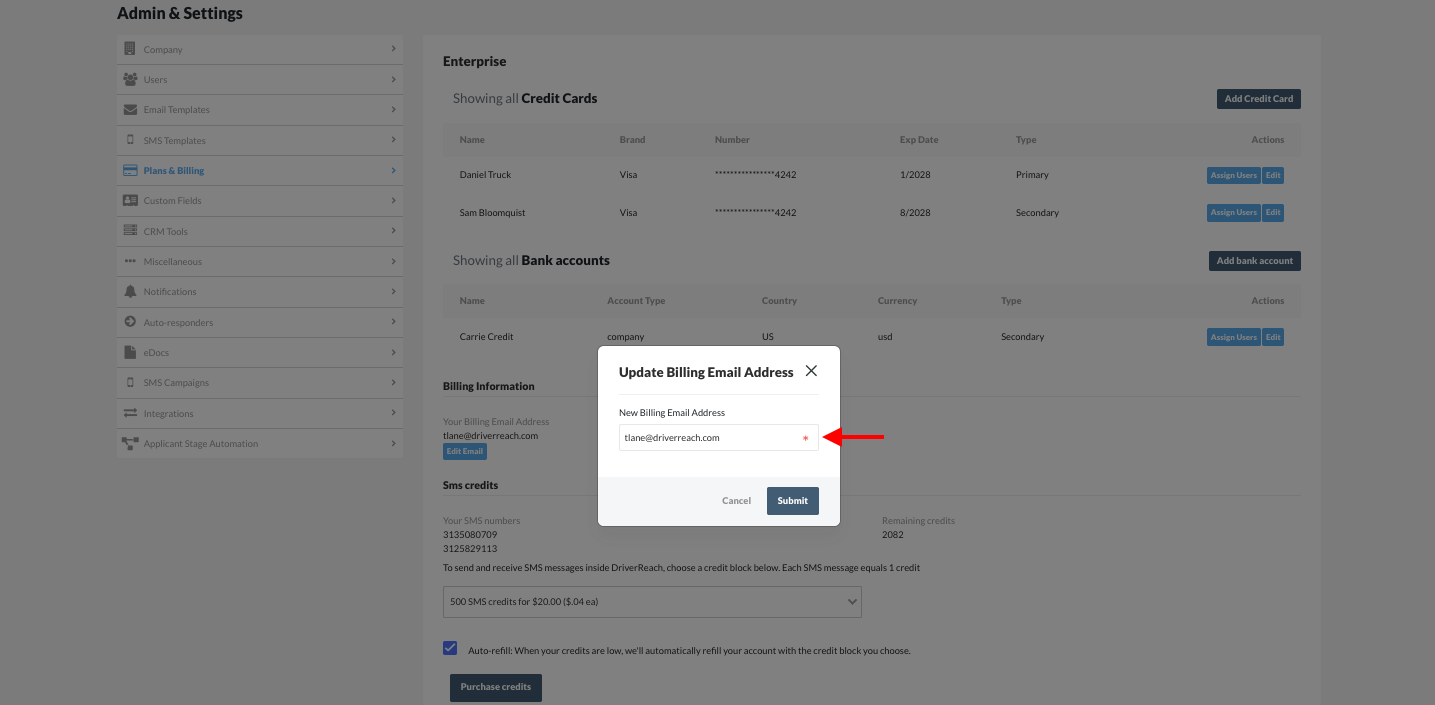
In the pop-up window that appears, type the corrected email address in the text box.
Step 9
Click the blue "Submit" button once you are finished. Alternatively, clicking the white "Cancel" button will close the pop-up window without saving any changes.

Step 10
A small green notification will appear briefly in the upper right-hand corner of the screen confirming that the billing email address associated with the organization's account has been updated.
Step 11
Scrolling down, the next subheading on the page, "SMS credits", provides options for adding SMS (text messaging) credits to the organization's account so that SMS messages may be sent from and received by the numbers listed on your account. There are two options for adding more SMS credits if you are running low: purchasing credits á la carte versus auto-refilling credits.
Á La Carte:
- For those who do not wish to automatically refill SMS credits every time they run low, á la carte refills are always available. Clicking on the drop-down menu within this section provides several options for adding credits. Below, we have selected 1000 SMS credits for purchase, meaning that a combined total of 1000 text messages may be sent or received by the organization before credits must be refilled.
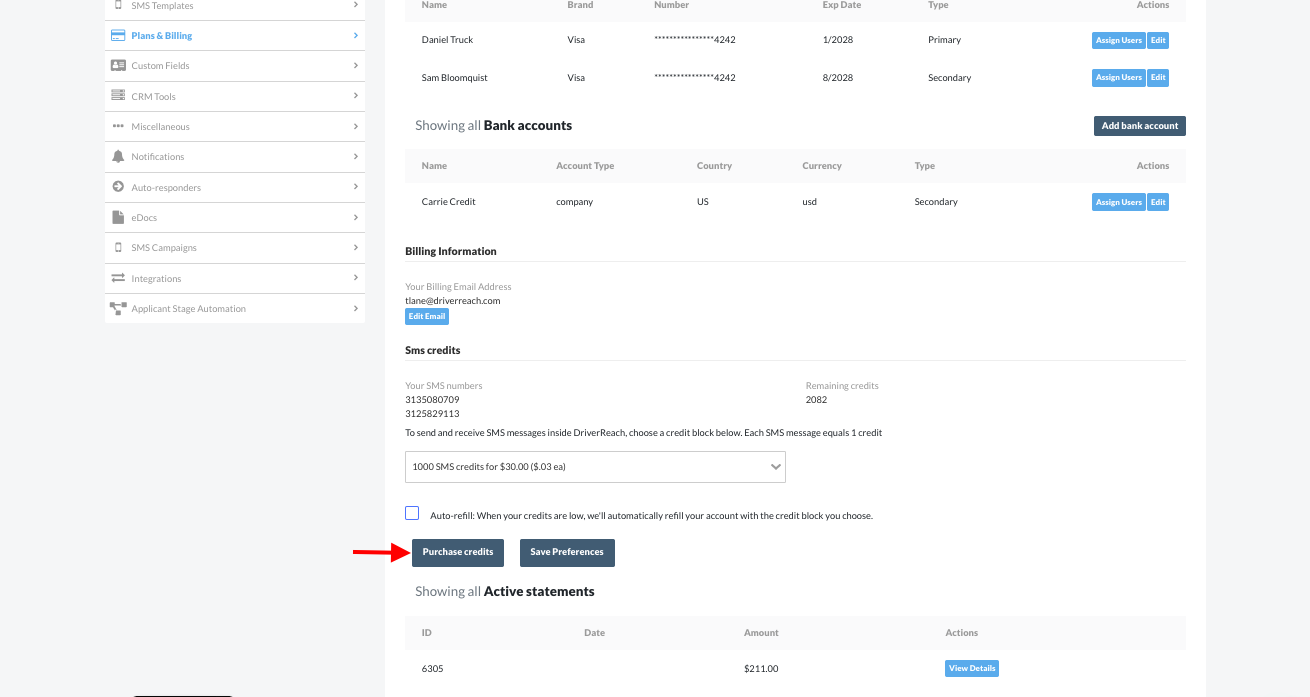
- Clicking on the blue "Purchase credits" button officially adds the credits to the organization's account and bills the organization for those credits.
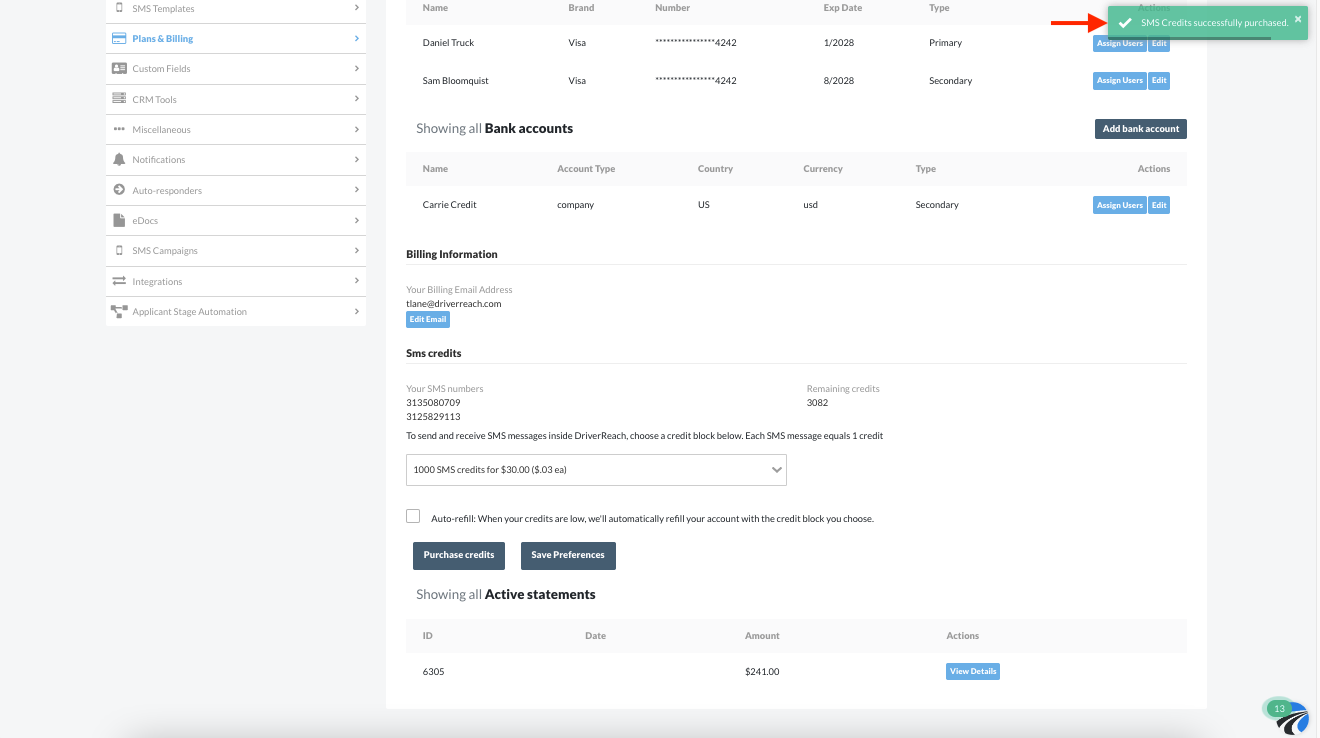
- After clicking the "Purchase credits" button, a small green notification will appear in the upper right-hand corner of the screen confirming the successful purchase of SMS credits.
Auto-refilling SMS Credits:
- For those who never want the organization to be without SMS credits and wish to replenish credits whenever they run low so that text messages may always be sent and received, auto-refilling is the better option. The checkbox labeled "Auto-refill" underneath the "SMS credits" heading may be checked to enable auto-refilling as marked below.
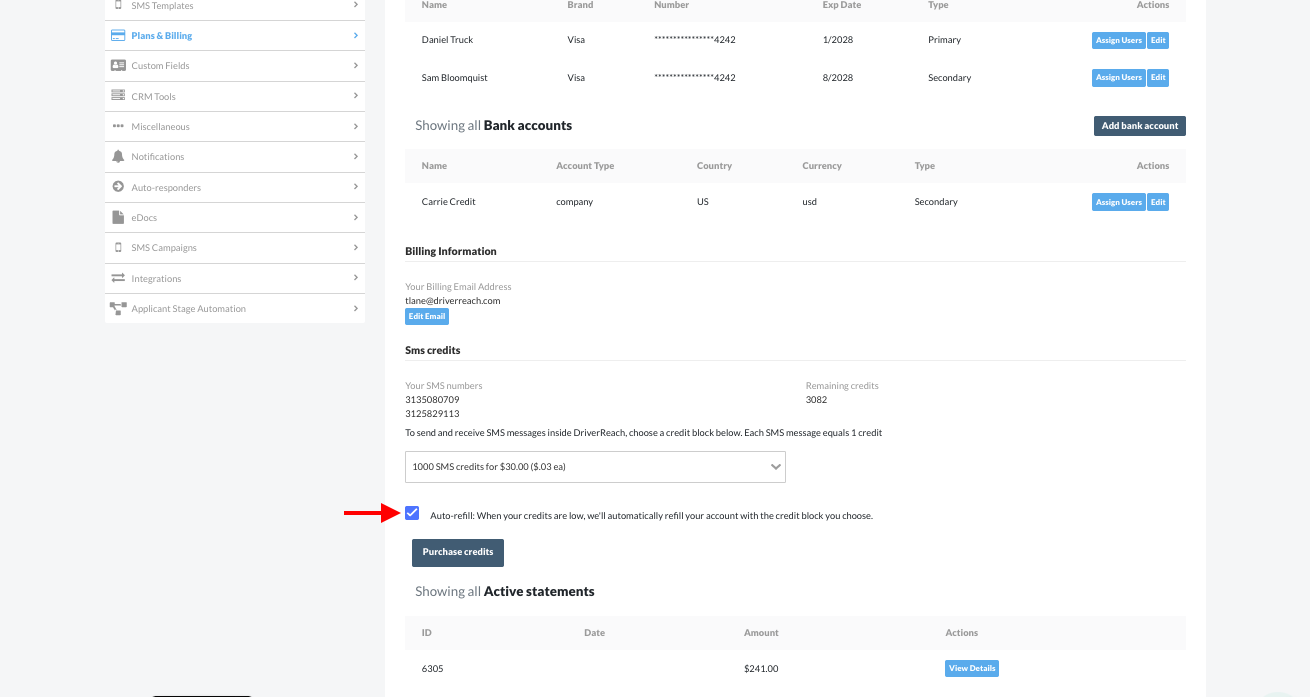
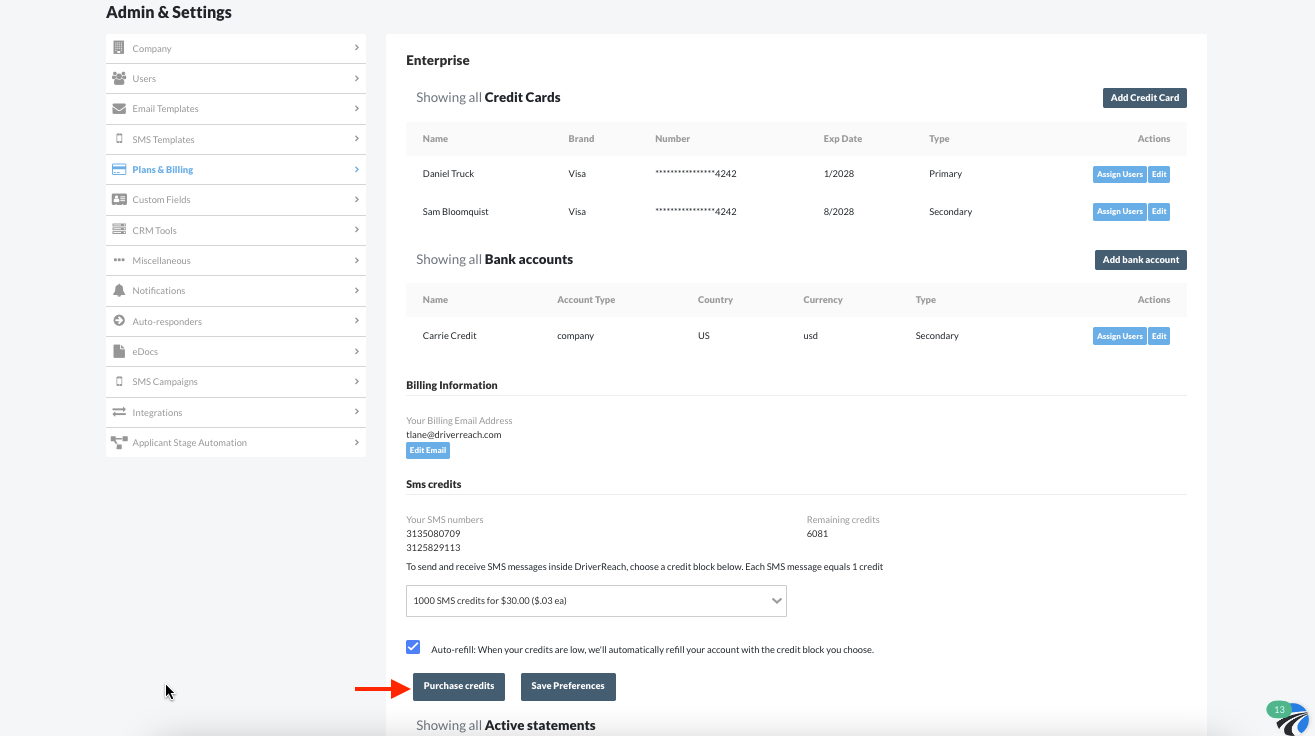
- The next step to enable auto-refilling is to select the credit block you wish to automatically refill each time credits run low. Do this within the drop-down menu underneath the "SMS credits" heading. In this case, we have selected "1000 SMS credits for $30.00 ($.03 ea)".
- Next, select the blue "Purchase credits" button to buy credits and enable the auto-refill option for the selected credit block.
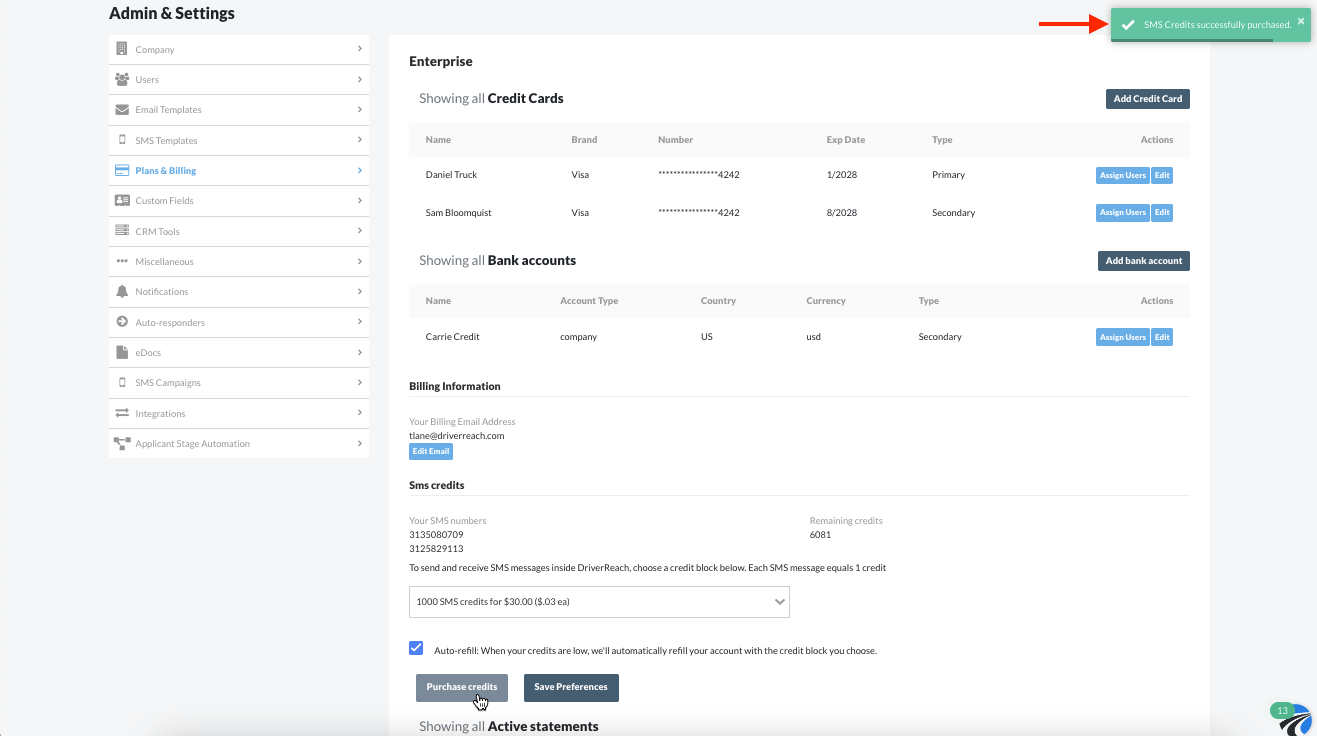
- After clicking the blue "Purchase credits" button, a small green confirmation will appear in the upper right-hand corner of the screen notifying the user that the SMS credits have been purchased successfully. By checking the "Auto-refill" checkbox and selecting this credit block option, we can be sure that every time our SMS credits run low, 1000 will be automatically added to our account so that text messages may continue to be sent and received without interruption.
- The blue "Save Preferences" button in this section is useful if you wish to modify your preferences (uncheck the "Auto-refill" option, for example, or select a different SMS credit block to auto-refill) in the future.

Step 12
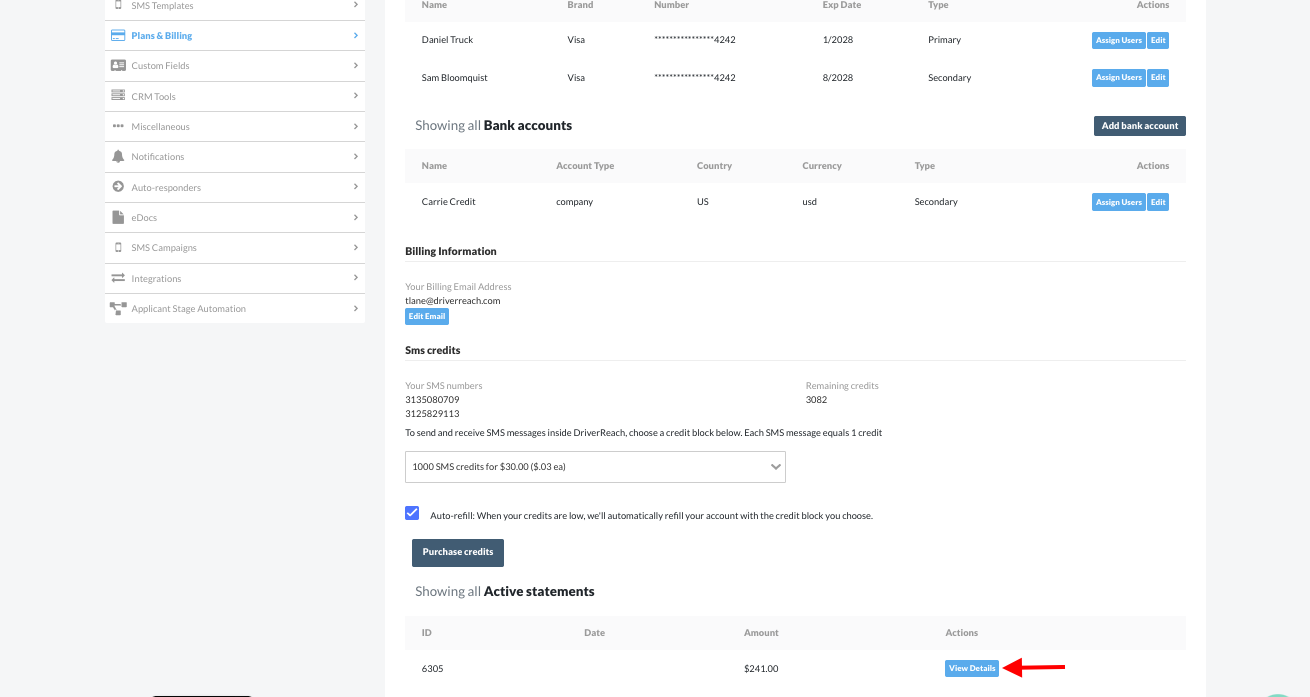
Scrolling down below the "SMS credits" subsection of the page, users will find a section heading entitled "Active statements". This is a list of billing statements that may be viewed by clicking the blue "View Details" button located on the right side of each row in the active statements table.
Step 13
After clicking on the "View Details" button for any of the statements listed for your organization, a new screen will appear listing line items that make up the total statement amount as seen in the example below. Details for each line item provided include the ID, date, item description, name of the user who ordered the item, location, and price. To view or print a PDF of this information, simply click on the blue "View/Print Statement PDF" button located above the top right corner of the table.

Step 14
If you have a question about billing that is not covered by the information available on the "Plans & Billing" page, DriverReach is here for you! Please reach out to our support team at help@driverreach.com for a prompt response to your inquiry.