ACH, which stands for Automated Clearing House, is a U.S. financial network used for electronic payments and money transfers. ACH payments, otherwise known as “direct payments”, are an efficient way to transfer money from one bank account to another electronically without the need for paper checks, credit card networks, wire transfers, or cash. This article explains how to set up ACH payments within the DriverReach platform.
Step 1
From the "Dashboard" page, click on the small cog icon located near the top right corner of the window.

Step 2
A drop-down menu will appear; select “Administration” from the list.

Step 3
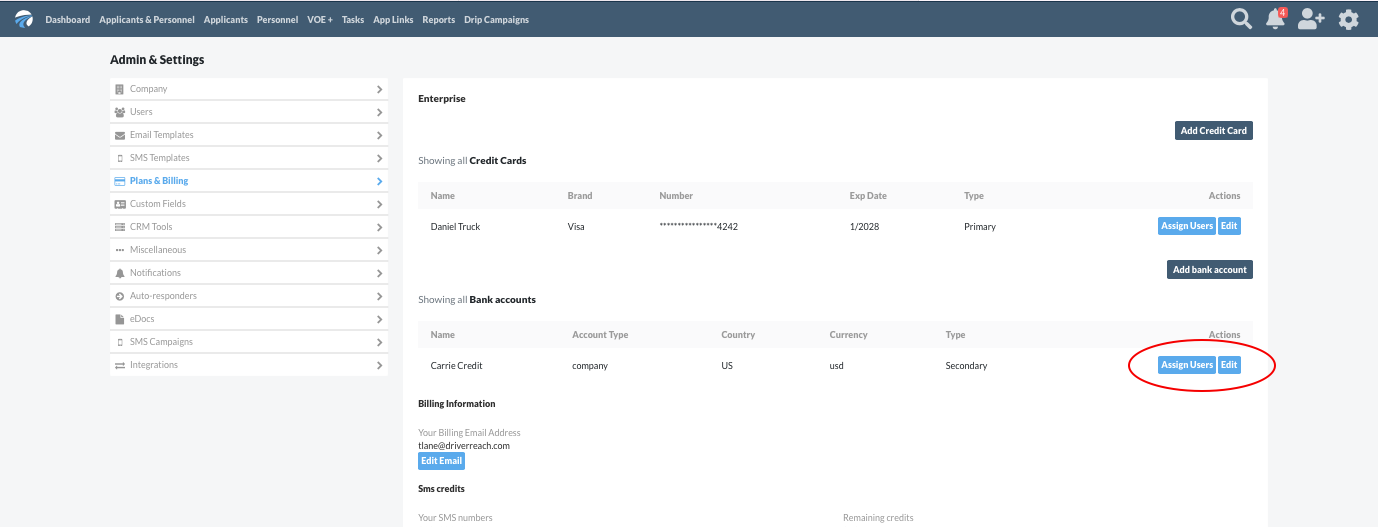
Select “Plans & Billing” from the “Admin & Settings” menu on the left side of the screen.

Step 4
Click on the dark blue “Add bank account” button on the right side of the screen.

Step 5
A pop-up window will appear; enter the required bank account information into the appropriate fields and click the blue “Save” button when complete.

Step 6
A small green notification will appear for a moment in the upper right-hand corner of the screen to confirm that the new bank account information was added successfully.

Step 7
Verification of your specific bank account information is the next step in this process. Stripe, our payment processor, will deposit two micro deposits for very small amounts of money (typically less than $1.00 each) into the bank account you have just entered into the DriverReach system. To verify the ACH, you must access the deposit records of your bank account so that you can find out the amount of each of these two small deposits. Record them both because you will need them for Step 7. For example purposes, let’s use the figures $0.32 and $0.45 as the two amounts deposited in our bank account by Stripe.
Step 8
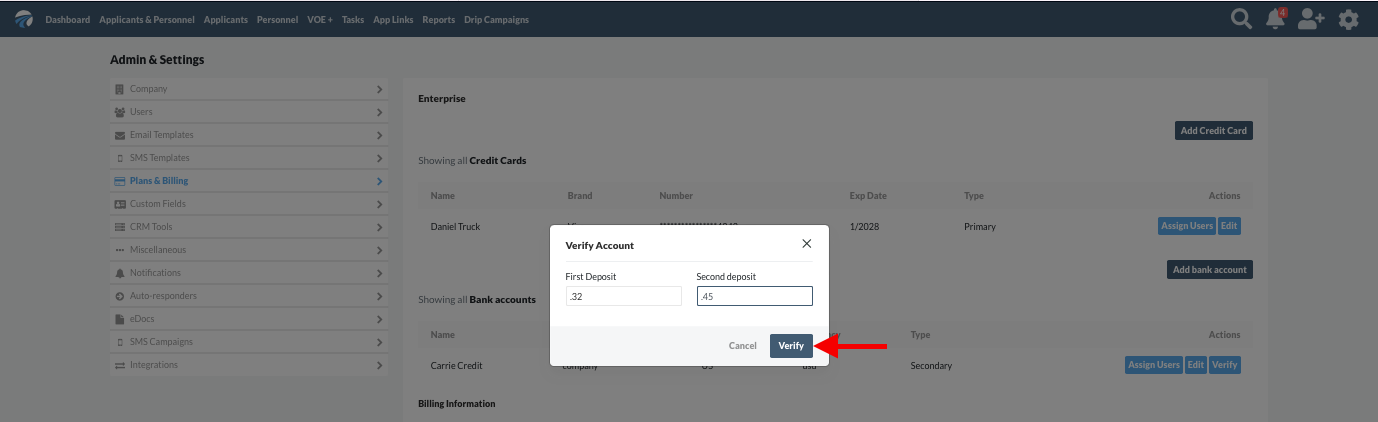
Back on the “Plans & Billing” page within the “Admin & Settings” section of the DriverReach platform, click on the light blue “Verify” button next to the bank account information you entered earlier.

Step 9
In the pop-up window that appears, enter the amounts of the two micro deposits you found in your bank account. In our example case, the amounts of $0.32 and $0.45 were deposited. As the image below shows, each amount should be entered within its own textbox and without a dollar sign or a zero before the decimal point (as such: .32 and .45). Once the amounts from your account have been entered in this format, click on the dark blue “Verify” button.
Step 10
After clicking the “Verify” button, a small green notification will briefly appear in the upper right corner of the screen confirming the successful addition of this bank account.

Step 11
If you happen to miss seeing the green success notification before it disappears, another way to confirm success is to check that there is no longer a blue “Verify” button next to this bank account. As you can see in the image below, the “Verify” button is gone now because we have successfully completed that step. Congratulations–your bank account is now set up to use ACH payments within the DriverReach system!