Overview
Auto-responders (automated messages triggered by an event within the DriverReach system) are powerful tools that save time and money by helping users effortlessly strengthen relationships with leads, applicants, and personnel. Among other topics, auto-responder examples include messages thanking applicants for an inquiry, application receipt confirmations, prompts to complete an application, welcome aboard messages, out of office notifications, and messages that can set expectations about the recruitment journey or orientation processes. DriverReach users can craft personalized messages that feel nothing like form emails or bulk texts.
This article explains the basics of auto-responders, instructs users on navigating to the auto-responder landing page, and provides step-by-step information on how to create and edit text (SMS) and email auto-responders within the DriverReach system and personalize them using insert fields. Auto-responders are a great way to ensure that contacts move through the stages of recruiting process efficiently and feel acknowledged, informed, supported, and appreciated each step of the way. Read on to make sure your organization reaps the benefits of this powerful communication toolkit!
Basic Components of an Auto-Responder
Users build auto-responders using required and optional fields. A brief review of these fields can provide the necessary background to ensure you're crafting an effective message that goes to the right recipients at the right time. If you are already familiar with the basic components and instead ready to navigate to the auto-responder landing page, click here.
Required fields have a red asterisk next to them. They differ between email and SMS auto-responders, but they may include:
- Response type: Choose between email or SMS (text).
- Template: These make a great starting point as you craft your message. DriverReach has many helpful options from which to choose, all of which can be edited and personalized in the content field. Remember to look through them before starting from scratch to save yourself some time.
- Applicant Types: You must choose at least one (but may choose as many as desired) from the list. As an applicant or lead progresses through the recruitment and hiring process in the DriverReach system, changes in status occur. It is these changes in the applicant type trigger the appropriate auto-responders to be sent. For example, at the time of an applicant's status change from "Non-DOT phone app" to "Hired", he or she will receive any auto-responders saved with the applicant type of "Hired" selected in this field. Remember that only those applicants or leads who meet this event trigger requirement will receive the message you're composing.
- Content: This is a free text field. You can type your message here, or if you've selected a template or any insert fields, those items will populate here. Templates may be edited and personalized here and insert fields may be highlighted and moved around within the message.
- Subject (email only): Here you will type the subject line for your email message.
Optional fields have no asterisk next to them. They may include:
- Insert Fields: Everything from the user's phone number to the applicant's name to the application link is available for use. Click here for more information on taking full advantage of insert fields!
- Location: Select as many as desired from those saved in your DriverReach account; if you wish for this auto-responder to be sent to applicants from any location, simply leave this field blank.
- Position Type: Again, select as many as desired from the available list; if you wish for this auto-responder to be sent to those with any position type, simply leave this field blank.
- From: Here you may choose to select from the users in your DriverReach account or leave this field blank.
- Lead Source: Here you have the option of selecting a lead source (i.e. Billboard, ZipRecruiter, TruckersReport, etc.) to link to this auto-responder; if you wish for this auto-responder to be sent to applicants from any lead source, simply leave this field blank.
Navigating to the Auto-Responder Landing Page
Step 1
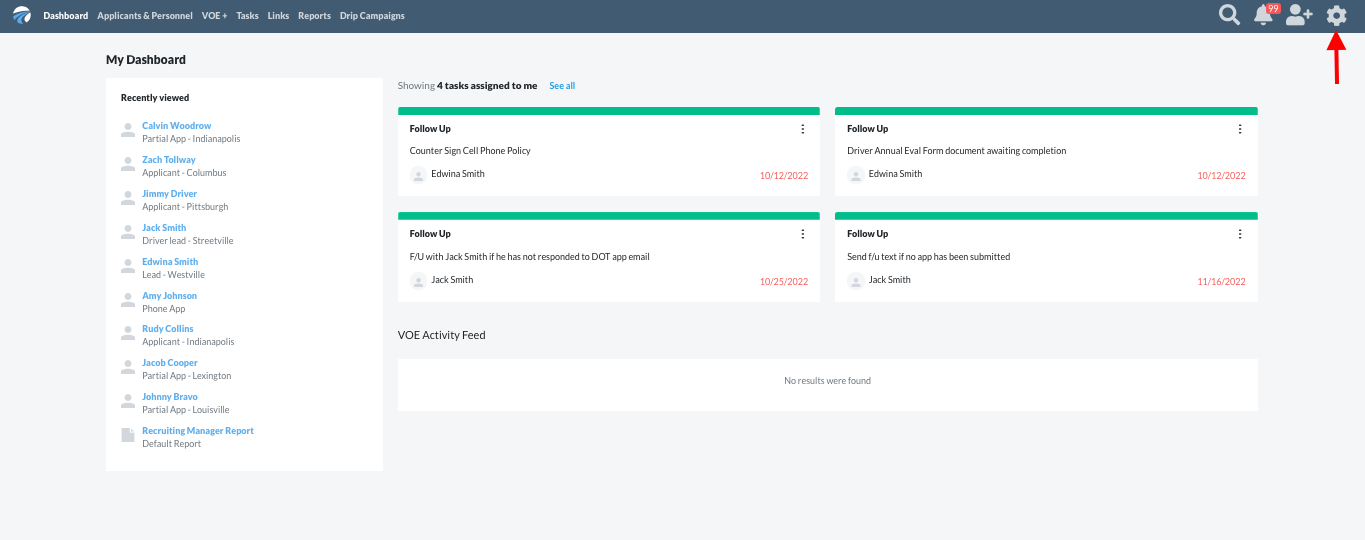
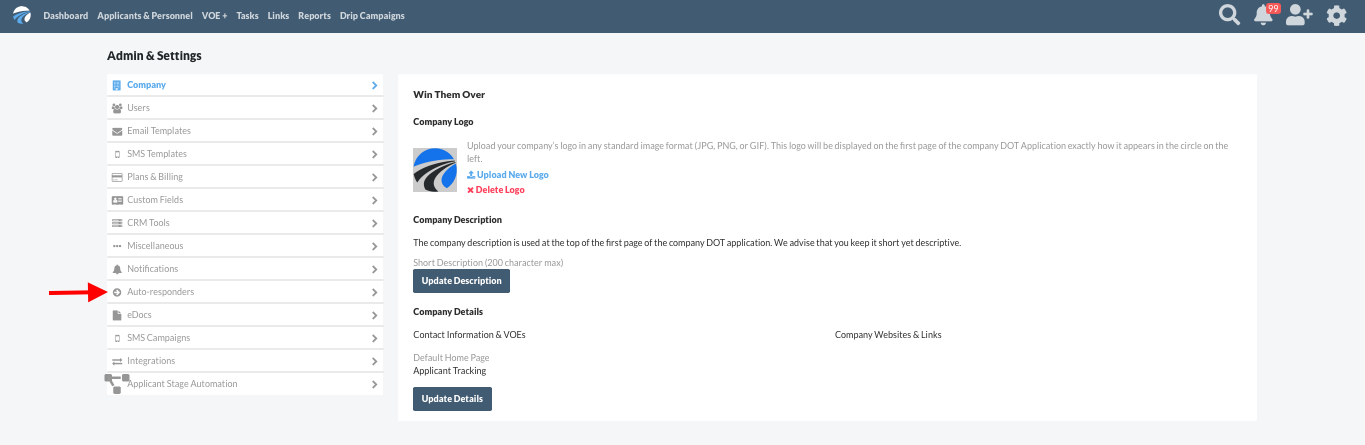
Within the blue main navigation menu, select the cog icon on the upper right side of the screen.
 Step 2
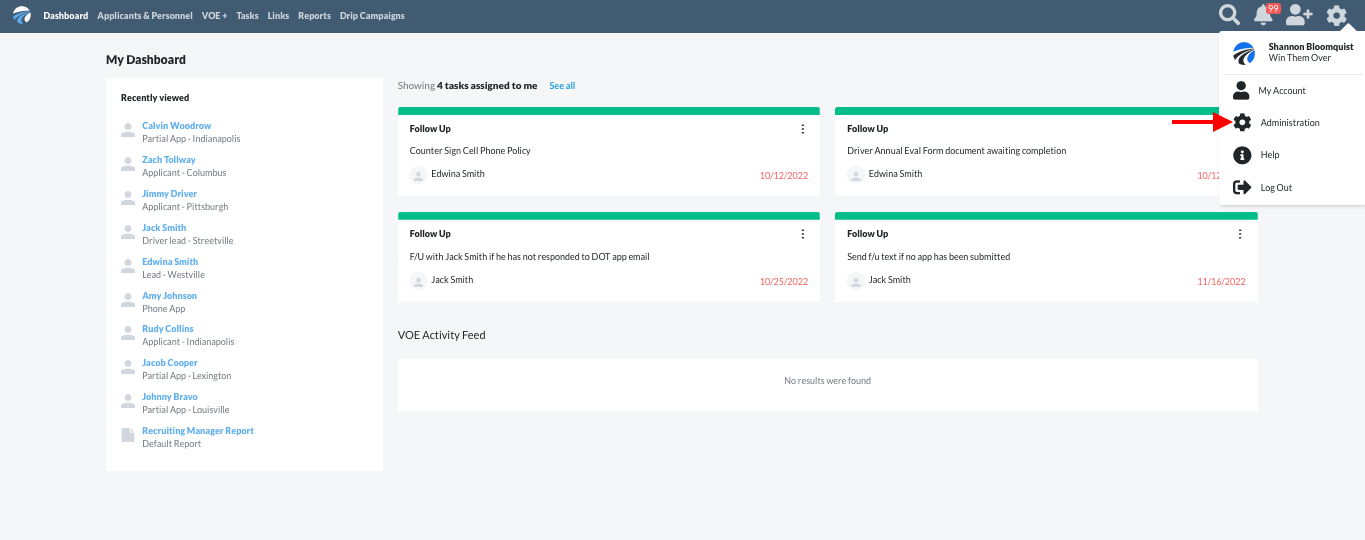
A drop-down menu will appear; select the cog icon labeled "Administration".
 Step 3
Select the "Auto-Responders" option from the menu running down the left side of the screen.
 Step 4
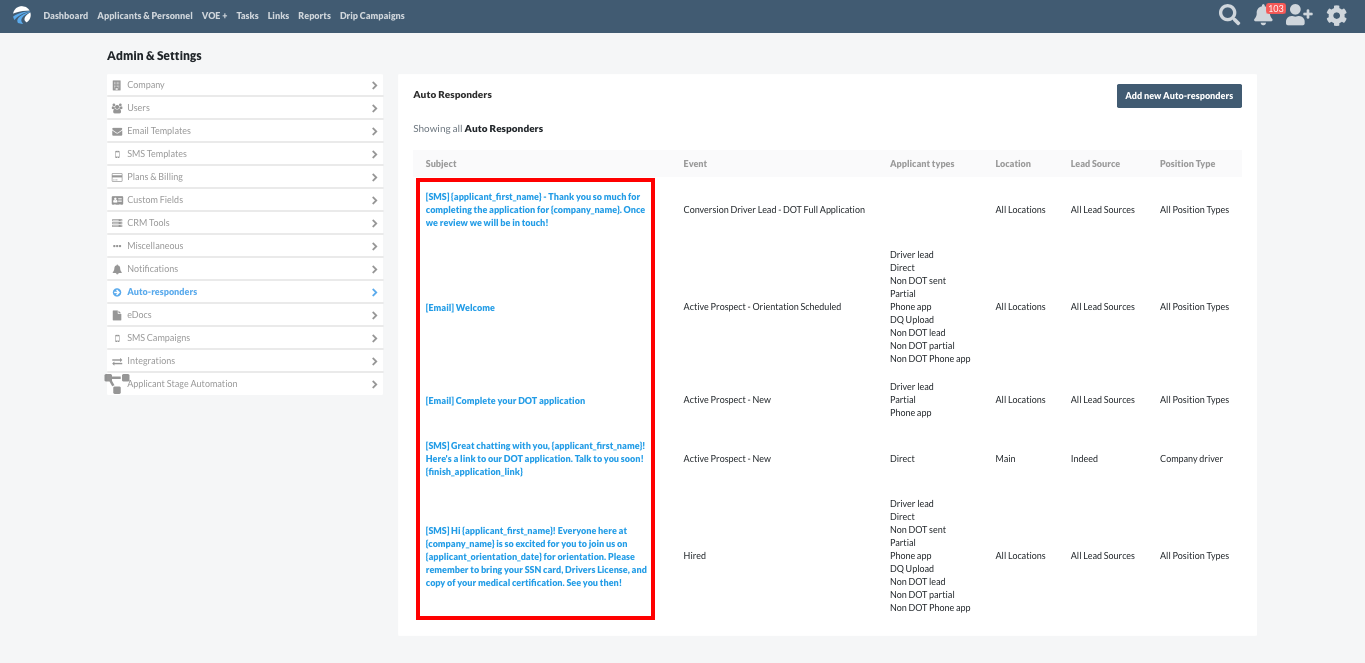
The Auto Responder landing page lists all existing auto-responders; simply click on any one of the bright blue subject listings to view the auto-responder. From this point, users may wish to review the basic components of an auto-responder, create a new auto-responder, or edit an existing auto-responder. Or, if you feel ready to learn more about making sure your auto-responders feel personal and are as effective as possible, skip down to the Insert Fields: Amp Up Your Auto-Responders! section.
Option 1: Create a New Auto-Responder
Step 1
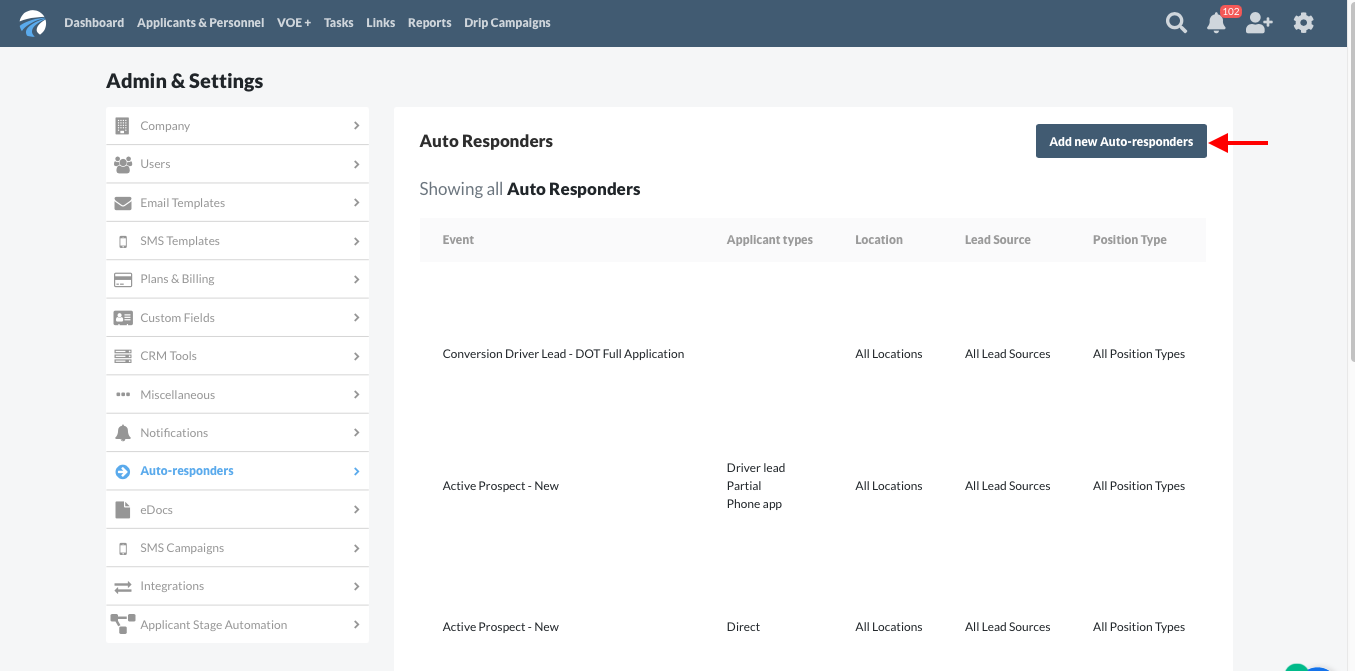
From the "Auto-Responders" page, select the blue "Add new Auto-responders" button in the top right corner of the screen.
Step 2
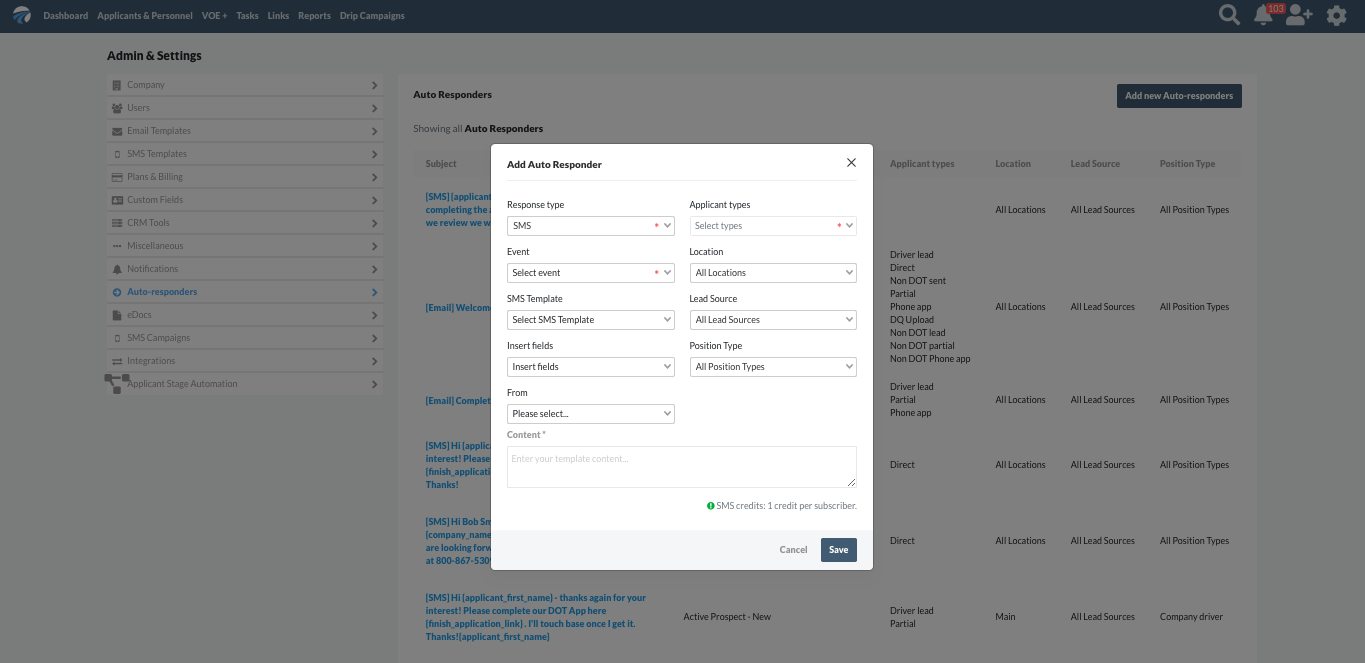
The pop-up window that appears features both required fields (with a red asterisk next to them) and optional fields (without an asterisk). Note that you will not be able to save your new auto-responder until all required fields are complete.
Step 3
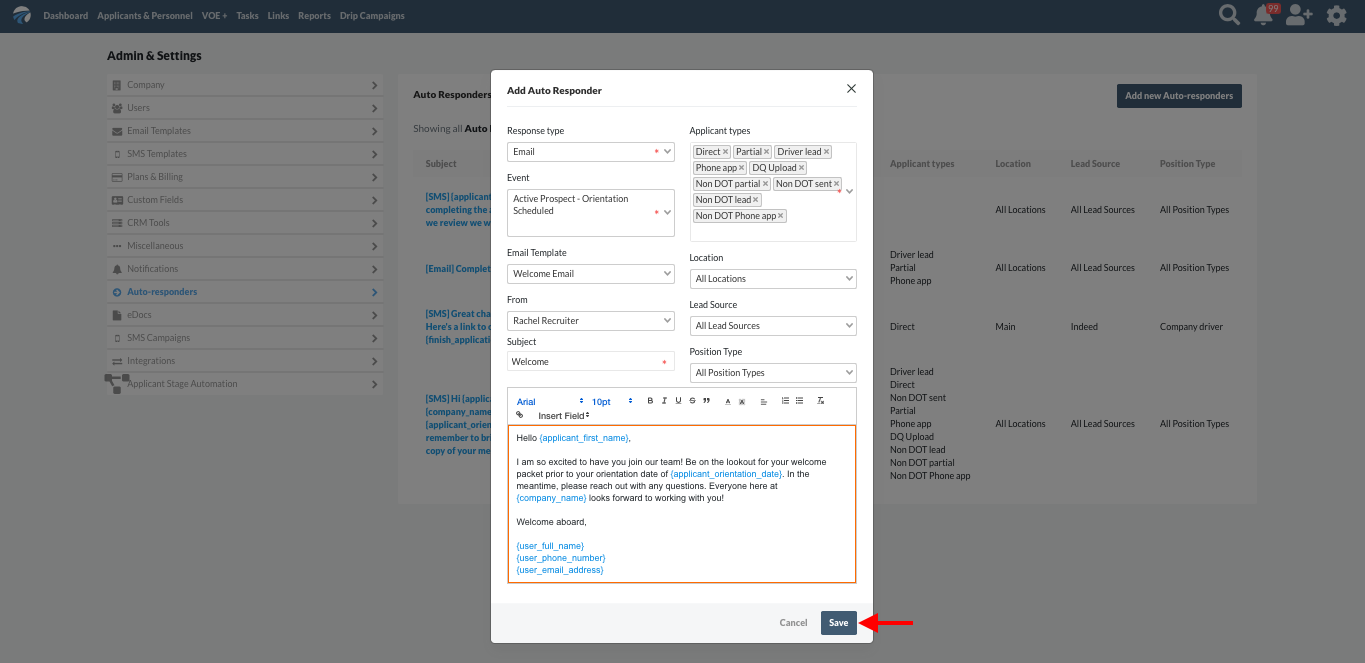
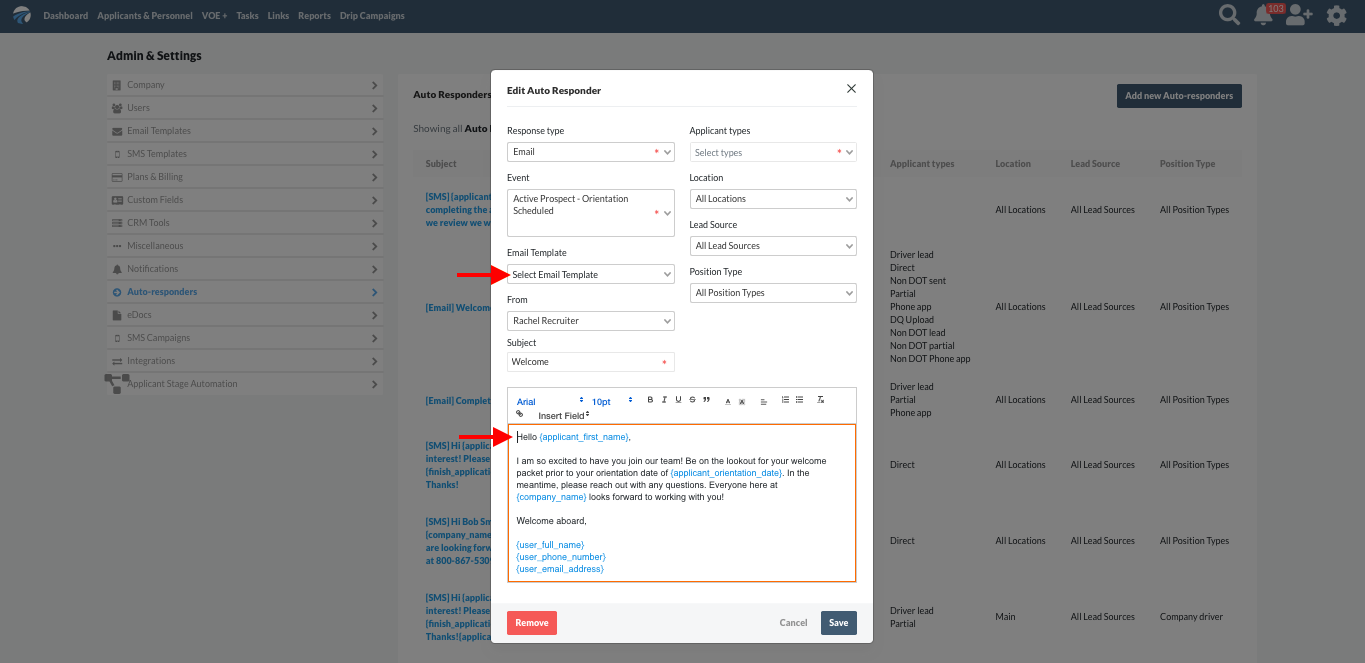
Make your selections in the pop-up window. In the screenshot below, our example creates an email auto-responder to welcome new hires to the company and confirm a date for orientation. Our required selections have been highlighted below to reflect these goals:
- We have used the DriverReach template entitled "Welcome" to get started.
- We want this auto-responder to be triggered whenever an applicant moves into the "active prospect - orientation scheduled" stage, so we have selected that for our "Event" field.
- Because this auto-responder will apply to all applicants, we have added each type in the "Applicant Types" field.
- Our email subject is "Welcome".
- We have edited the template in the content field and included several insert fields as well just to make sure this message feels personal for the recipient.
- We have left the "Location", "Lead Source", and "Position Type" fields blank because we want this auto-responder to apply everyone in the "active prospect - orientation scheduled" stage regardless of location, lead source, or position type.

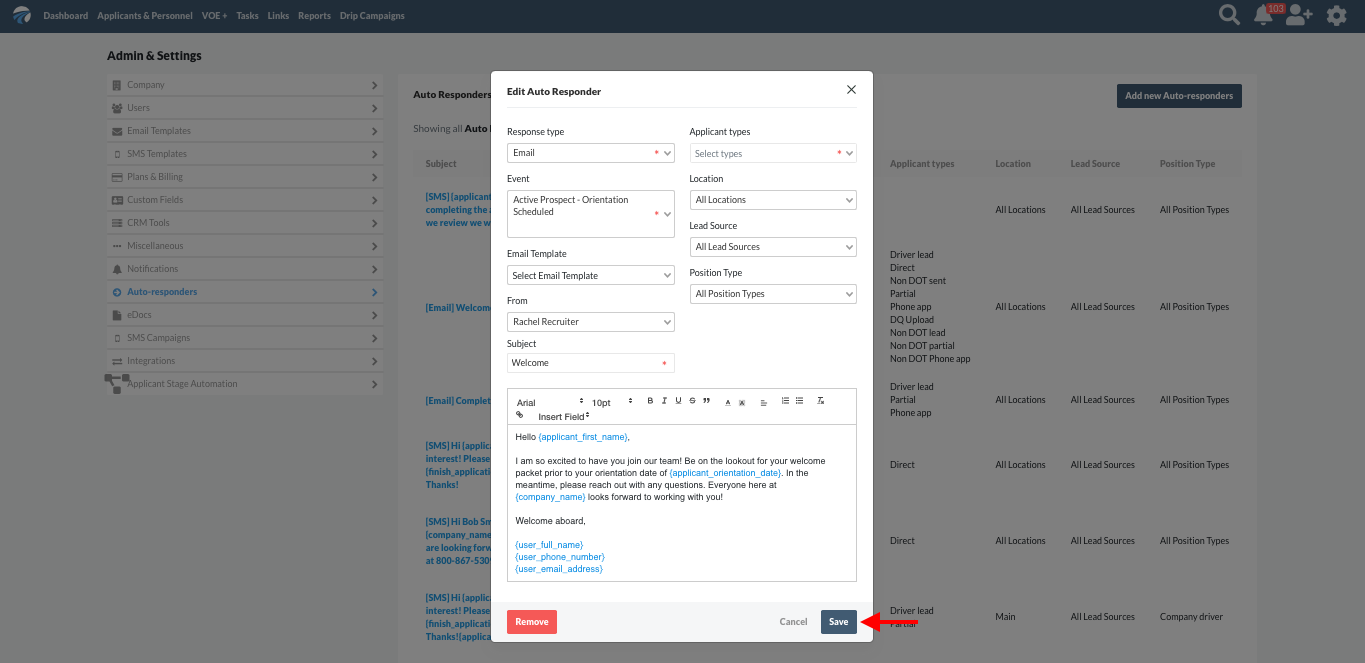
Step 4
Once all fields are completed as desired, click the blue "Save" button to add the auto-responder to the list on the landing page. Alternatively, clicking the white "Cancel" button will discard all changes made without saving.
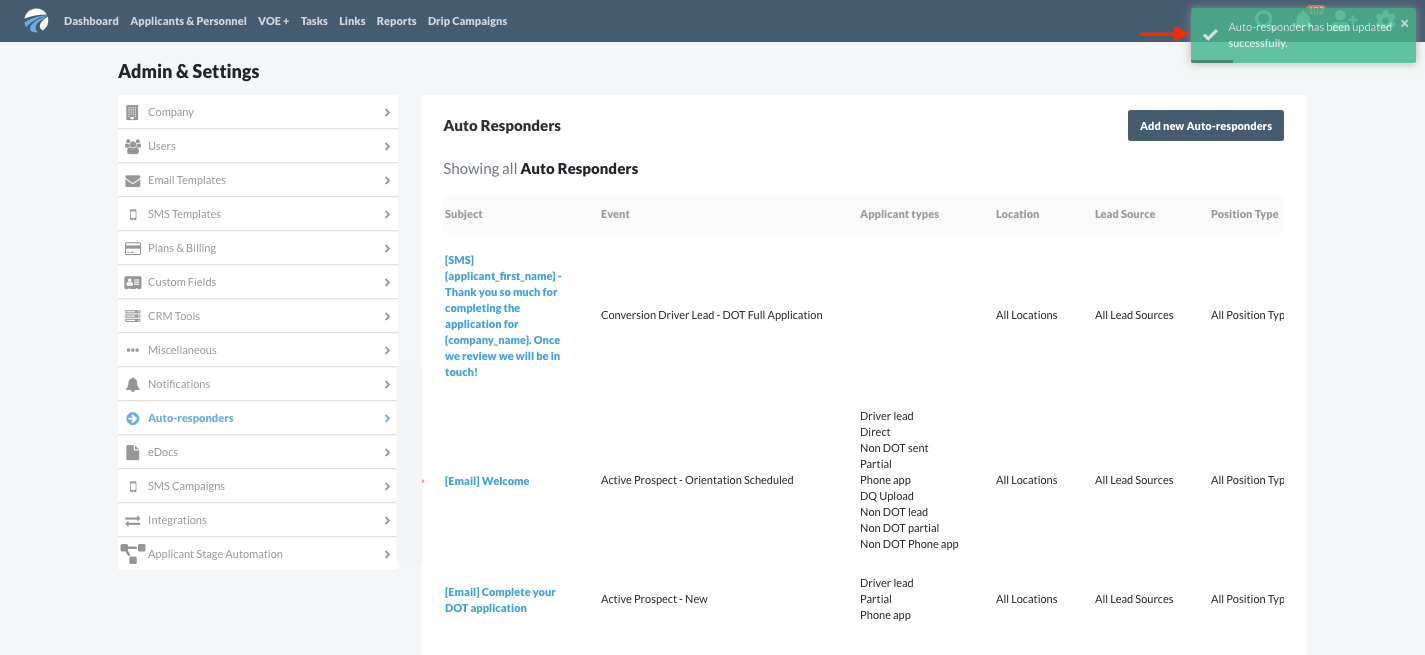
Step 5
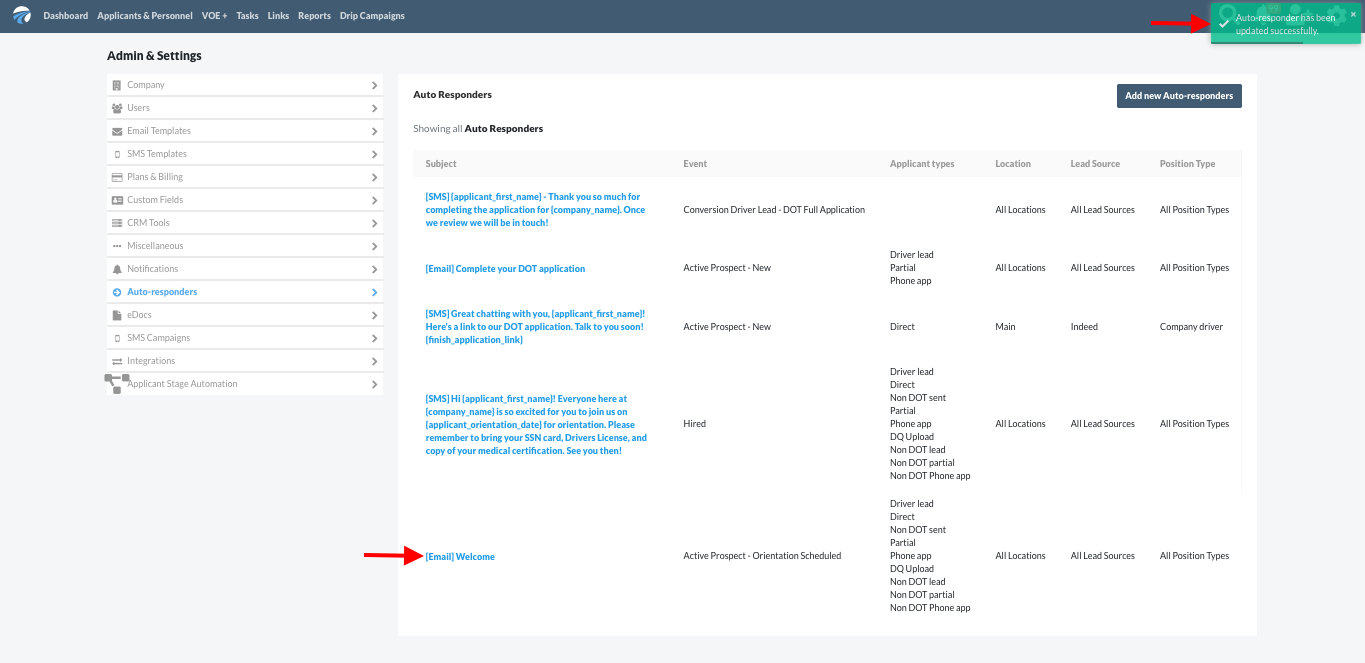
A green notification will appear in the upper right-hand corner of the screen confirming that the auto-responder has been saved, and the new auto-responder will now be listed in the list on the auto-responder landing page as seen below.
Option 2: Edit an Existing Auto-Responder
Step 1
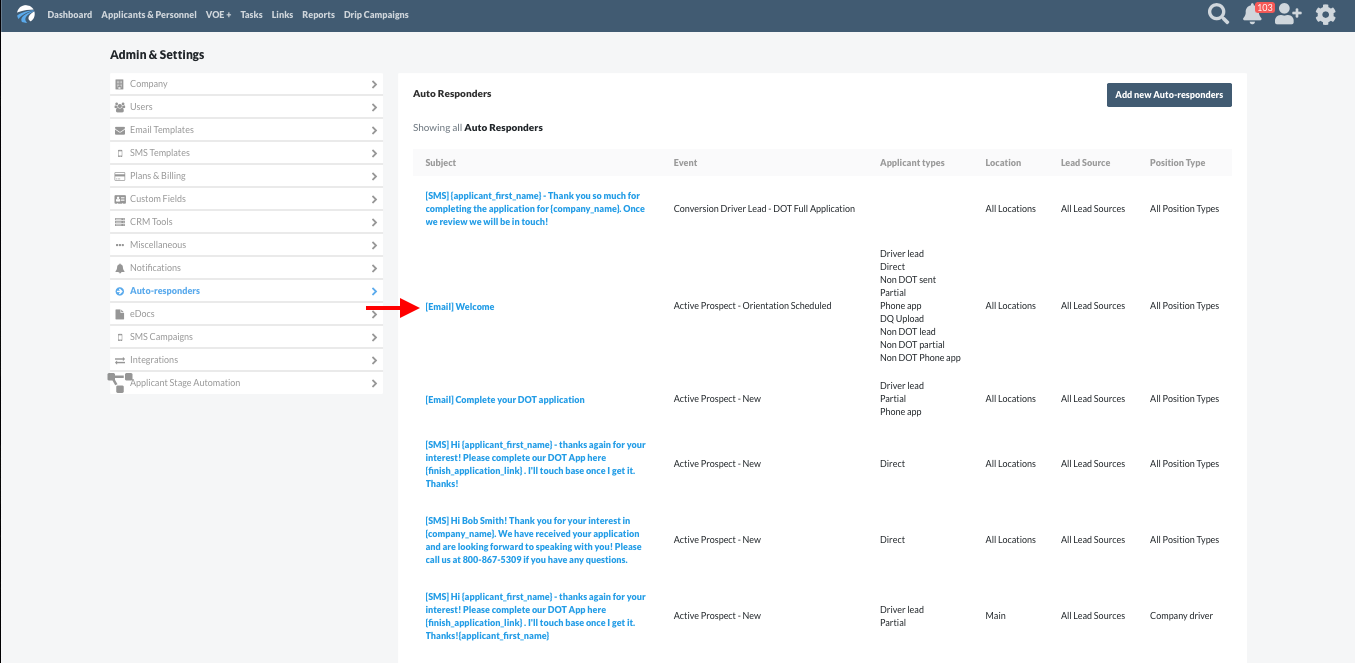
From the "Auto-Responders" page, scroll through the list and click on the blue title text of the auto-responder you wish to edit.
Step 2
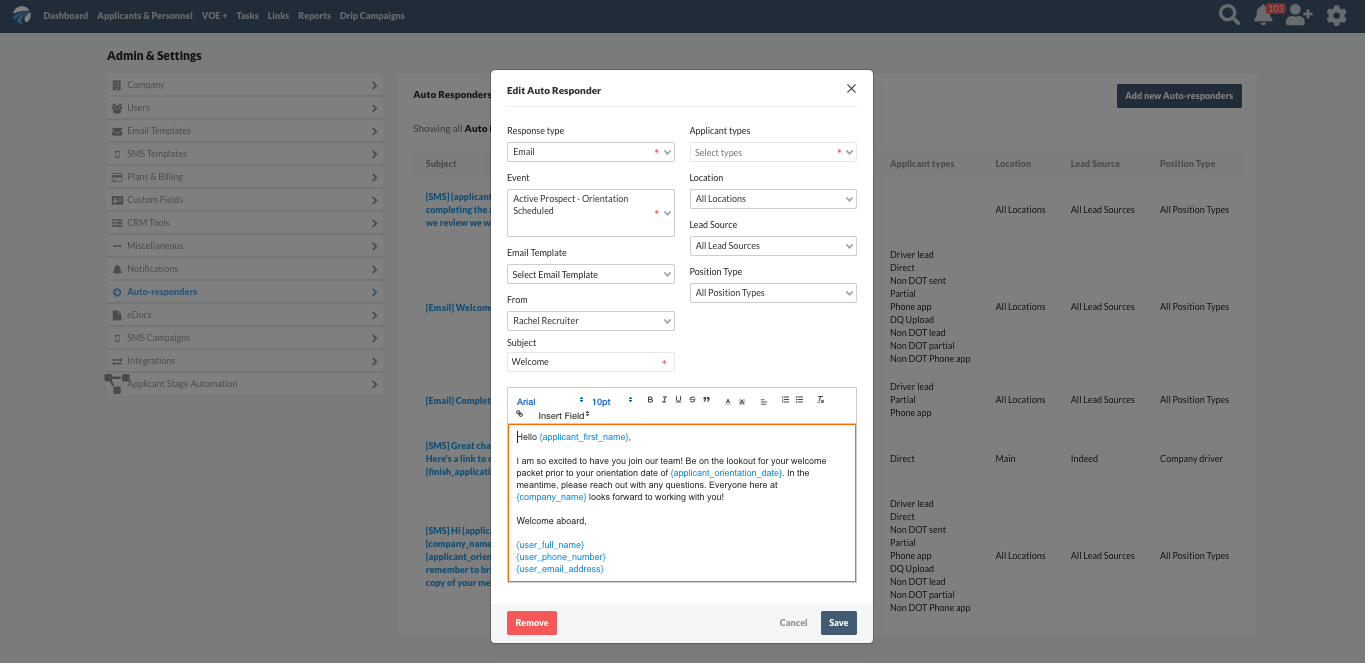
In the pop-up window that appears, make the desired edits to the auto-responder. Remember that fields with a red asterisk next to them are required while fields without an asterisk are optional. Users may choose to edit any field, including the "Response Type" field.
Step 3
To change the content, select one of many pre-populated templated messages available from DriverReach to populate the content field, or simply click inside the content field to manually edit the message.
Step 4
When you are finished editing, click the blue "Save" button. Alternatively, clicking the white "Cancel" button will discard all changes made without saving, while clicking the orange "Remove" button will delete this auto-responder from the system.
Step 5
A green notification will appear in the upper right-hand corner of the screen confirming that the auto-responder has been updated. A similar notification will appear confirming removal of the auto-responder if that option was chosen.
Insert Fields: Amp Up Your Auto-Responders!
While we all love to save time and increase efficiency, no recruiter wants to send texts or emails to applicants that come off sounding impersonal, canned, or insincere. It's a competitive job market out there for individuals in the trucking industry, and recruiters who can't leverage technology to make personal connections miss out on excellent hires. So, how can you make your auto-responders feel personal? Enter insert fields!
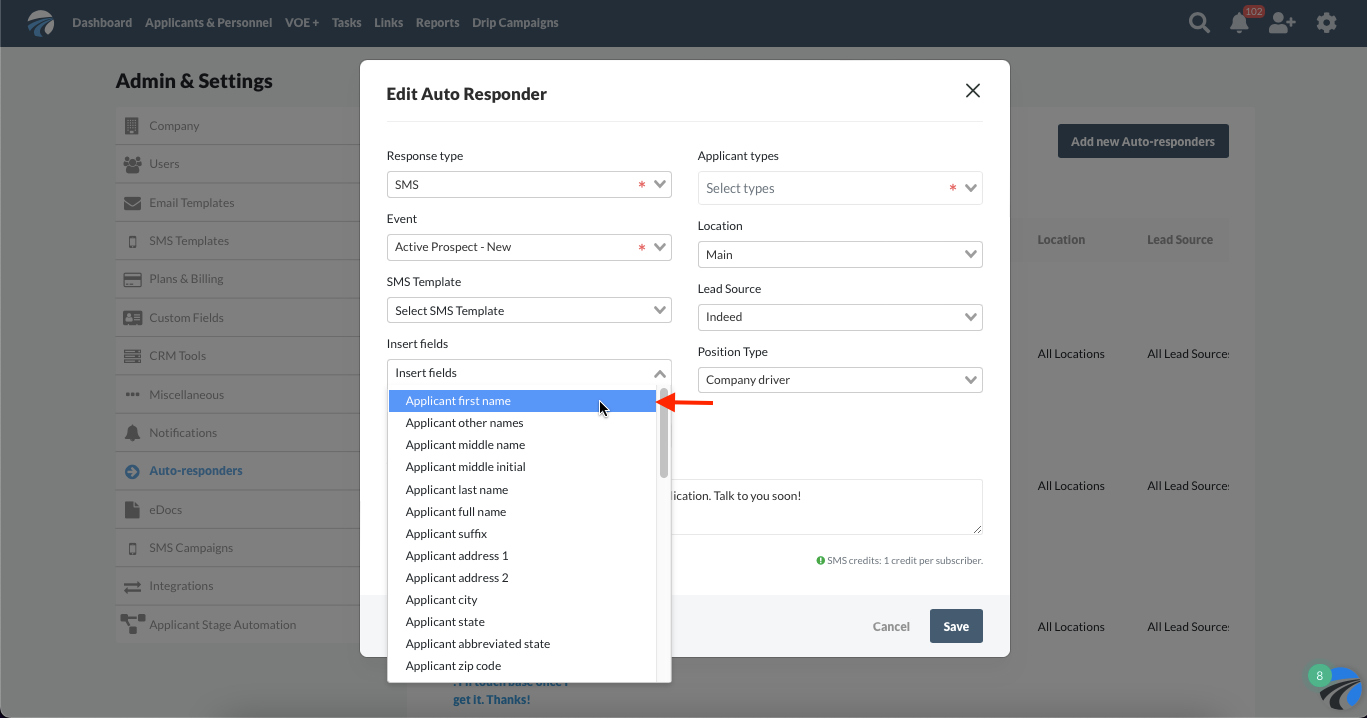
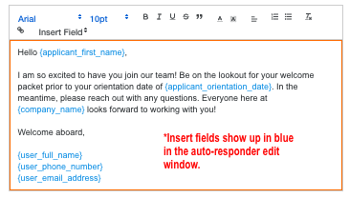
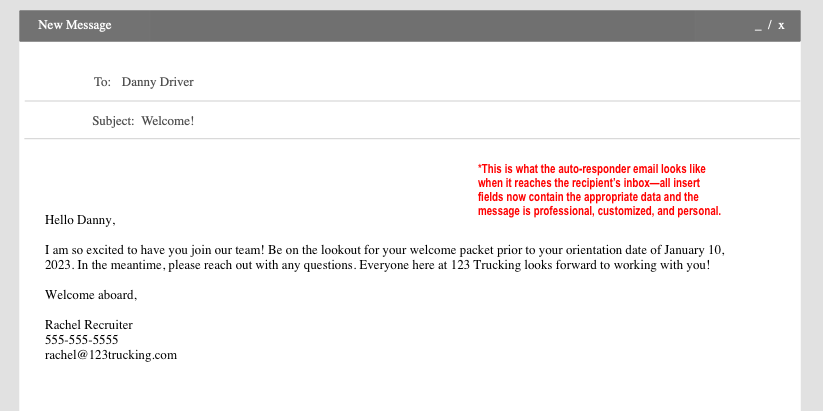
Insert fields are the best way to personalize your message, and personalized messages can make the difference between an applicant responding to versus simply ignoring a text or email! Wise use of the many insert fields DriverReach makes available can elevate your organization's communications above any competitors who are also trying to recruit the same individuals. Even inserting an applicant's name in your message can confirm for a recipient that you are personally invested in his or her recruitment journey and rather than that he or she is one of hundreds or even thousands receiving this message. When crafting auto-responders, remember to make them personal with insert fields! An example of an auto-responder in edit mode followed by the finished product as it looks to the recipient is seen below: