Keeping track of your to-do list has never been simpler thanks to DriverReach's intuitive task tool! Creating new tasks and viewing tasks assigned to you or to other users within the DriverReach system is a breeze, and editing, deleting, or marking tasks as complete helps you stay organized and prioritize what comes next. Read on to learn how the task tool can support you and your team in skillfully navigating the many moving parts that make up the recruitment process.
Creating a New Task
Step 1
From any page within the DriverReach system, select the "Applicants & Personnel" option from the blue main navigation menu. 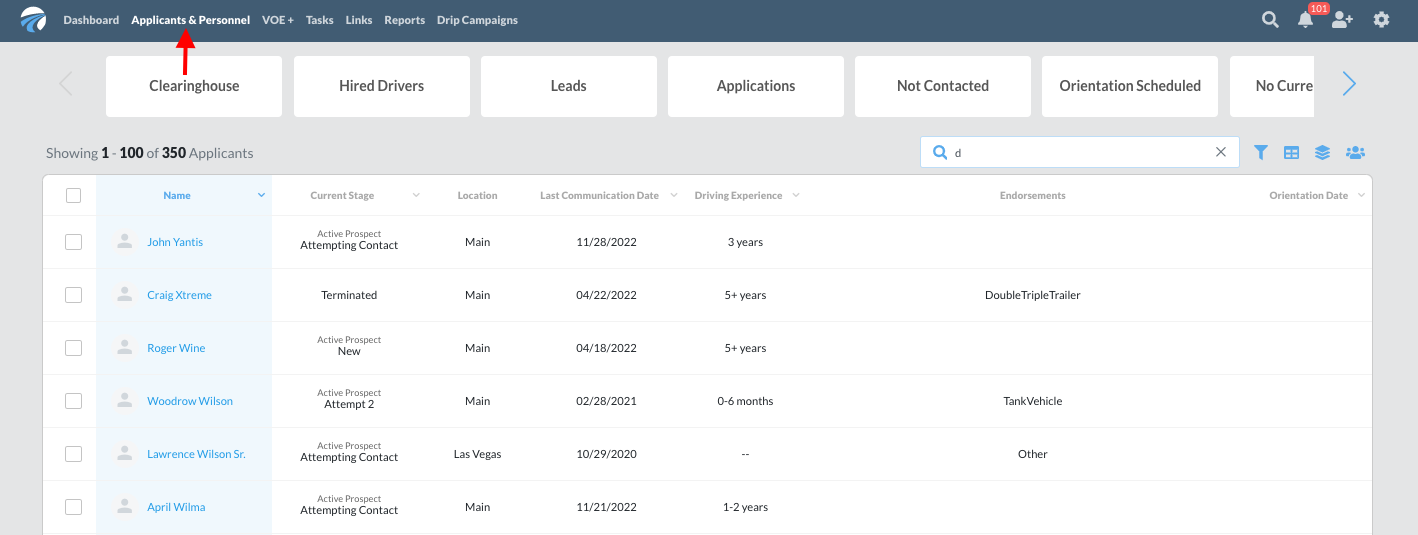
Step 2
Locate the individual for whom you wish to create a task by using the global search tool or scrolling through the applicant and personnel list to find the correct name. 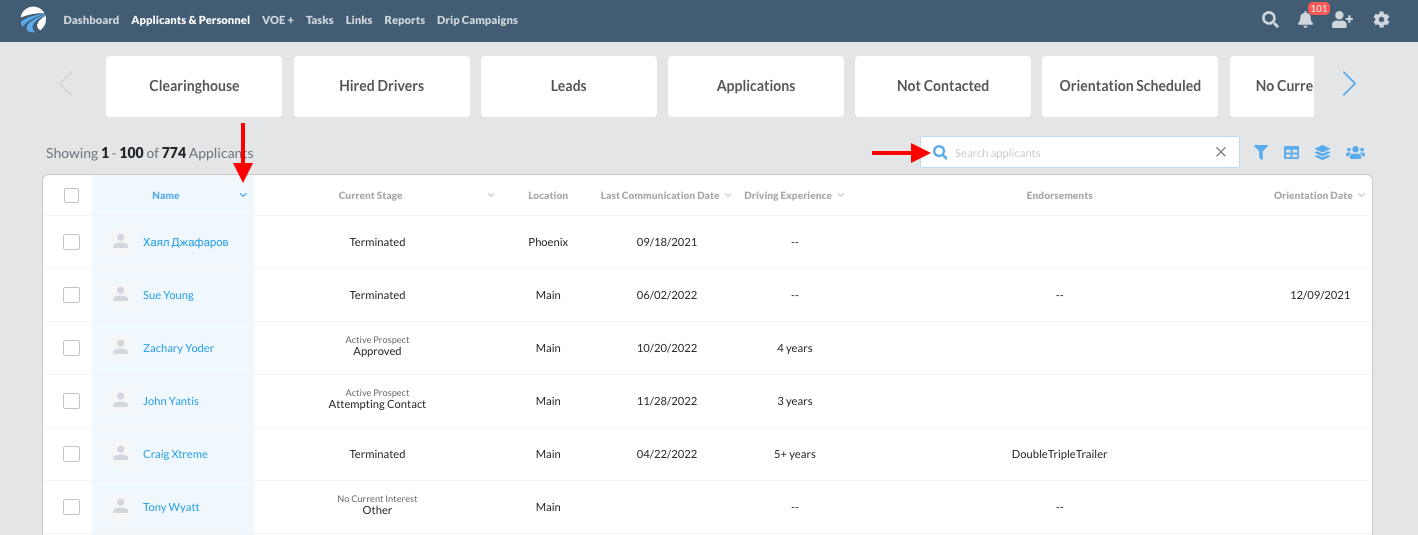
Step 3
Open the individual's profile by clicking on his or her name.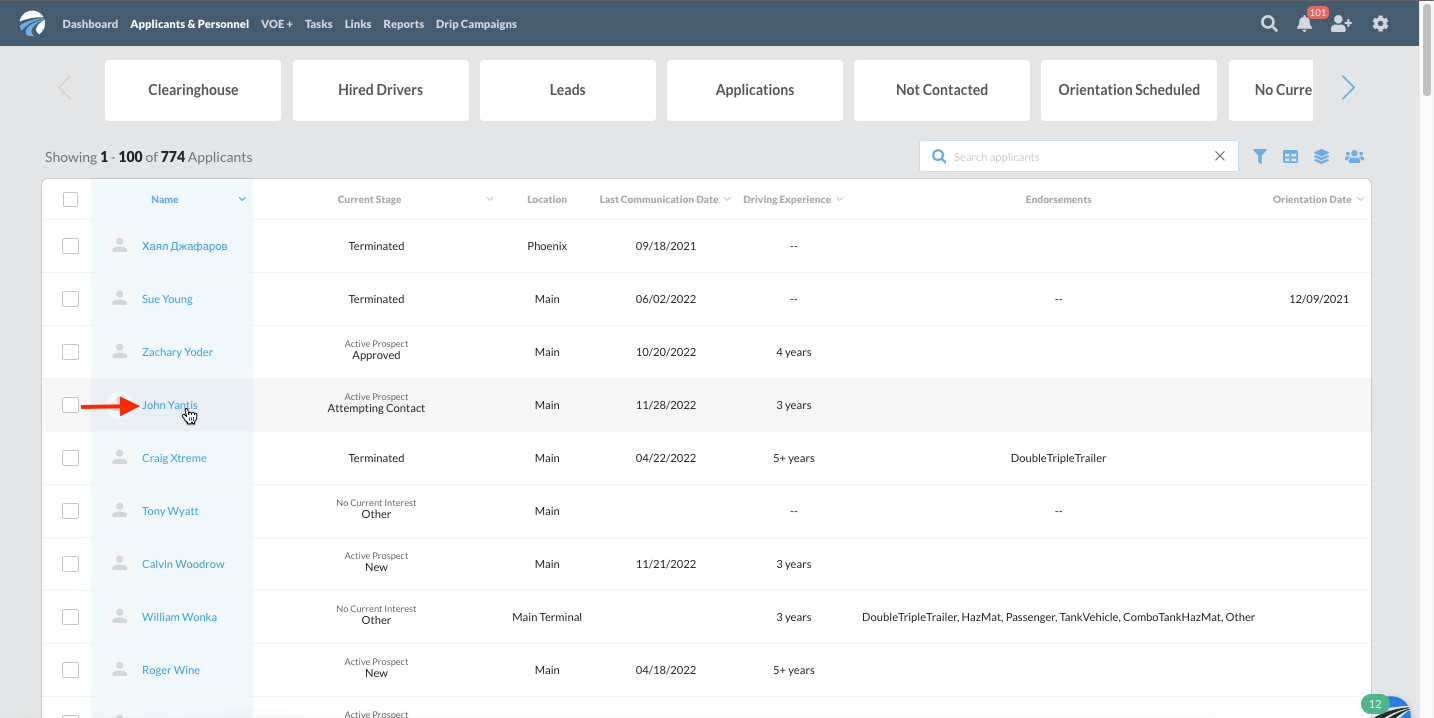
Step 4
Within the individual's record, select the "Task" tab on the right side of the screen under the "Workflow" area.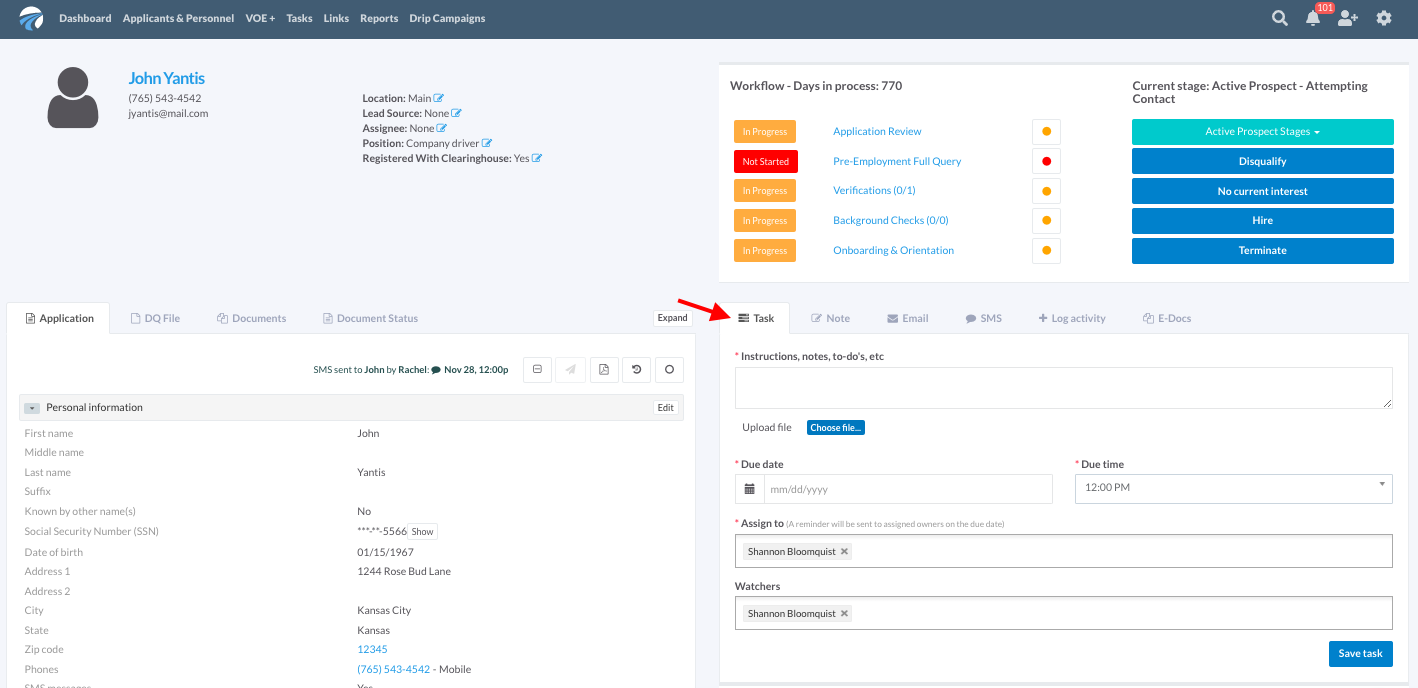
Step 5
Within the "Task" tab panel, enter information you would like to associate with this task. Options include:
-
Instructions
- Any attachments or uploads you wish to include with the task for future reference
-
Notes
-
To-do reminders
-
Due date and/or time
-
Assignees for the task (those who may contribute to completing the task)
-
Watchers for the task (those who wish to monitor task progress)

Step 6
Once you have entered all pertinent information, click the blue "Save task" button in the lower right corner of the "Task" tab.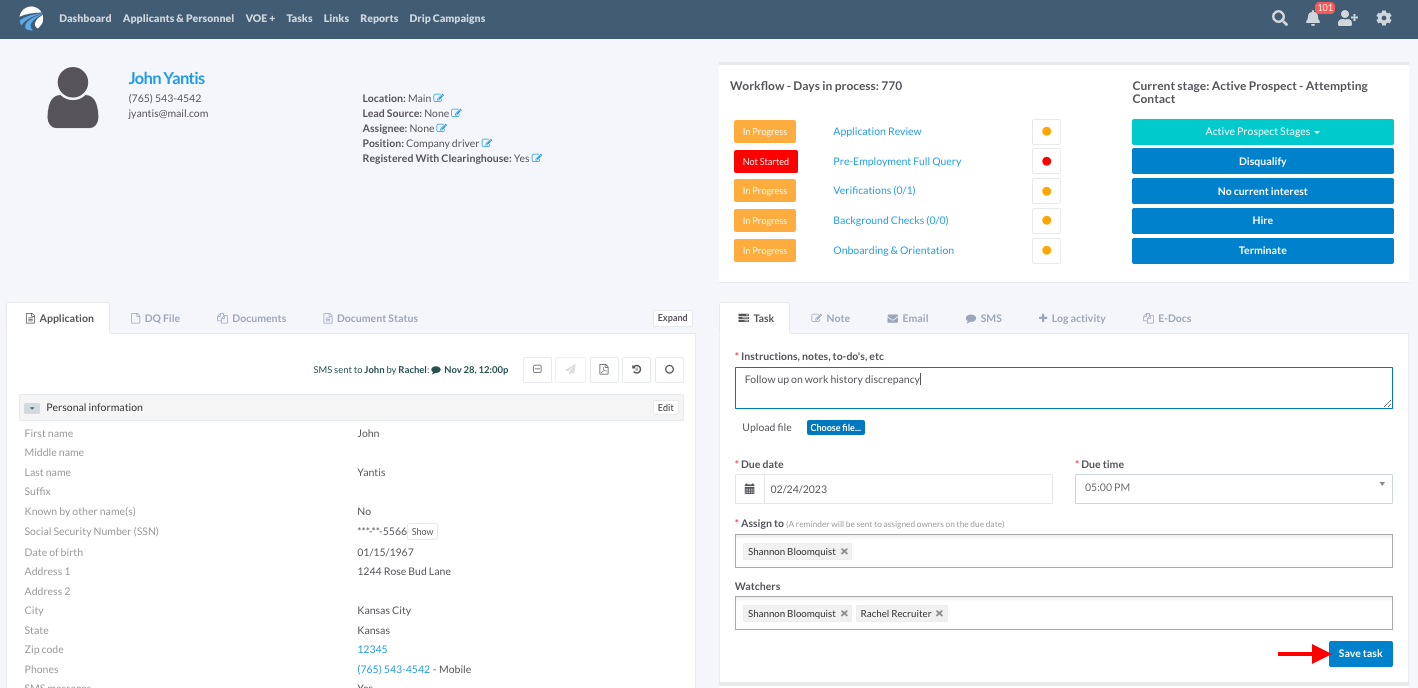
Step 7
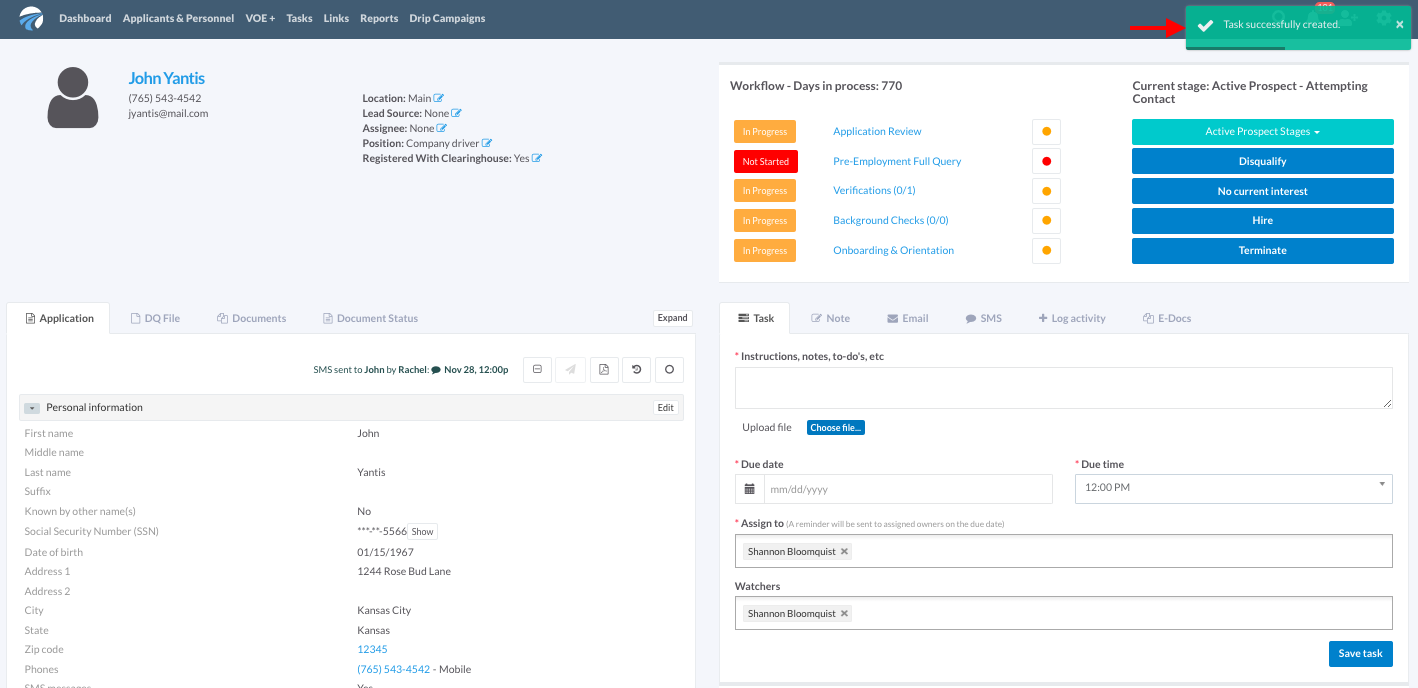
A green notification will appear in the upper right-hand corner of the screen confirming that the task has been saved to the applicant's record. Assignees and watchers will have access to monitor progress on this task so that everyone remains on the same page regarding action steps for that individual.
Viewing a Task
Once a task is created, the places within the DriverReach system where it may be viewed include:
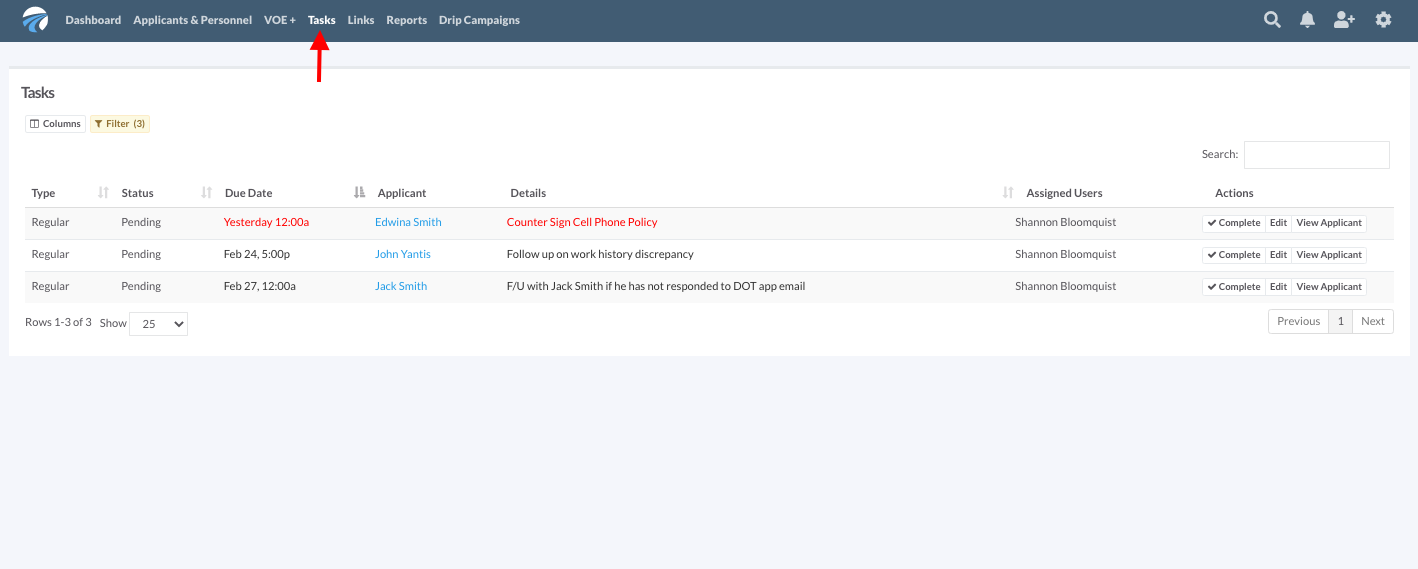
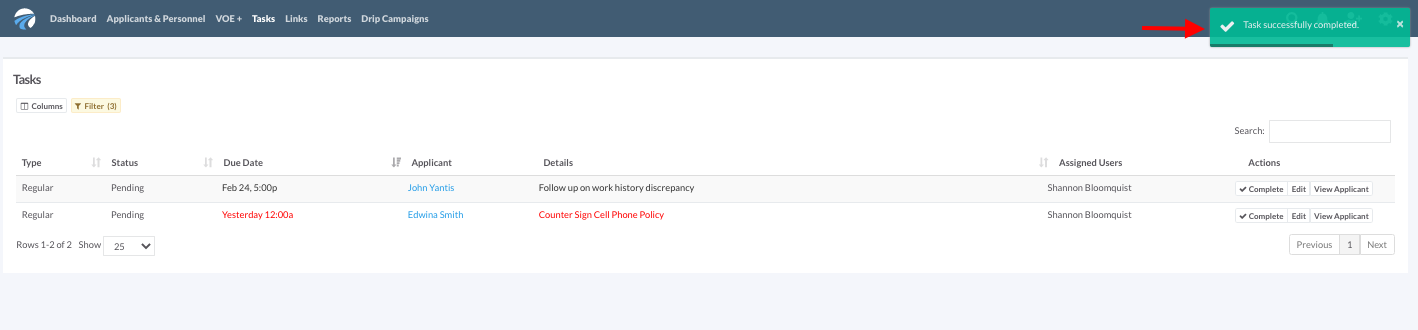
- On the "Tasks" dashboard
- This dashboard is available from any screen by clicking the "Tasks" menu option located within the blue main navigation bar. This dashboard includes a detailed view of each task for which you are listed as an assignee with overdue tasks listed in red font as seen below:
- Within the "Activity Timeline"
- The "Activity Timeline" is located underneath the "Task" tab in the individual's profile:

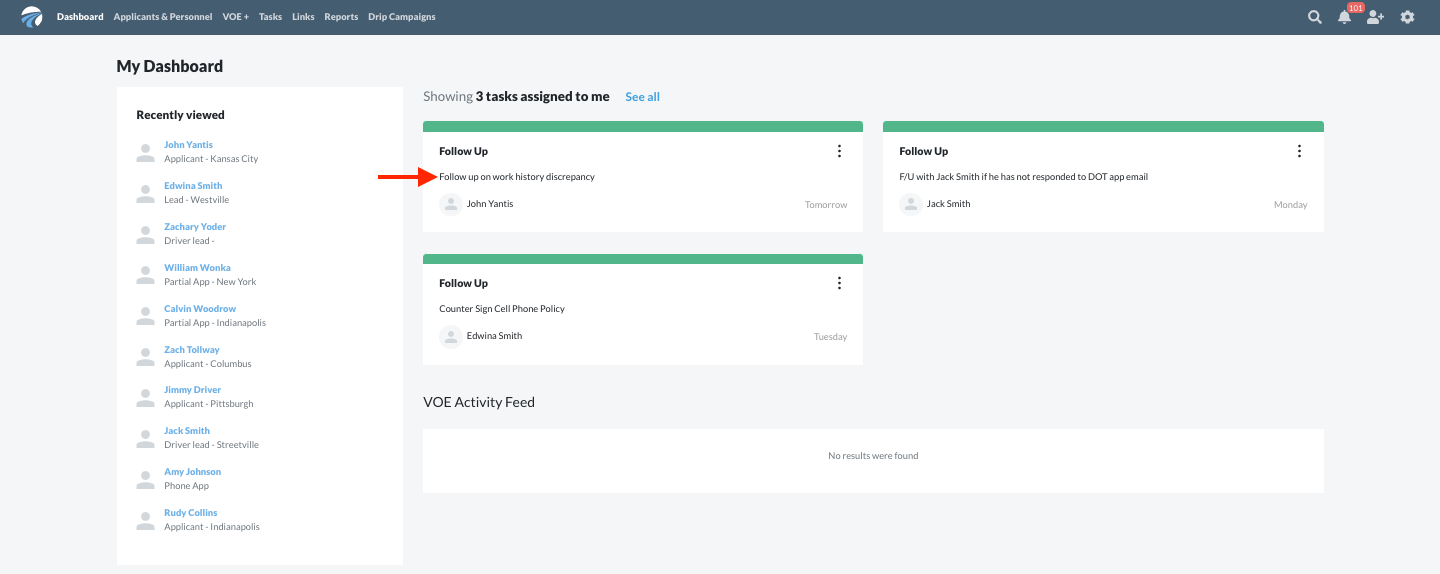
- On the "Dashboard" of each assignee
- Any user assigned a task may view it on the "My Dashboard" screen as in the example below:
Editing, Deleting, or Marking a Task as Complete
Users may edit, delete, or mark a task as complete either from the "Tasks" dashboard or from the individual's profile.
Edit, delete, or mark a task as complete from the "Tasks" dashboard:
Step 1
From any screen within the DriverReach system, click on the "Tasks"option within the blue main navigation menu.
Step 2
To choose filters for viewing tasks, click on the yellow "Filters" tab on the top left side of the "Tasks" table. The area surrounding the table will turn yellow when viewed in the "Filters" tab as seen below.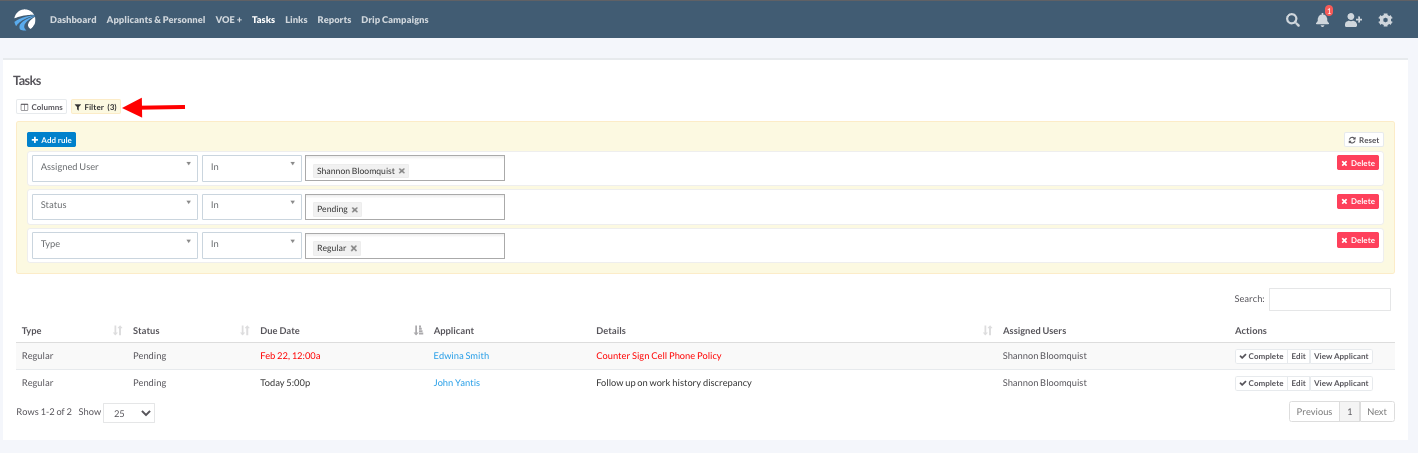
Step 3
Create a new filter by clicking the blue "Add rule" button above the first filter in the list. Depending on the filters chosen, you may view pending or completed tasks, tasks for which you are an assignee, or tasks for which others are the assignee. 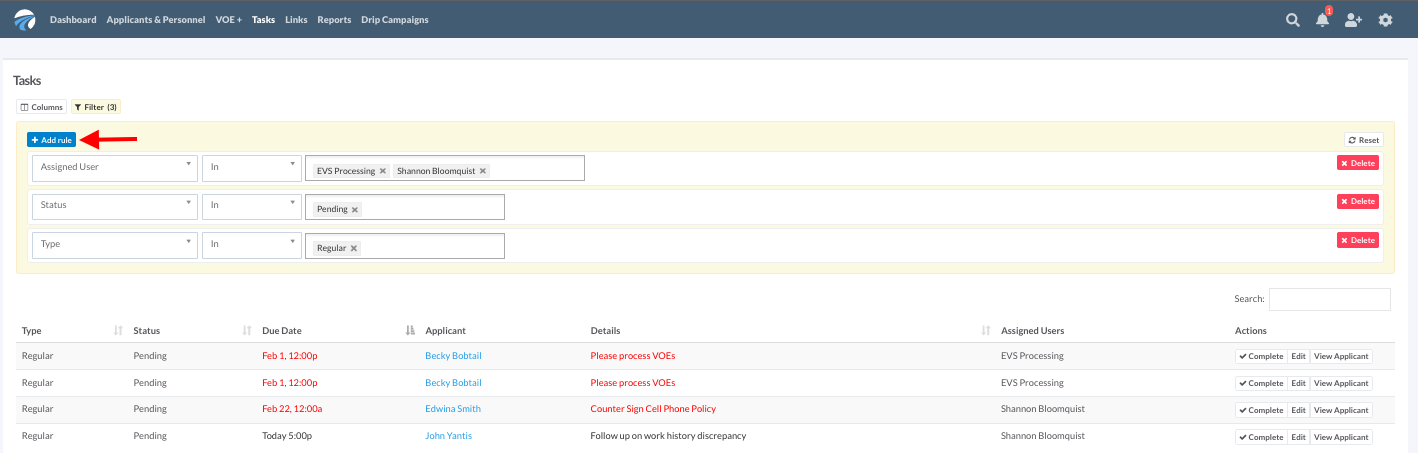
Step 4
Delete an unwanted filter by clicking the red "Delete" button on the right side of each filter's row--doing so will not delete the tasks themselves, but it will result in changes to the contents of the list you see in the task table located directly below your filters. 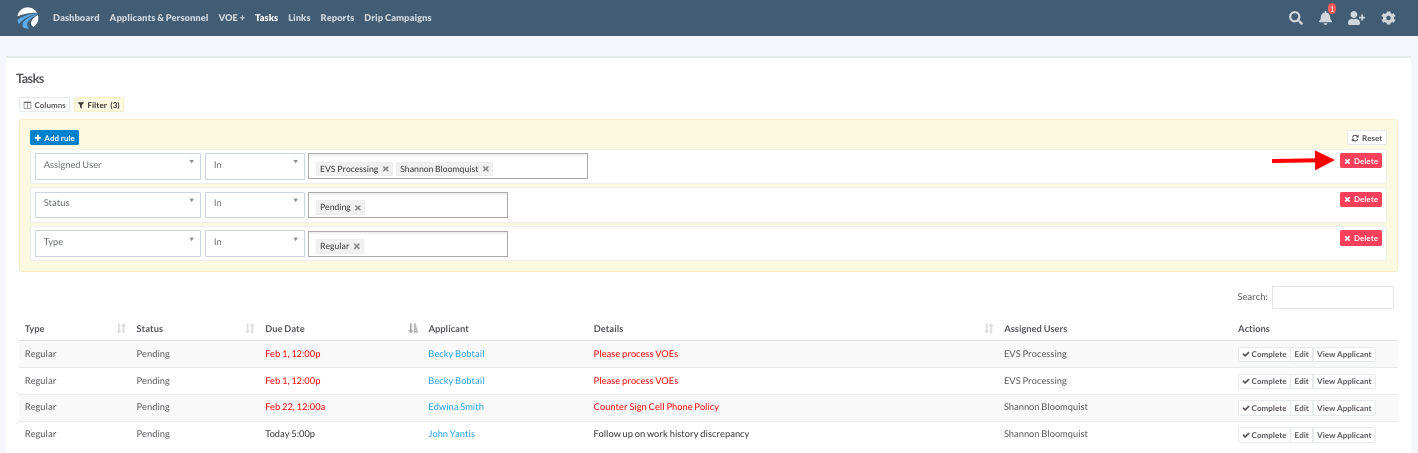
Step 5
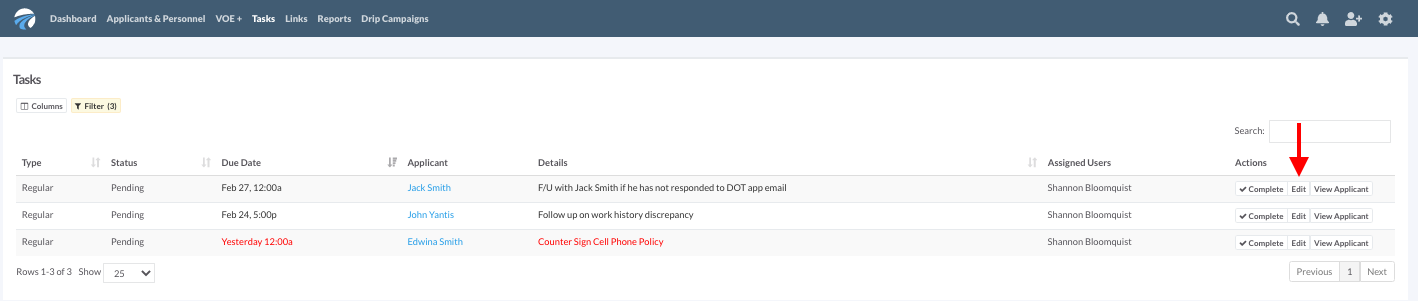
Once the filters have loaded the desired tasks for viewing, to edit a task, click on the white "Edit" button located in that task's row on the right-hand side of the screen.
Step 6
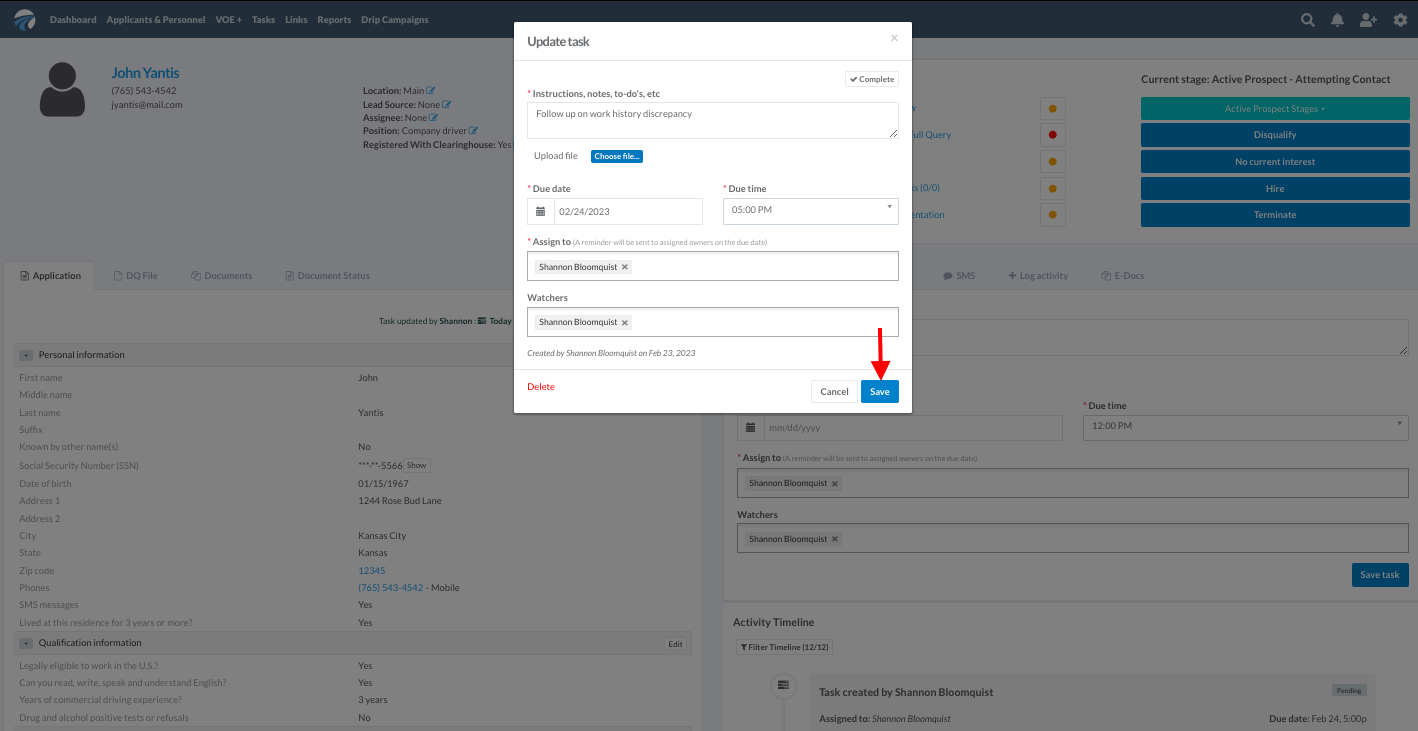
Make any desired edits to the task note, uploads, date, time, and assigned users or watchers in the pop-up window that appears.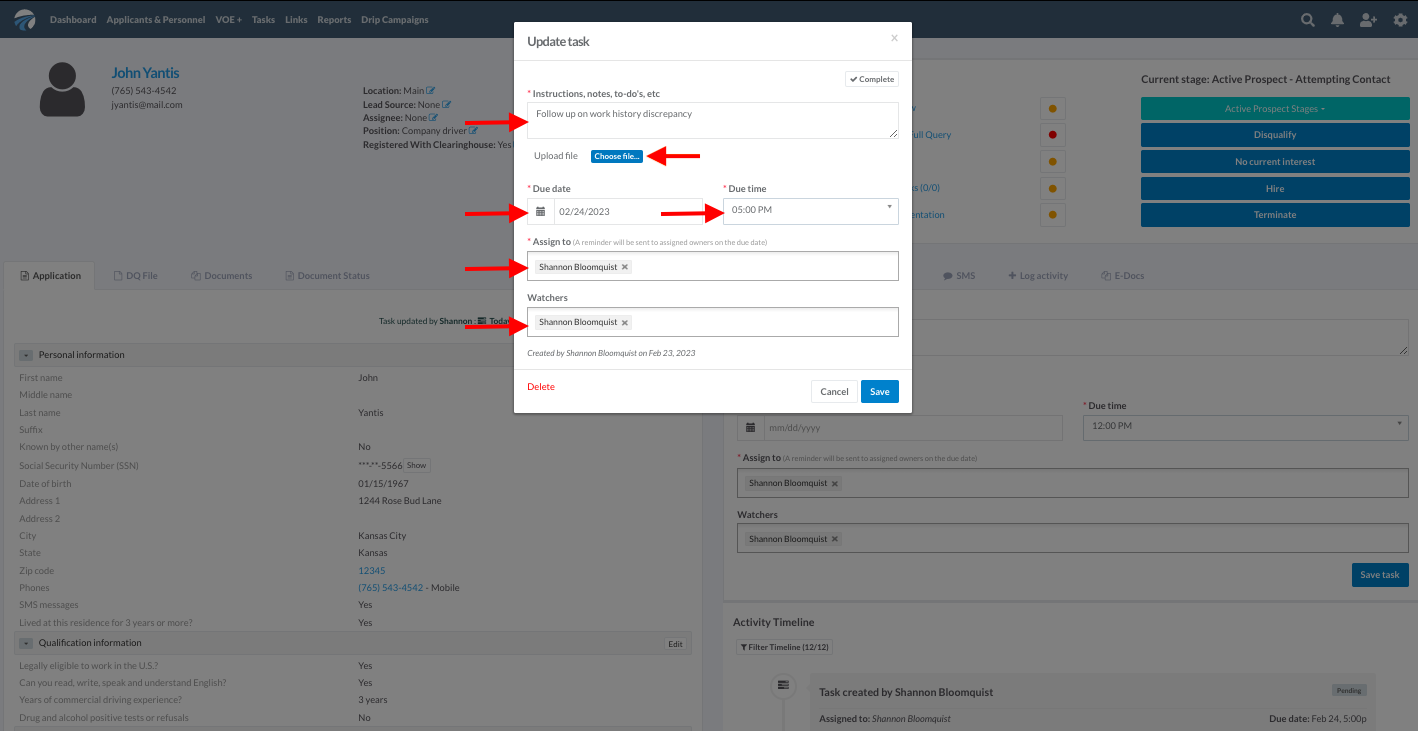
Step 7
Click on the blue "Save" button to keep the changes. Alternatively, click the white "Cancel" button to discard any changes and revert back to the task as it was before. Select "Delete" (in red in the bottom left corner) to permanently delete the task from the system.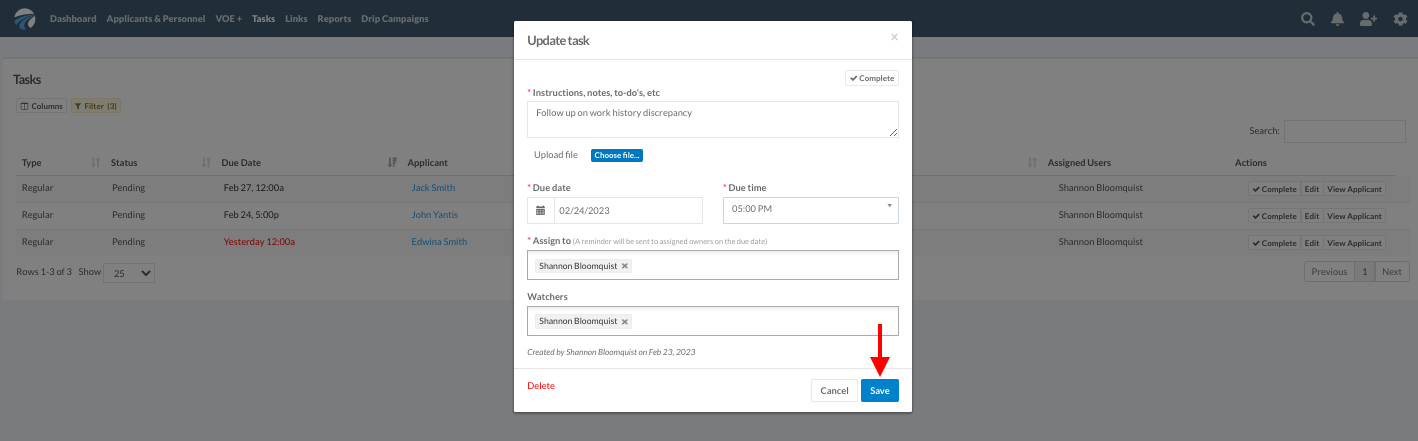
Step 8
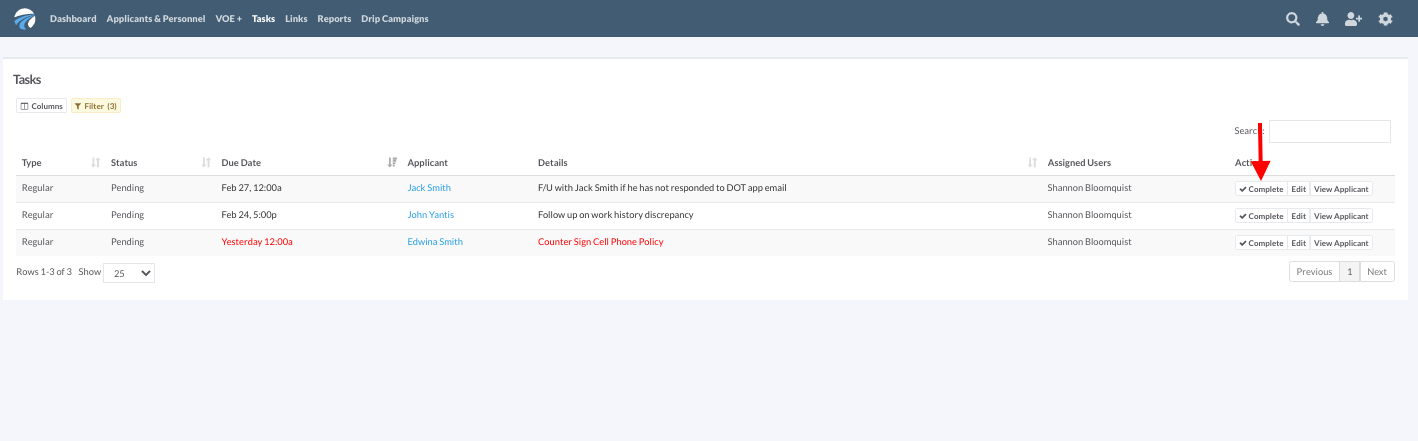
When a task is finished and you are ready to mark it as complete, select the white "Complete" button located in that task's row on the right-hand side of the screen.
Step 9
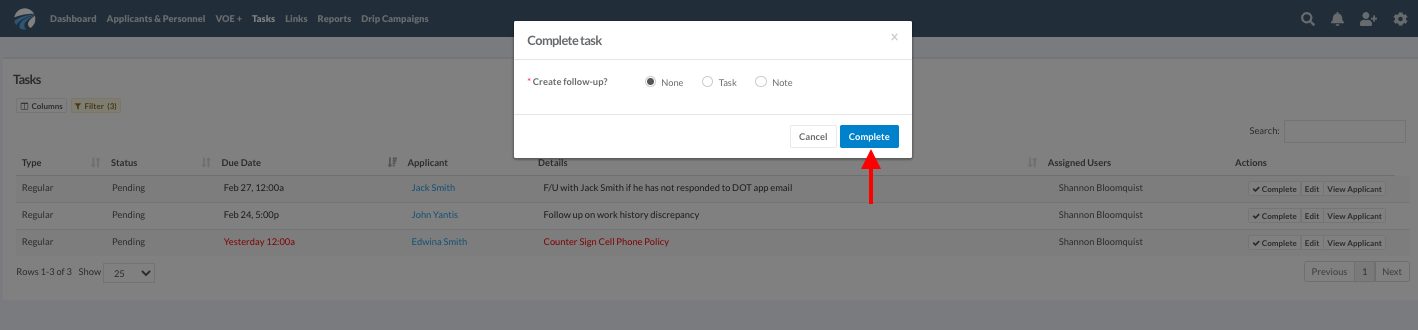
A pop-up window will appear; click on the blue "Complete" button in the lower right-hand corner to mark the task as complete. Optionally, you may choose to add another task or a simple note to this task by clicking on the radial buttons in the pop-up window before clicking the "Complete" button.
Step 10
A small green notification will appear in the upper right-hand corner of the screen confirming successful completion of the task.
Edit, delete, or mark a task as complete from the individual's profile:
Step 1
From any page within the DriverReach system, select the "Applicants & Personnel" option from the blue main navigation menu.
Step 2
Locate the individual for whom you wish to create a task by using the global search tool or scrolling through the applicant and personnel list to find the correct name.
Step 3
Open the individual's profile by clicking on the name of the individual for whom you wish to find a task.
Step 4
Within the individual's record, scroll down to view the "Activity Timeline" below the "Task" tab on the right hand side of the screen. 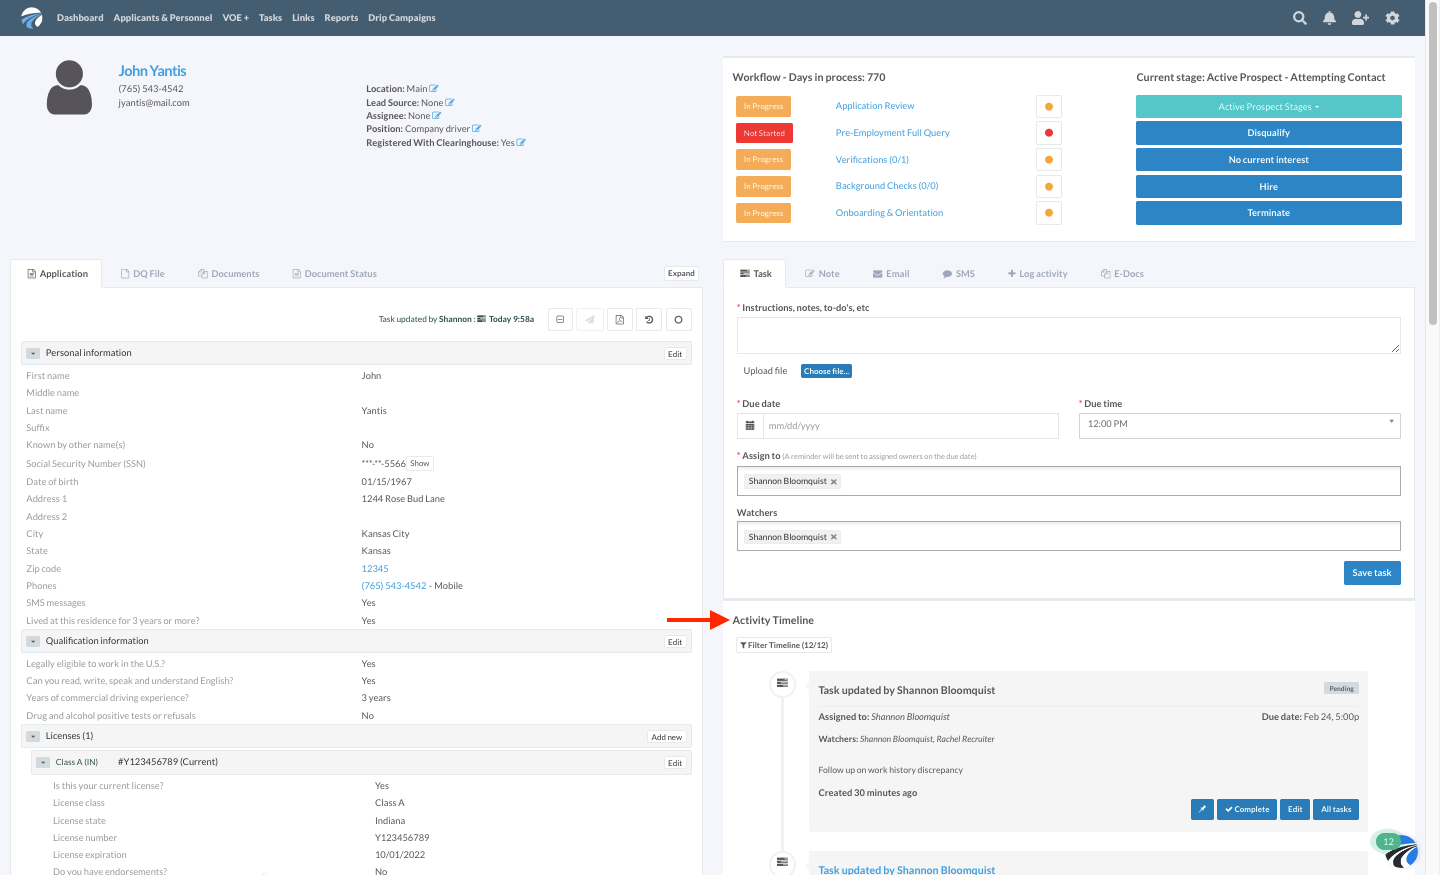
Step 5
To edit a task, scroll through the "Activity Timeline" to locate the desired task, and then click on the blue "Edit" button.

Step 6
Make any desired edits to the task note, date, time, and assigned users or watchers in the pop-up window that appears.

Step 7
Click on the blue "Save" button to keep the changes. Alternatively, click the white "Cancel" button to discard any changes and revert back to the task as it was before. Select "Delete" (the white button with red font located in the bottom left corner of the pop-up window) to permanently delete the task from the system.
Step 8
When a task is finished and you are ready to mark it as complete, scroll through the "Activity Timeline" to locate the desired task, and then click on the blue "Complete" button.

Step 9
A small green notification will appear in the upper right-hand corner of the screen confirming successful completion of the task.
