This article explains how to edit an application and send it to the applicant for approval.
Editing an Application
Step 1
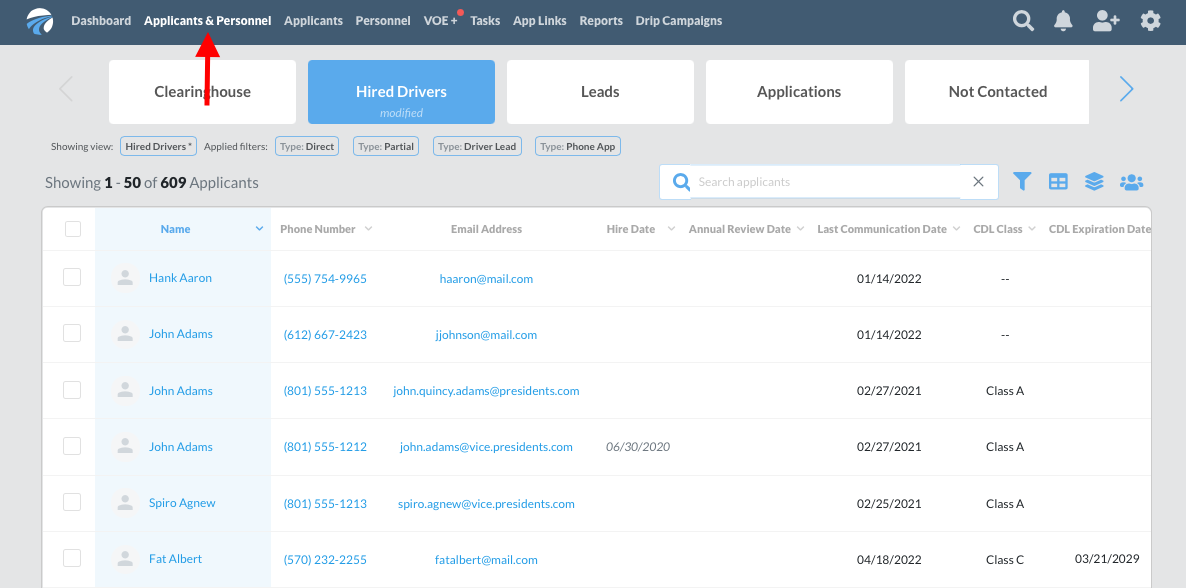
Visit the “Dashboard” page in the DriverReach platform to select the “Applicants & Personnel” tab in the main navigation bar.
Step 2
There are several ways to locate an applicant. One is to type a piece of identifying information such as the applicant’s name or location into the search bar in the upper right corner of the page and hit enter or return. Another is by using the pale gray up and down arrow icons beside each column header to sort the applicants to your liking based on applicant stage, name, application date, location, and many other data points.

Step 3
Once you have located the correct applicant, click on that applicant’s name to open his or her application.

Step 4
The applicant’s information will appear. Click on the “Application” tab on the left side of the screen to view the application data for that individual.

Step 5
Click on the “Expand” button at the top right of the “Application” tab to hide the Task tab and other timeline tabs on the right and to maximize the application view on your screen.

* Anytime you wish to return to the previous view of this page that included the “Task”, “Notes”, “Email”, “SMS”, and “Log activity” tabs, simply click on the white “Show timeline” button (see image below).

Step 6
To make changes, navigate to the appropriate area of the application you need to edit. For example, let’s say that Mr. Dufrense made a mistake when entering his social security number on the application. Navigate to the “Personal information” section of his application and click on the “Edit” button on the right side of that row.

Step 7
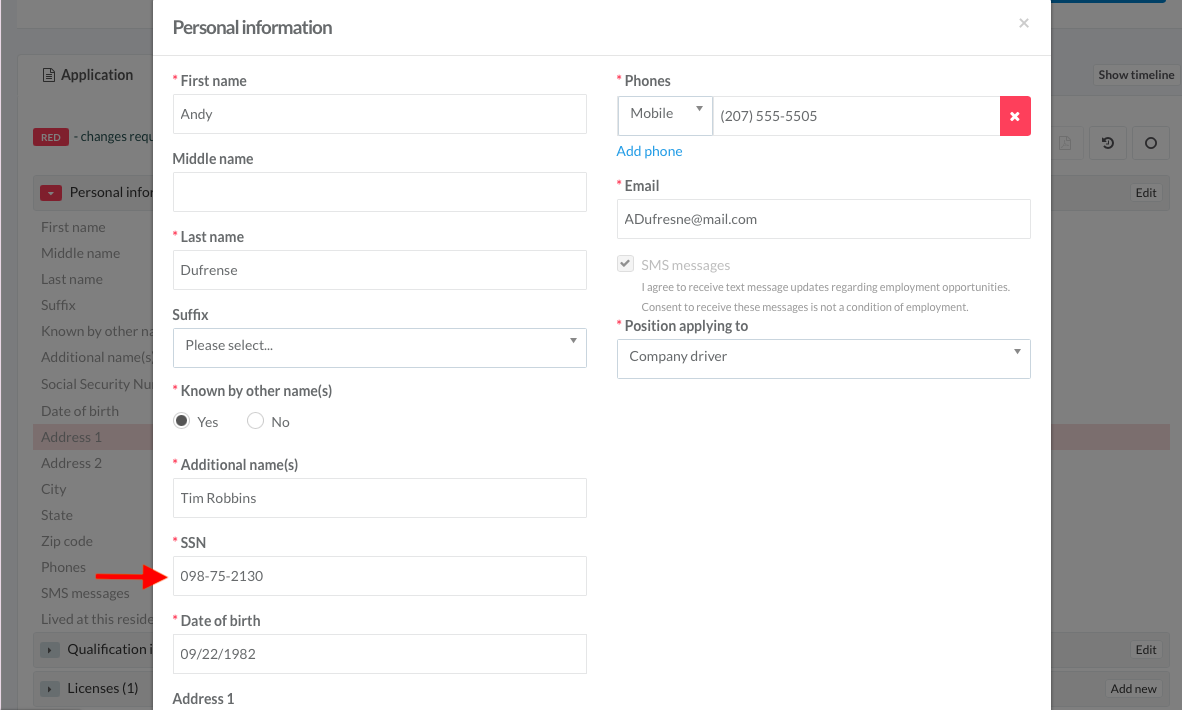
A pop-up window will appear allowing you to click on the appropriate section of the application requiring edits and type in the correct information. In this case, it’s the “SSN” text that needs to be updated. Click in the box with the SSN listed and make the necessary changes.
Step 8
Once you have made the change, scroll down to the bottom of the pop-up window and click the blue “Save” button in the lower right corner. If you change your mind about making changes, clicking the white “Cancel” button instead will undo any changes you’ve made and revert back to the previously saved version of the application.

Step 9
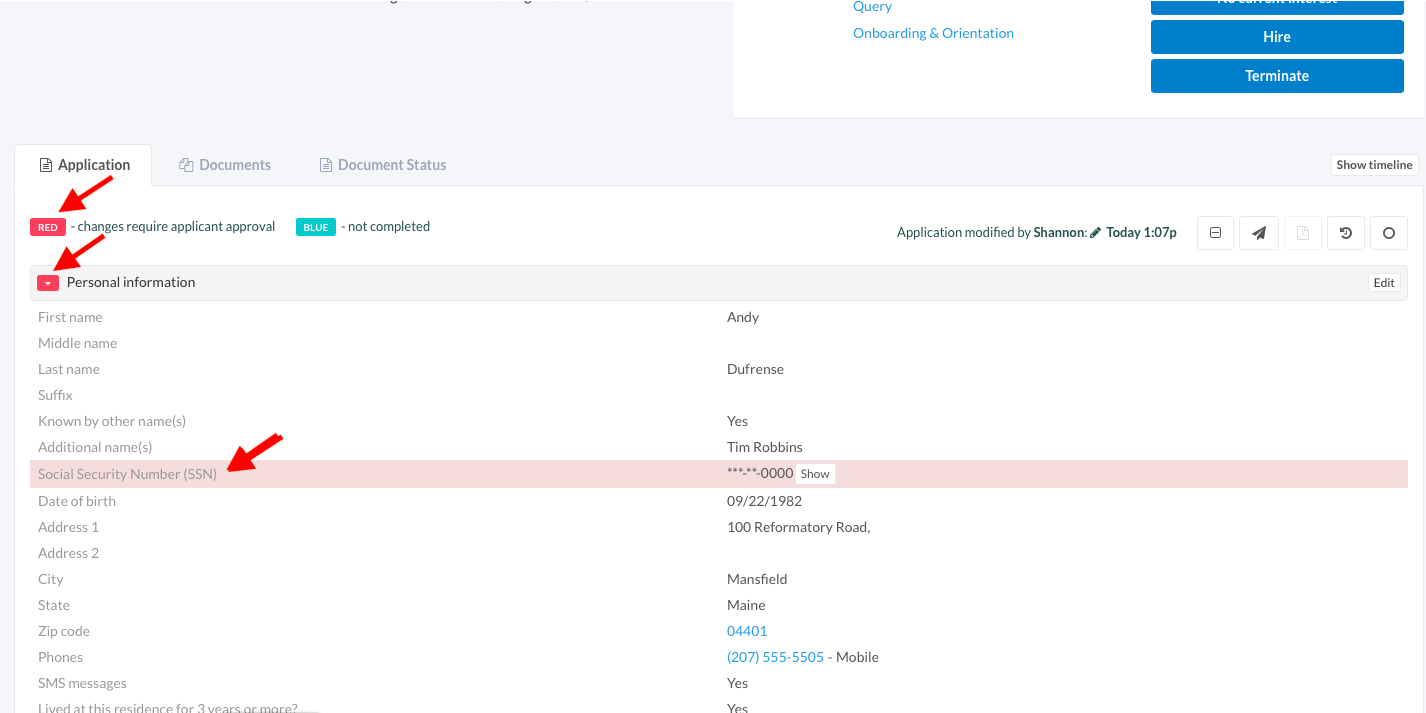
Whenever you make changes and click “Save” within an application, these edits will be flagged with red in the platform. For example, after the social security number edit we have just saved, notice that the drop-down arrow for “Personal information” is now red and that the social security number row of that section is also highlighted in red. These red highlights will remain until the applicant approves the changes.
Sending a Request to Approve Application Changes
Application changes must be approved by the applicant in order to move forward with the application process. This section explains how to send an approval request to the applicant once necessary changes have been made.
Step 1
Click on the paper airplane icon located along the upper right side of the “Application” tab.

Step 2
A small “Send notification” pop-up window will appear. Decide whether you would like to send the approval request to the applicant via email, SMS, or both, and make sure to click the checkbox next to each method of communication you wish to use. When you see a black check mark appear in the checkbox, you have successfully selected that method. To unselect it, simply click the box again to make the check mark disappear.

Step 3
Click the blue “Send” button to officially forward a request for approval to the applicant. This request contains a convenient link the applicant can click on to view and approve the changes. When the applicant responds to your request, you will receive a notification. Alternatively, if you aren’t ready to send your request yet, simply click on the white “Cancel” button instead to close the approval request pop-up window and return to the previous screen.
