Enlist your IT professional's help with these steps to prove to ISPs that the emails you send via the DriverReach platform are legitimate. Authentication helps your emails avoid spam filters and enhances your organization's online reputation.
Why is domain authentication important?
Domain authentication improves your reputation as an email sender and increases your organization's overall email deliverability. Email service providers distrust messages that don't have domain authentication set up because without it, they can never be certain of the origin of your organization’s emails. By authenticating your domain with DriverReach, you are explicitly stating that the emails you send through our system are legitimate. Doing so enhances your reputation with email service providers, making it unlikely that they will filter your email to keep it from arriving in the inboxes of your recipients.
Email service providers’ trust in your organization increases your organization’s email deliverability. As an added bonus, your emails will also look more legitimate to your recipients, making it much less likely that they will choose to mark your email as spam.
The domain authentication process is straightforward. To get started, ask your IT professional to follow the steps below.
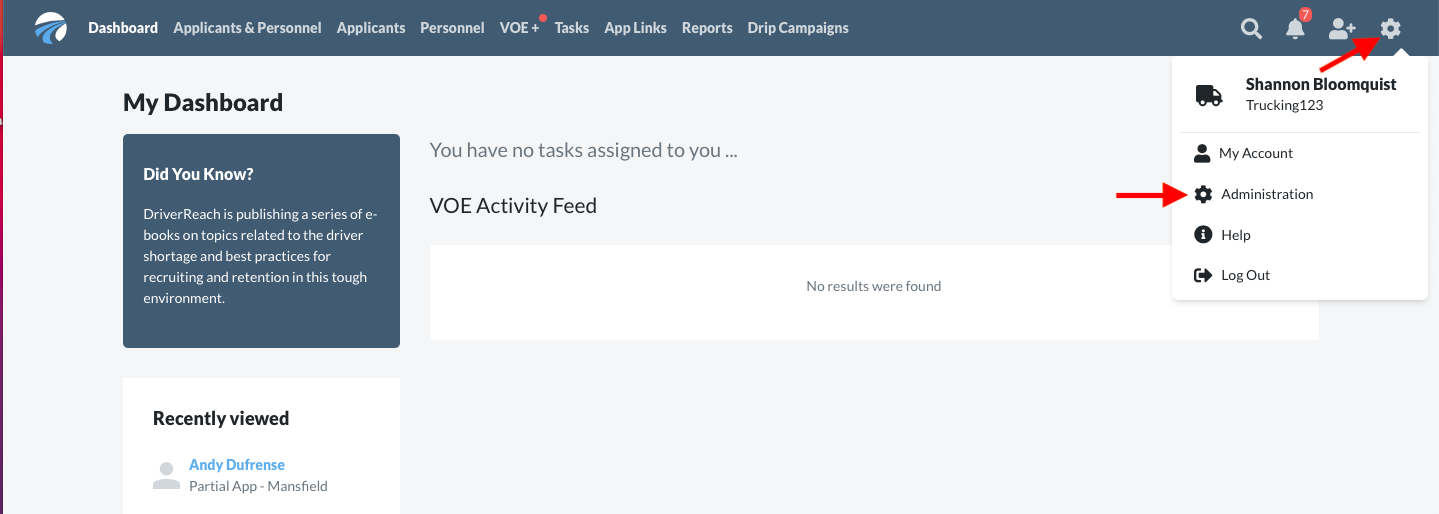
Step 1
From the Dashboard, click on the cog icon on the upper right side of the window and select "Administration" from the drop-down menu.
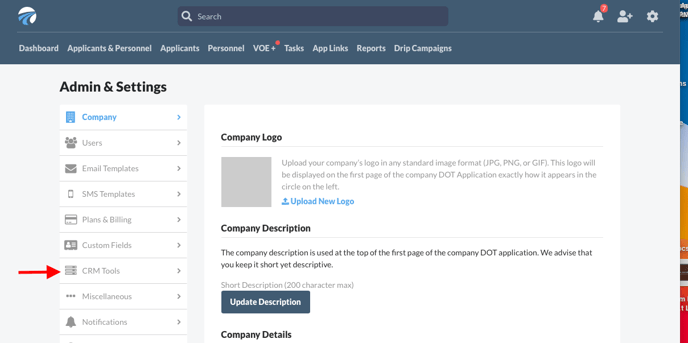
Step 2
On the "Admin & Settings" page, click on "CRM tools" from the left-side menu.
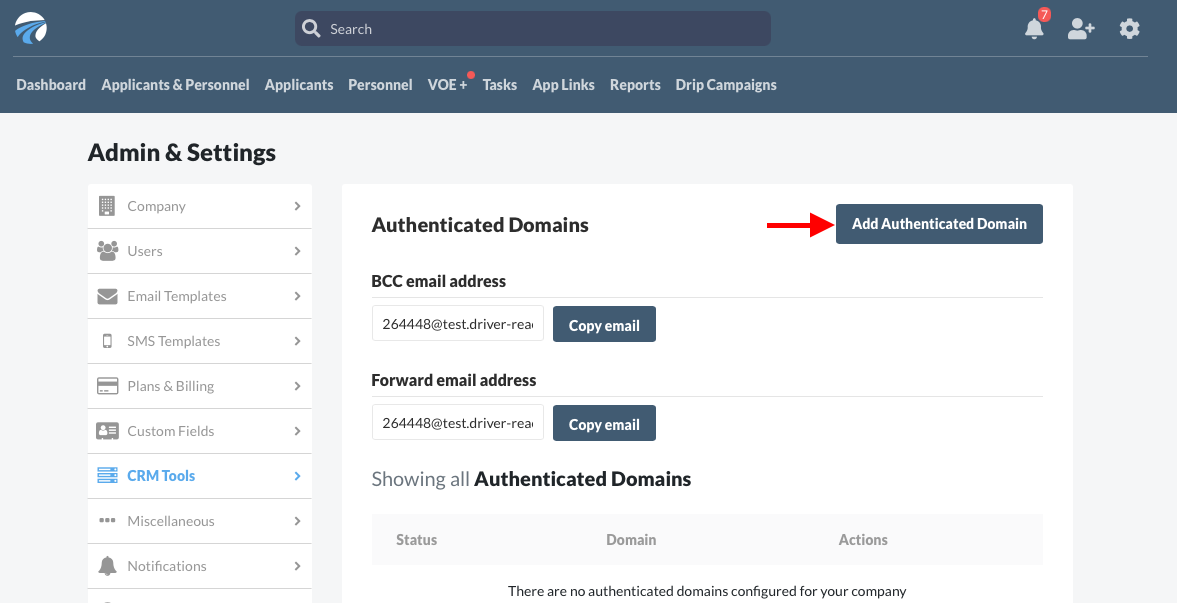
Step 3
Click the blue "Add Authenticated Domain" button near the upper right corner of the window.
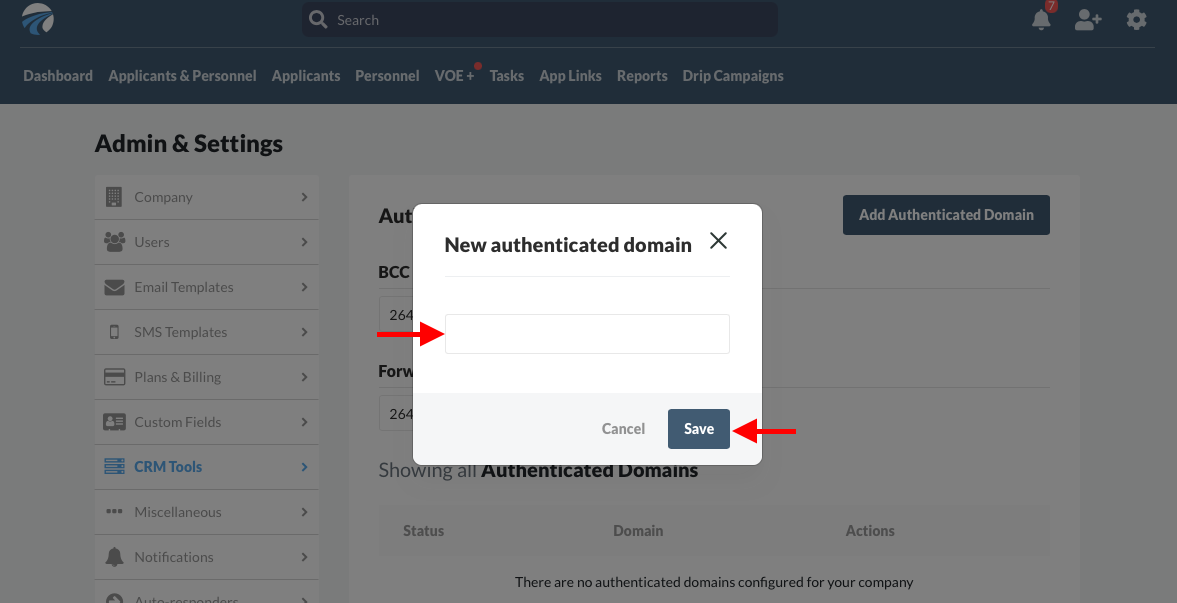
Step 4
A small pop-up window will appear. Type your root domain (e.g. abctrucking.com) into the text box and click the blue "Save" button. Clicking the white "Cancel" button instead will erase any changes you have made. In the steps to come, we will authenticate the domain "driverreach.io" as an example so you can see what it will look like when you add your domain to our system.
Step 5
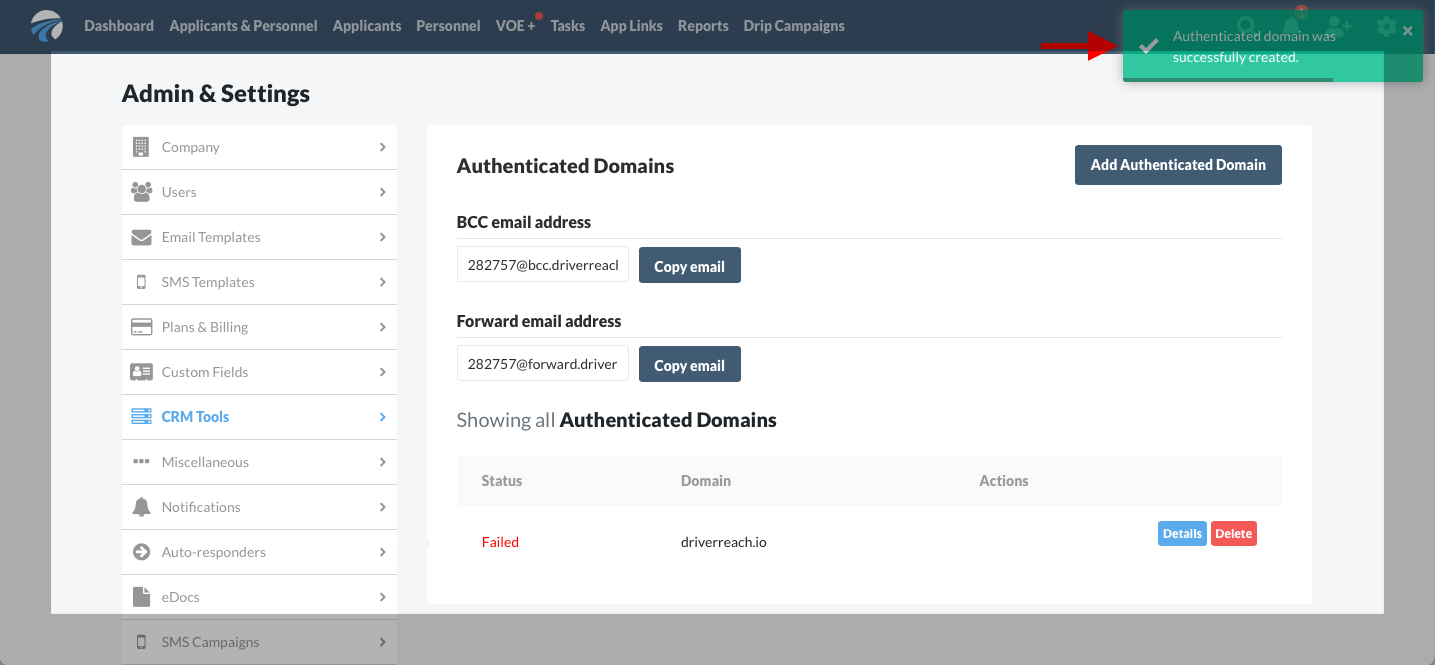
After you have typed in your domain and clicked the blue "Save" button, a small transparent green notification will briefly appear in the upper right corner of the window to let you know that your authenticated domain was successfully created.
Note:
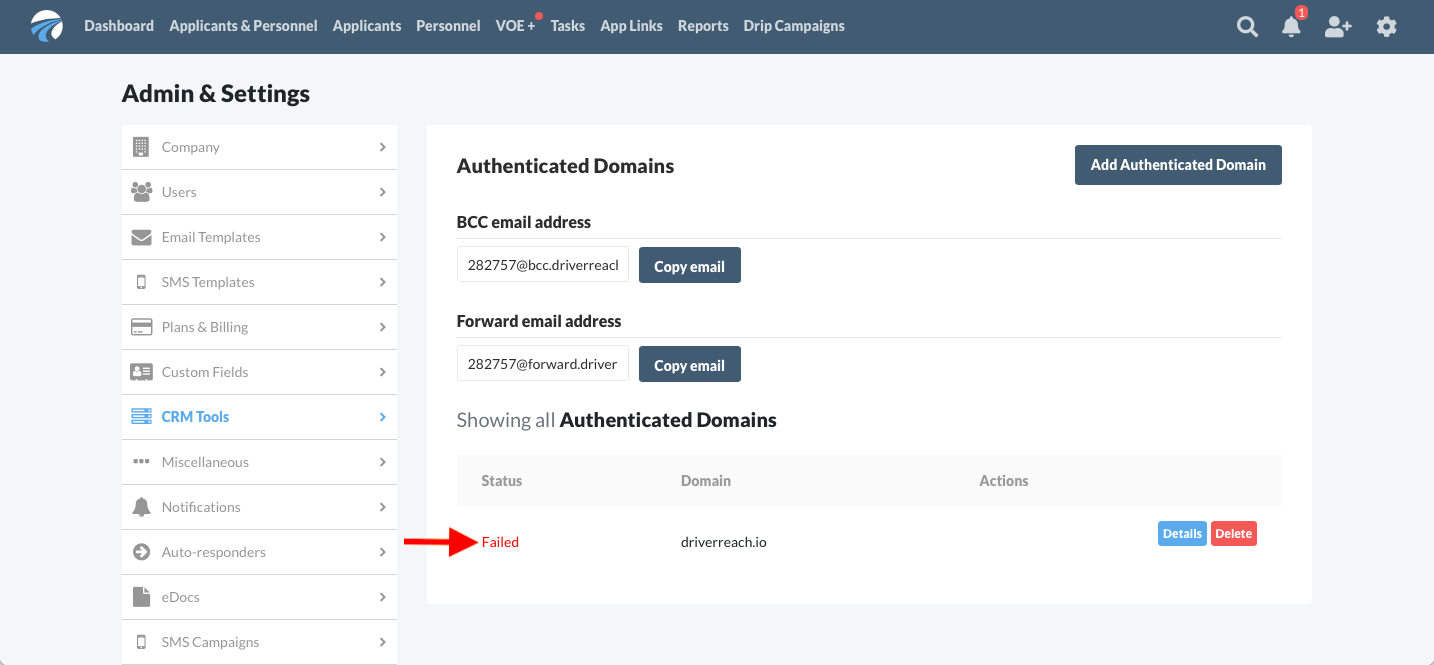
At this point in the process, it is normal to see the status "Failed" listed in the "Showing all Authenticated Domains" list in the lower left portion of the window; the subsequent steps within this article will help you officially authenticate the domain.
Step 6
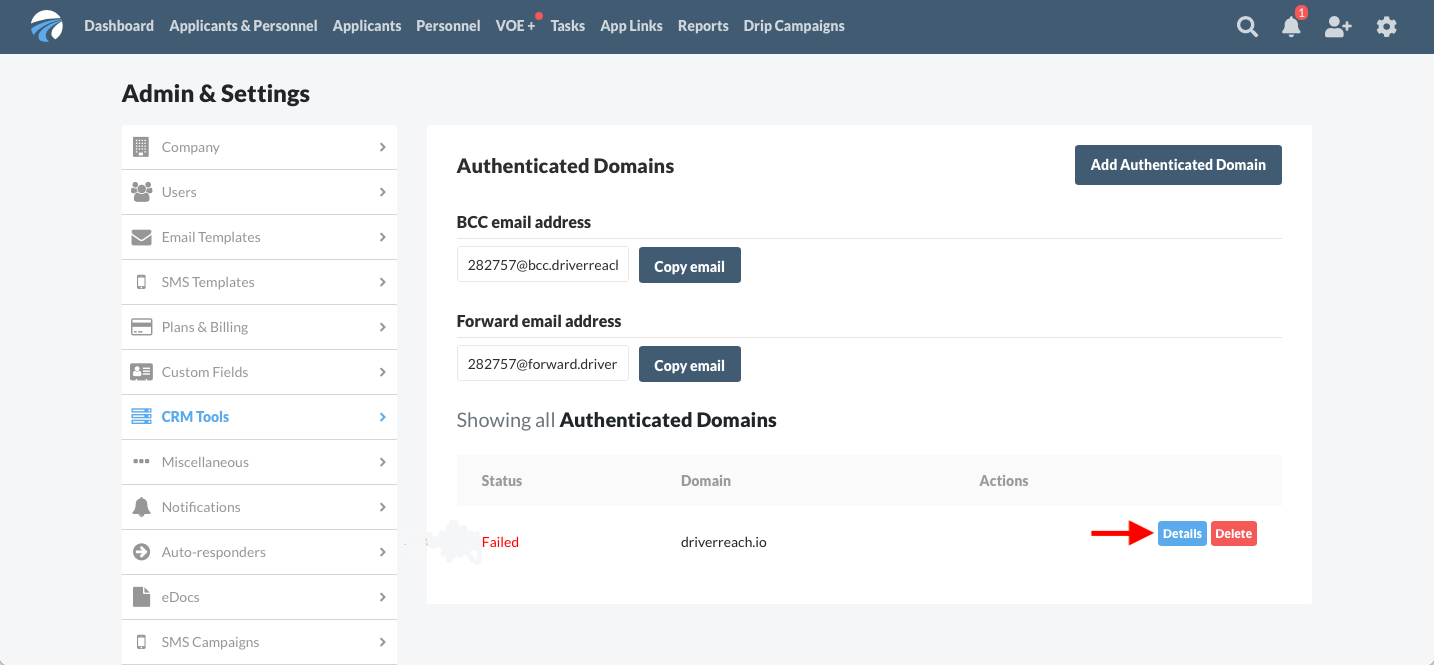
To continue with the authentication process, click on the light blue "Details" button in the lower right corner of the window; if, on the other hand, you made a mistake and need to remove the domain you just added, simply click on the "Delete" button in the lower right corner.
Step 7
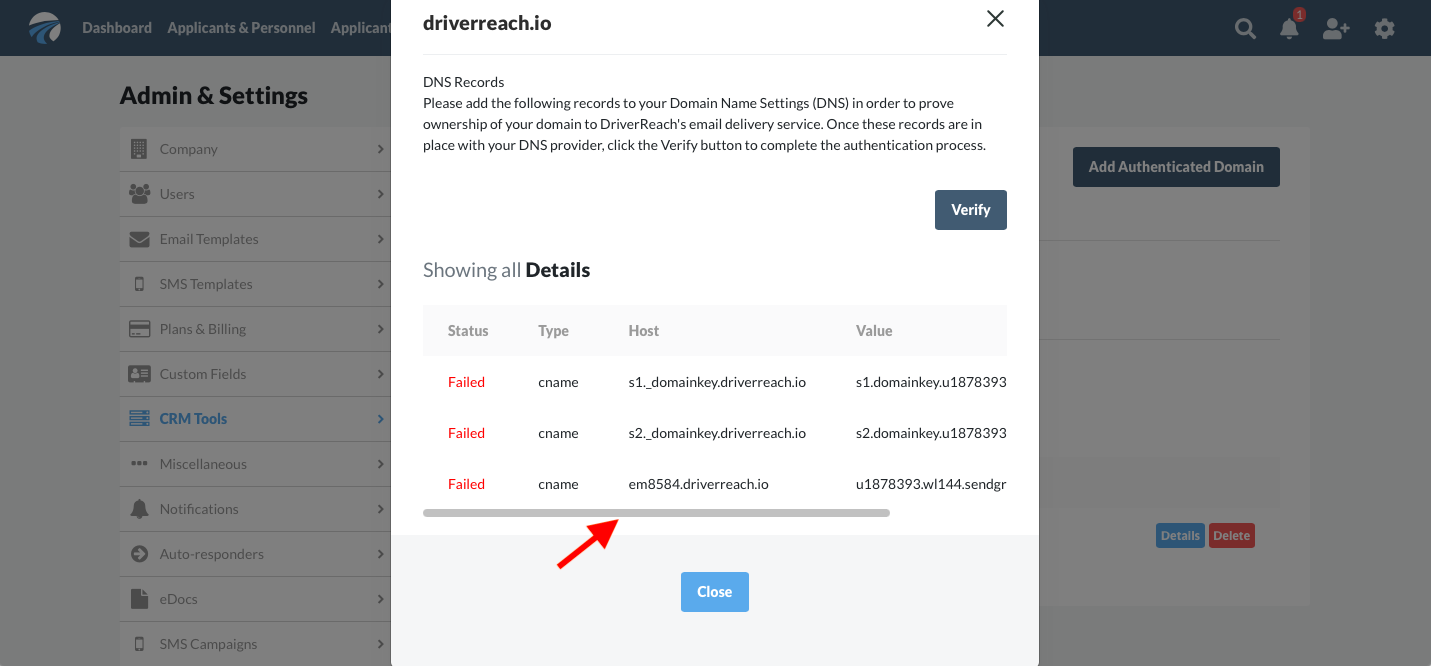
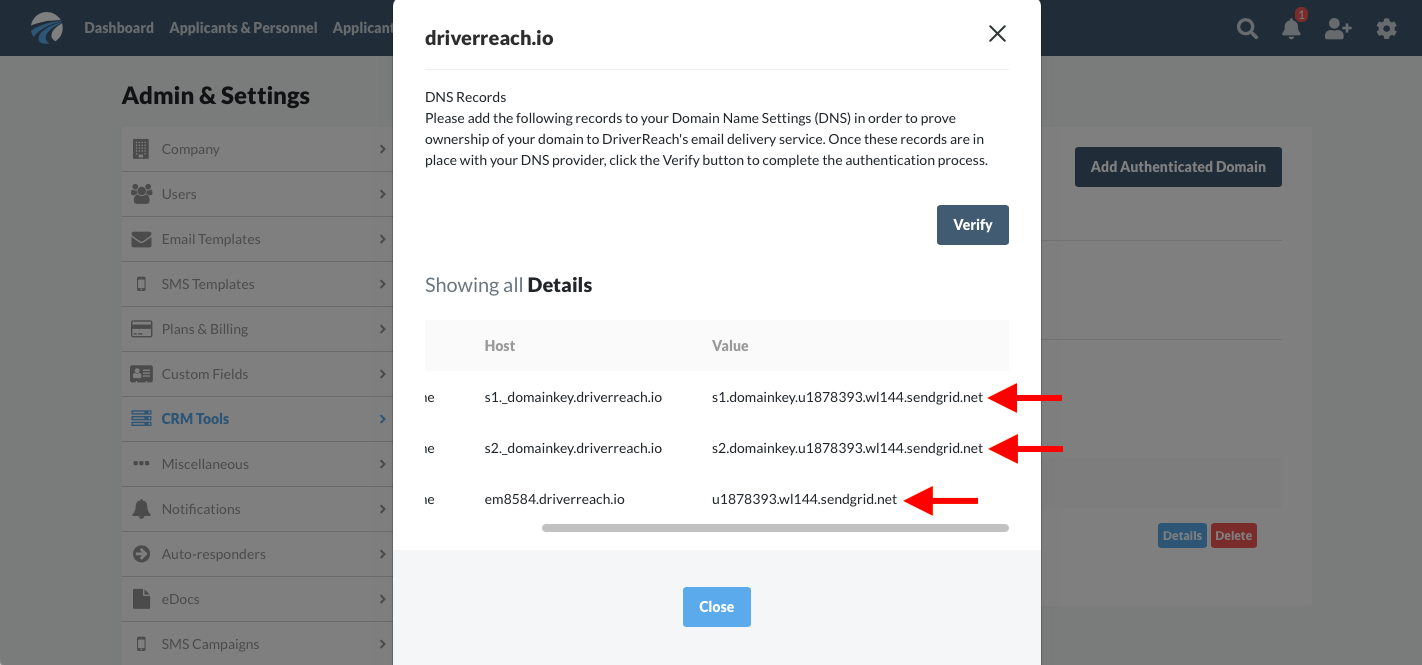
A pop-up window will appear displaying the details of the records you will need to add to your Domain Name Service (DNS) configuration in order to complete authentication of your domain. You will see a table with columns that include the status, host, and value for each DNS. If you see a gray scroll bar at the bottom of the table, be sure to scroll to your right so that the entire "Value" column is visible.
Step 8
Most users will need to enlist the help of their organization's website administrator or IT department at this point in the process. The next step is to create CNAME records in your DNS configuration that match the "Host" and "Value" columns of each row on the "Details" page and then copy and paste them into the DNS settings in the domain registrar your organization uses.
Step 9
Remember that DNS configuration looks slightly different in each domain registrar. Examples of domain registrars include GoDaddy, DNSimple, Google Domains, and Amazon Route 53. Your IT professional will have access to your domain registrar and can add your CNAME records there.
Many of our customers experience issues when adding CNAME records to the GoDaddy domain host DNS records. This is because GoDaddy typically will append the domain name to the record automatically. If you use GoDaddy for DNS configuration, do not include your domain in the "Host" record value.
For your reference, the following screenshot shows an example of how our test CNAME records look after being added to the DNS configuration in GoDaddy.

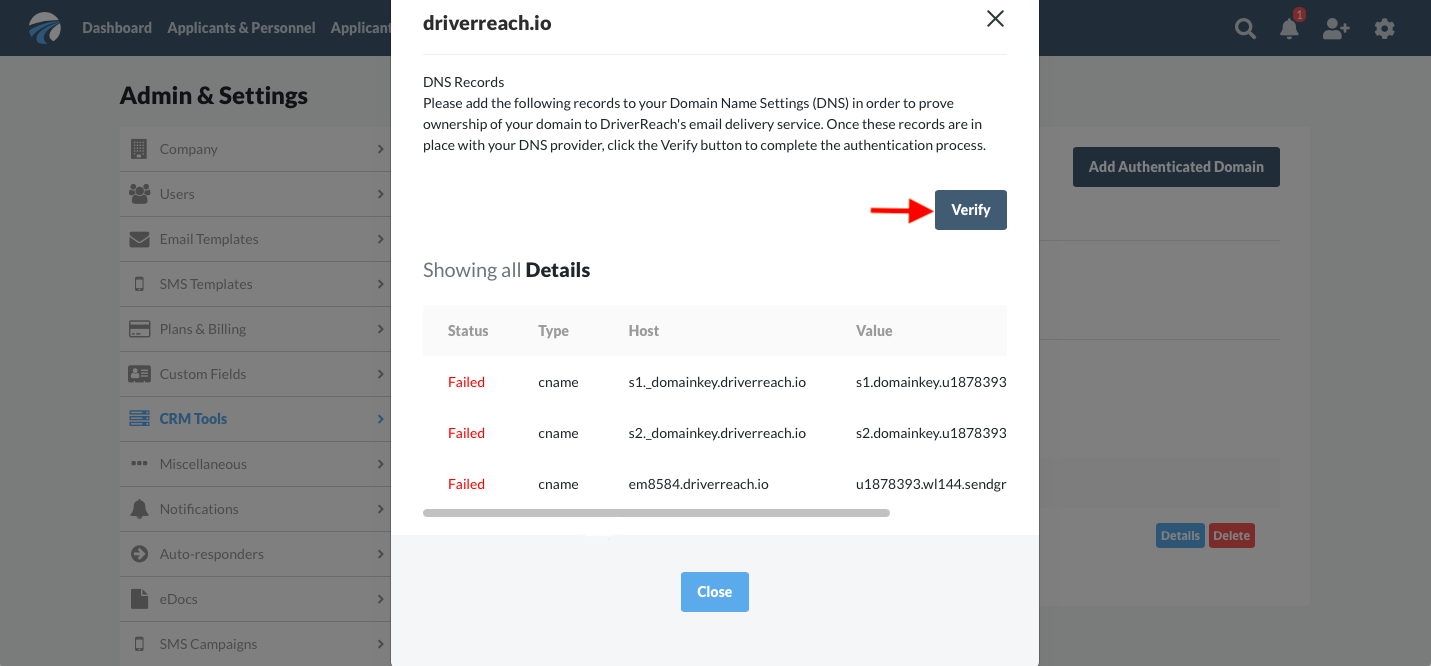
Step 10
Once the CNAME records have been added to your domain registrar, return to the "Admin & Settings" page in the DriverReach platform, where the "Details" pop-up window is still open. Click on the blue "Verify" button.
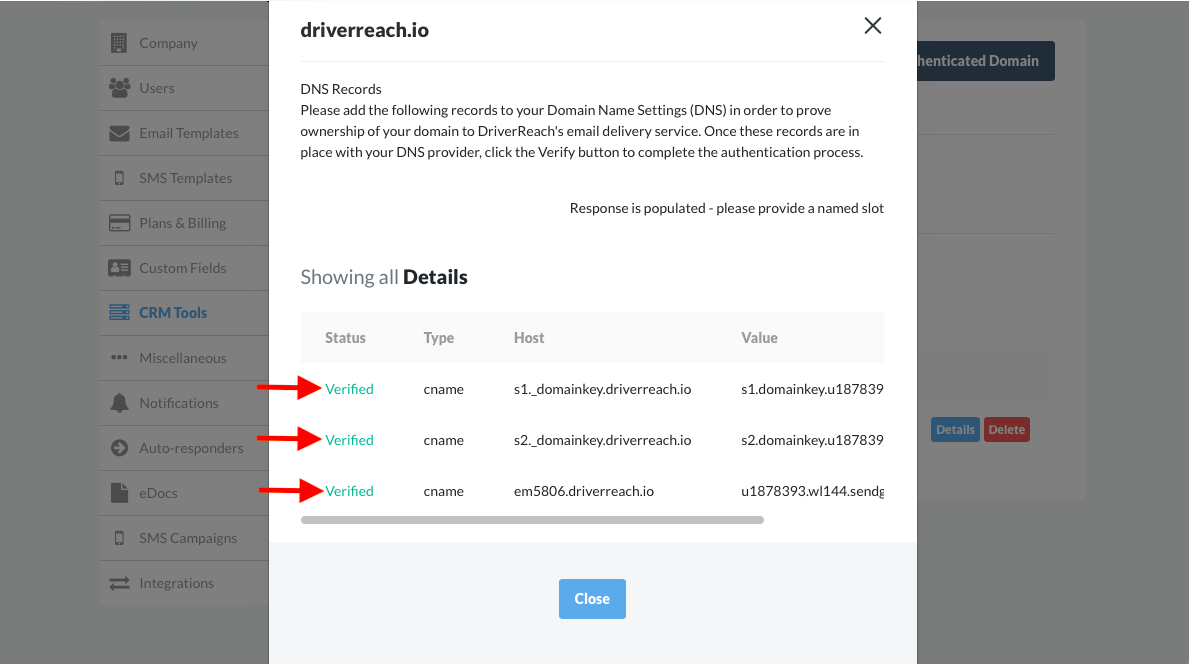
Step 11
The "Details" pop-up will still be visible. Expect to wait about 10-15 minutes for the new DNS settings to propagate through the Internet so that the authentication takes effect. You can click the "Verify" button every few minutes to check to see whether the authentication is complete. When the "Status" column on the "Details" pop-up window has a green "Verified" label next to that row, you can be certain that value is authenticated.
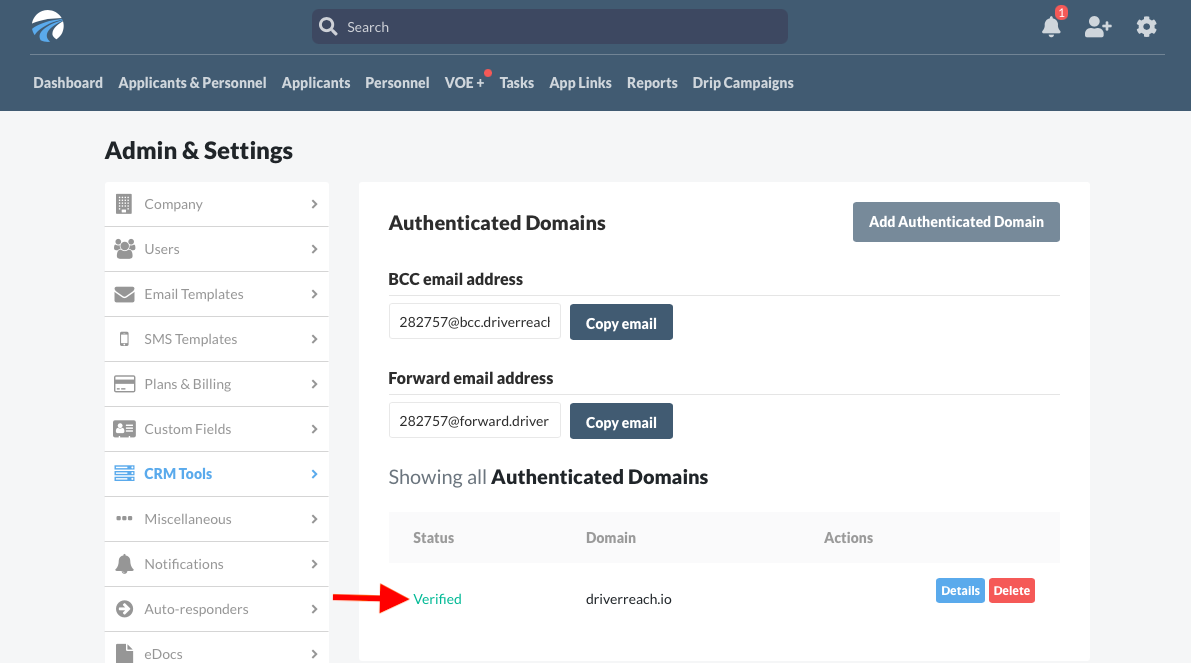
Step 12
After closing the "Details" pop-up window, you should now also see the green "Verified" label in the "Status" column next to that domain in the "Authenticated Domains" window. This means that your domain registrar recognizes emails you send via the DriverReach platform as legitimate. Now your emails have a much better chance of making it past spam filters and into the inboxes of your intended recipients.
Congratulations!
Your domain authentication is complete! You've just taken a very important step toward improving your reputation as an email sender. You've also increased your organization's overall email deliverability. More emails arriving safely in inboxes and trusted by recipients means better results and greater success for your organization.