DriverReach’s SMS templating functionality is a valuable, time-saving tool that gives users the best of both worlds: it saves users from having to type the same content over and over, but it also allows users to personalize and tailor templated content with convenient insert fields. Users may create dynamic SMS templates and choose from two different options for sending SMS templates to applicants. Sending a templated text message to one recipient may be done from the driver profile, while sending a templated text message to multiple recipients is best done using the bulk actions feature. Read on to learn all about how SMS templates can save time and ensure consistent, professional communication with recipients.
Creating SMS Templates
Step 1
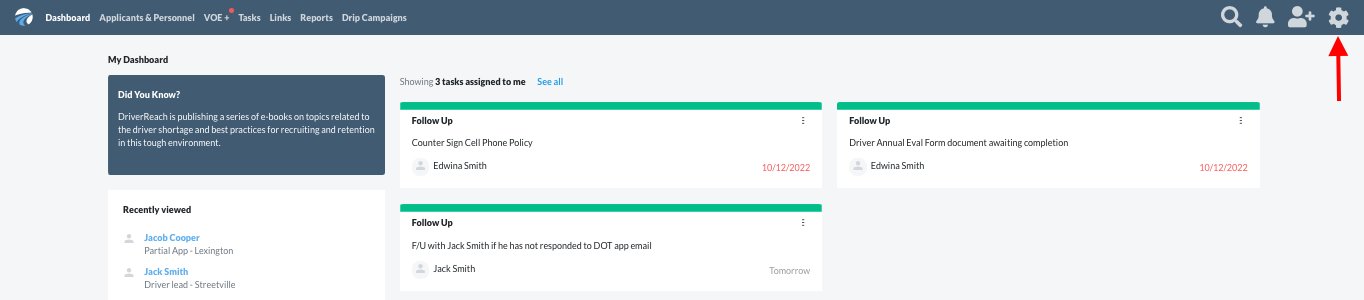
Visit the “Dashboard” page in the DriverReach platform to select the “Administration” icon, which looks like a cog, from the top right corner of the screen within the blue main navigation bar.
Step 2
On the drop-down menu that appears, select the black cog icon labeled “Administration”.

Step 3
Select “SMS Templates” from the list on the left side of the screen.

Step 4
Next, click on the dark blue button labeled “Add Template” on the upper right side of the screen.

Step 5
Determine a name for the template and type it in the “Name” box.

Step 6
Now it’s time to click in the free text field to craft the narrative for this SMS template.

Step 7
As you do so, keep in mind that most recipients dislike reading texts that lack personality or specificity. Users can combat this perception by making wise use of insert fields, such as adding the recipient’s name, links to documentation, and many more key pieces of data. These will automatically populate information specific to each individual selected to receive the template. Employing these techniques is quick and easy: just click on the “insert fields'' drop-down menu in the template creator as you see below and make your choice(s). SMS templates that wisely use insert fields convey a very personal and professional tone that recipients truly appreciate and that increases response rates.

Step 8
Click the blue “Save” button to save this template for future use. (Alternatively, if you are not happy with the template and do not wish to save, click the white “Cancel” button to close the pop-up window without saving your progress.) Saved templates show up as options whenever you choose to text recipients.

Sending SMS Templates
From the Driver Profile
Users wishing to send a text message template to one particular individual should use this method. Users wishing to send a text message template to several recipients should view instructions for sending SMS templates using the bulk actions feature instead.
Step 1
There are several ways to access the applicant to whom you would like to send a templated SMS message. From any screen, find the desired applicant by typing in his or her name into the global search area after clicking on the magnifying glass icon located on the right side of the top blue menu bar. Alternatively, from the “Applicants & Personnel” page, you may employ any filters you would like to use for your search and then type some or all of the individual’s name into the “Search applicants” box on the right above the applicant table.

Step 2
Click on the name of the individual to open his or her record.

Step 3
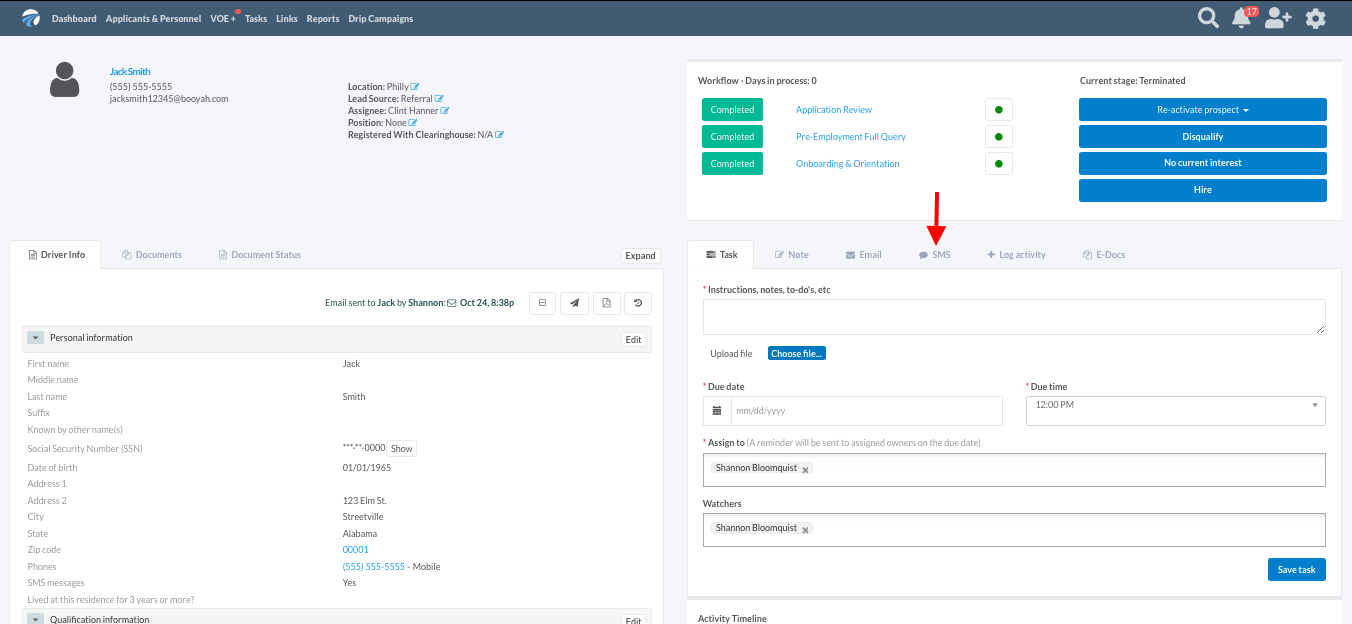
Click on the “SMS” tab on the right side of the screen.
Step 4
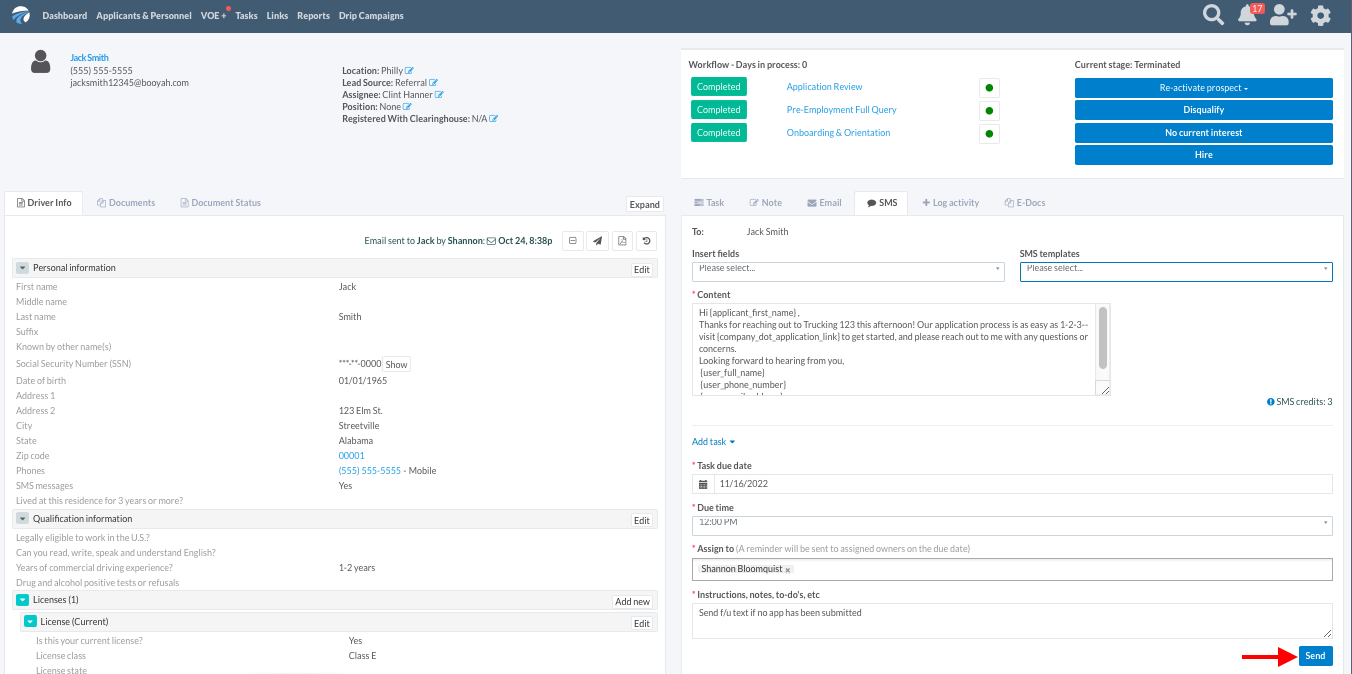
Click on the drop-down menu underneath the “SMS templates” heading to scroll through all of the text message template options created within your account in the DriverReach system.

Step 5
Select which SMS template you would like to send from the drop-down menu by clicking on that template name.

Step 6
The sample template below contains insert fields, so it has already been personalized for the recipient, but if users wish to further modify the SMS text, they may do so by typing in the message text box. For example, in the example below, “this afternoon” has been added in the first sentence to refer to the time of the recipient’s initial contact. These small additions help to show the recipient that this is not a text from a robot but rather a personalized message from someone who cares enough to spend some time getting his name and details right. Adding text in this way will not change the original template; it only modifies this specific message to this specific recipient.

Step 7
Users may find it convenient to add a task related to this SMS message at the same time they send the text. Clicking the blue “Add task” link below the attachment field will open a task input pop-down template.

Step 8
Simply fill in the task due date and time, select the person to whom the task is assigned, and input any instructions in the appropriate fields.

Step 9
After reviewing the message (and task, if one was created), clicking the blue “Send” button in the lower right corner of the “SMS” tab will send the text and, if a task has also been entered, it will save it to the assigned user’s task list. If no task has been entered, then only the text will be sent.
Step 10
After sending, users may confirm these actions by checking to see that they are listed in the Activity Timeline below the tabs on the right side of the screen.

Step 11
Users will note that there are conveniently-located buttons on tasks in the timeline that allow them to pin, mark as complete, and edit the task as well as to view all tasks.

Step 12
Users will note that there are conveniently-located buttons on SMS listings in the timeline that allow them to pin, resend, and view previously sent texts as well as view all communications.

Using the Bulk Actions Feature
Users wishing to send an SMS template to one particular individual might prefer using the driver profile method, but for those wishing to send an SMS template to multiple recipients, the bulk actions feature described below saves quite a bit of time.
Step 1
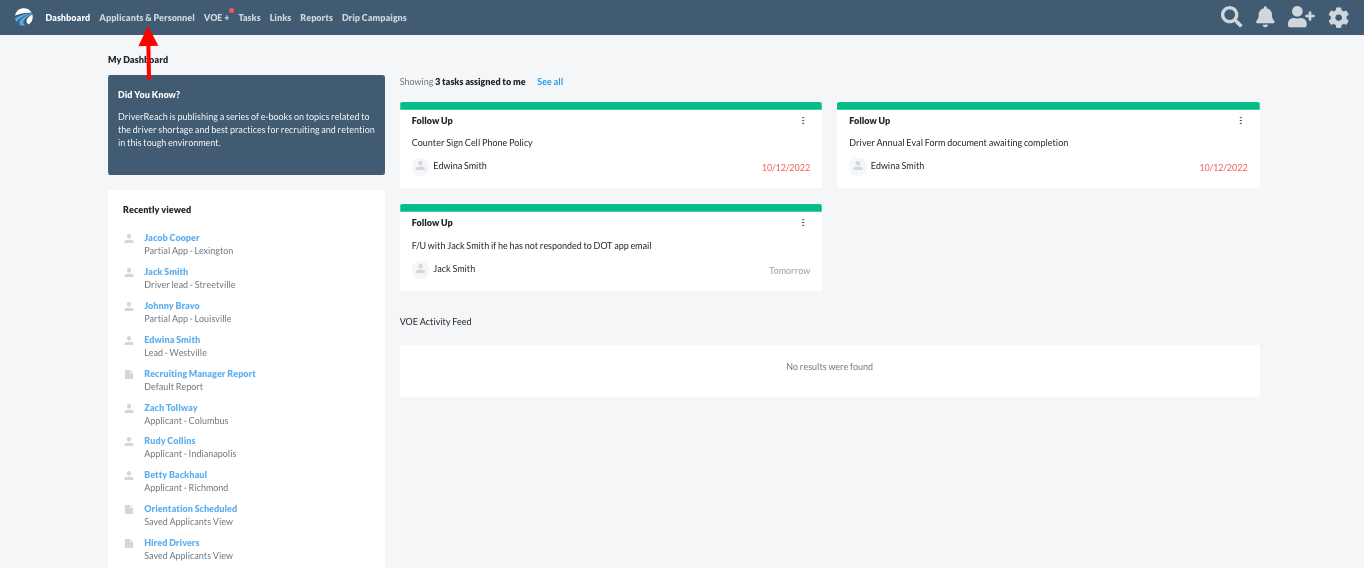
Starting on the Dashboard, select “Applicants & Personnel” from the main navigation menu.
Step 2
Click the checkbox next to each applicant to whom you would like to send the SMS template.

Step 3
Select the “Bulk Actions” icon, which looks like three individual silhouettes grouped together, from the top right side of the screen.

Step 4
Select the “Send SMS” choice from the selection of drop-down menu items.

Step 5
In the pop-up window that appears, select which SMS template you would like to send to the selected recipients.
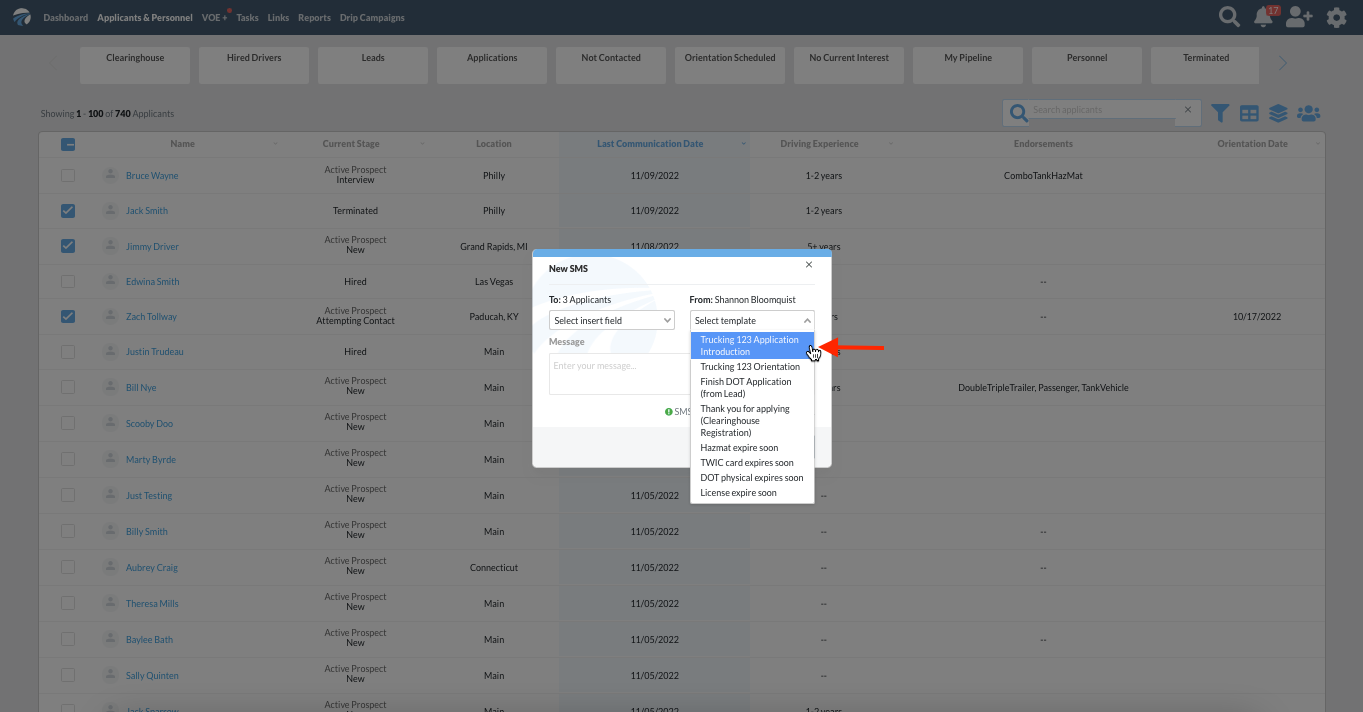
Step 6
The body of the text message may be edited; remember that this text will go out to every checked off recipient, so whatever is added to the template is going to be seen by every person selected on the previous screen. Insert fields can also be added to the template at this point.

Step 7
Once the SMS message is ready, click on the blue “Send” button in the lower right hand corner of the pop-up window to send the text message to all recipients previously selected.

Step 8
A small green notification will appear in the upper right corner of the screen confirming that the text message has been sent to the selected individuals.

Step 9
Just as when an SMS template is sent from the driver profile, users will also find after sending that the SMS message is now listed on the “Activity Timeline” on each individual’s profile selected during the bulk action send process as seen below.
