An email signature is personalized information specified by a user to be automatically inserted at the end of all emails drafted by that user within the DriverReach system. An email signature often includes the sender’s name, professional title, means of contact, a company name and address, and sometimes a company logo, slogan, or other meaningful piece of information. This article explains how to create a personalized email signature to make your online correspondence more professional and to provide necessary information to your recipients so that they know how best to contact you. Read on to learn how!
Step 1
Beginning on the Dashboard landing page, click on the cog icon located on the far right side of the screen within the main blue navigation bar.

Step 2
Within the dropdown menu that appears, select the “My Account” heading located next to the silhouette icon.

Step 3
Select the blue “Update profile” button under your account information on the left-hand side of the screen.

Step 4
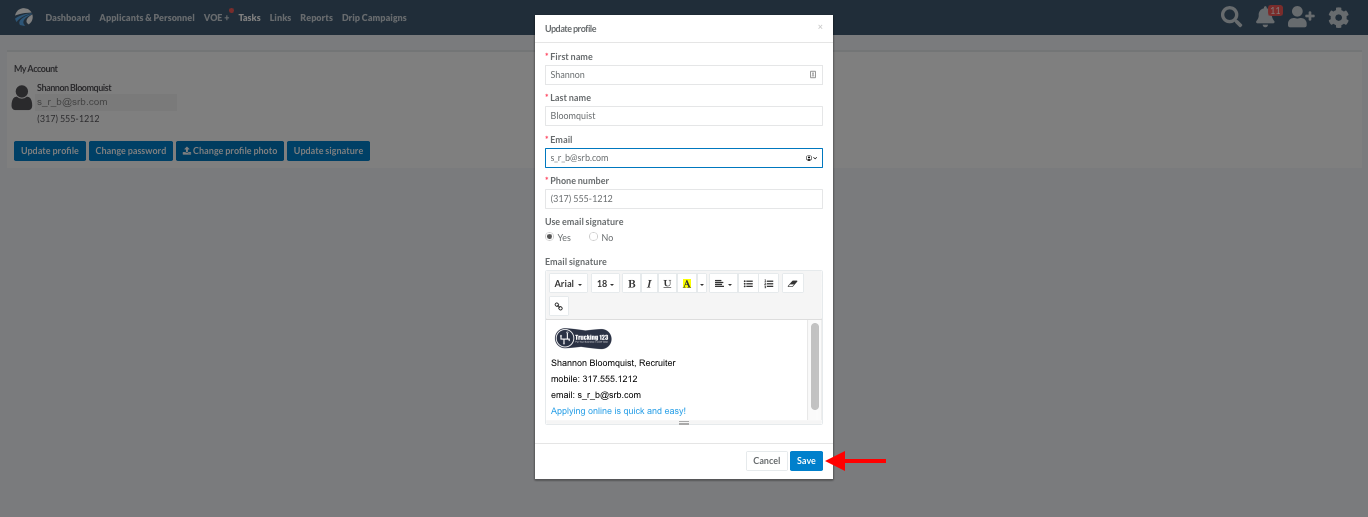
In the pop-up window that appears, double check the information in your profile and make any necessary corrections to the first and last name, phone, and email fields.

Step 5
Next, select the “Yes” radio button underneath the “Use email signature” heading at the bottom of the pop-up window.

Step 6
In the signature text box that appears below the radio buttons, users may enter information they wish to include in the email signature, keeping in mind that this information will be included at the end of every email sent. Typically, users include a first and last name, professional title, phone number, and email address. Some users may also choose to include their company name, web site, or address. For an email signature that also encapsulates their company’s brand more fully, users may also wish to include a company slogan or tagline; copying and pasting the company’s logo into the signature as seen below is also an option. Similarly to most word processing programs, users may adjust the font type, size, color, and style as well as add links to text by making use of the email signature toolbar along the top of the text box.

Step 7
Once the email signature information is complete, click the blue “Save” button. Clicking the white “Cancel” button will close the pop-up window without saving any changes made to the user’s profile information or email signature.
Step 8
Users who have clicked the "Save" button will see a small green confirmation message appear for a brief time in the upper right hand corner of the screen indicating that the email signature update is complete.

Step 9
When this user emails applicants or personnel within the DriverReach app, the email signature automatically populates within the draft email template as seen below.
