This article explains how to convert non-PDF documents to the PDF file type so that they may be uploaded to the eDocs system. It also explains how to remove password security from a PDF.
Converting Uploads to PDF
In this eDocs system, the only document file type that may be uploaded during the document creation process is a Portable Document Format, or a PDF. To determine whether the document in question is indeed a PDF, users may wish to check the document's file extension. If the file name ends in ".pdf", then it may be uploaded to the eDocs system during the document creation process. Those wishing to upload documents with a file name that ends in .html, .htm, .doc, .docx, .txt, .xls, or .xlsx will need to convert the document to a PDF, then upload the PDF version of the document to eDocs. This section provides simplified instructions for converting documents to PDF in macOS and Windows and provides information on removing password protection from a PDF file.
macOS Instructions
Step 1
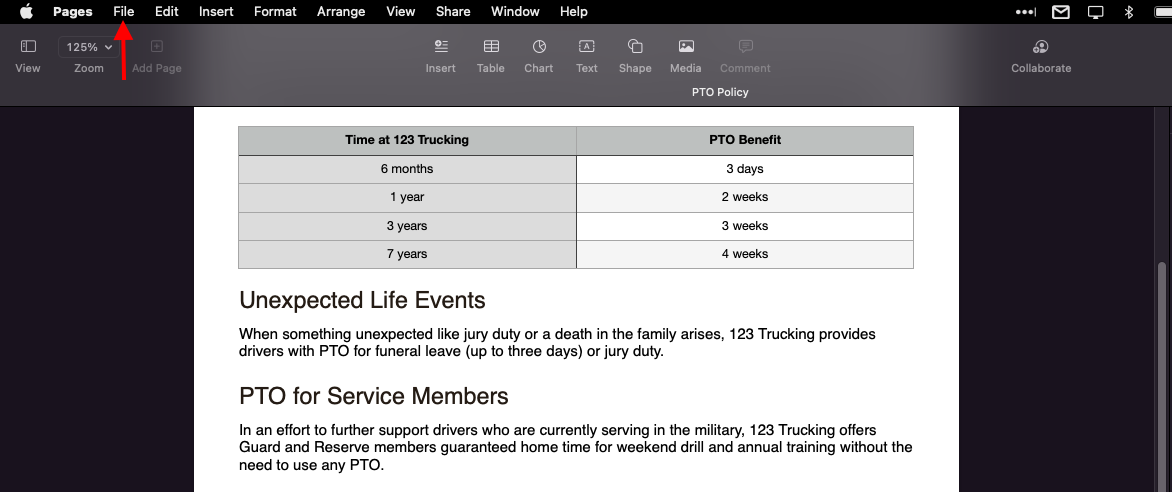
On a Mac, open the document that will be saved as a pdf. From the menu along the top of the screen, select "File".
 Step 2
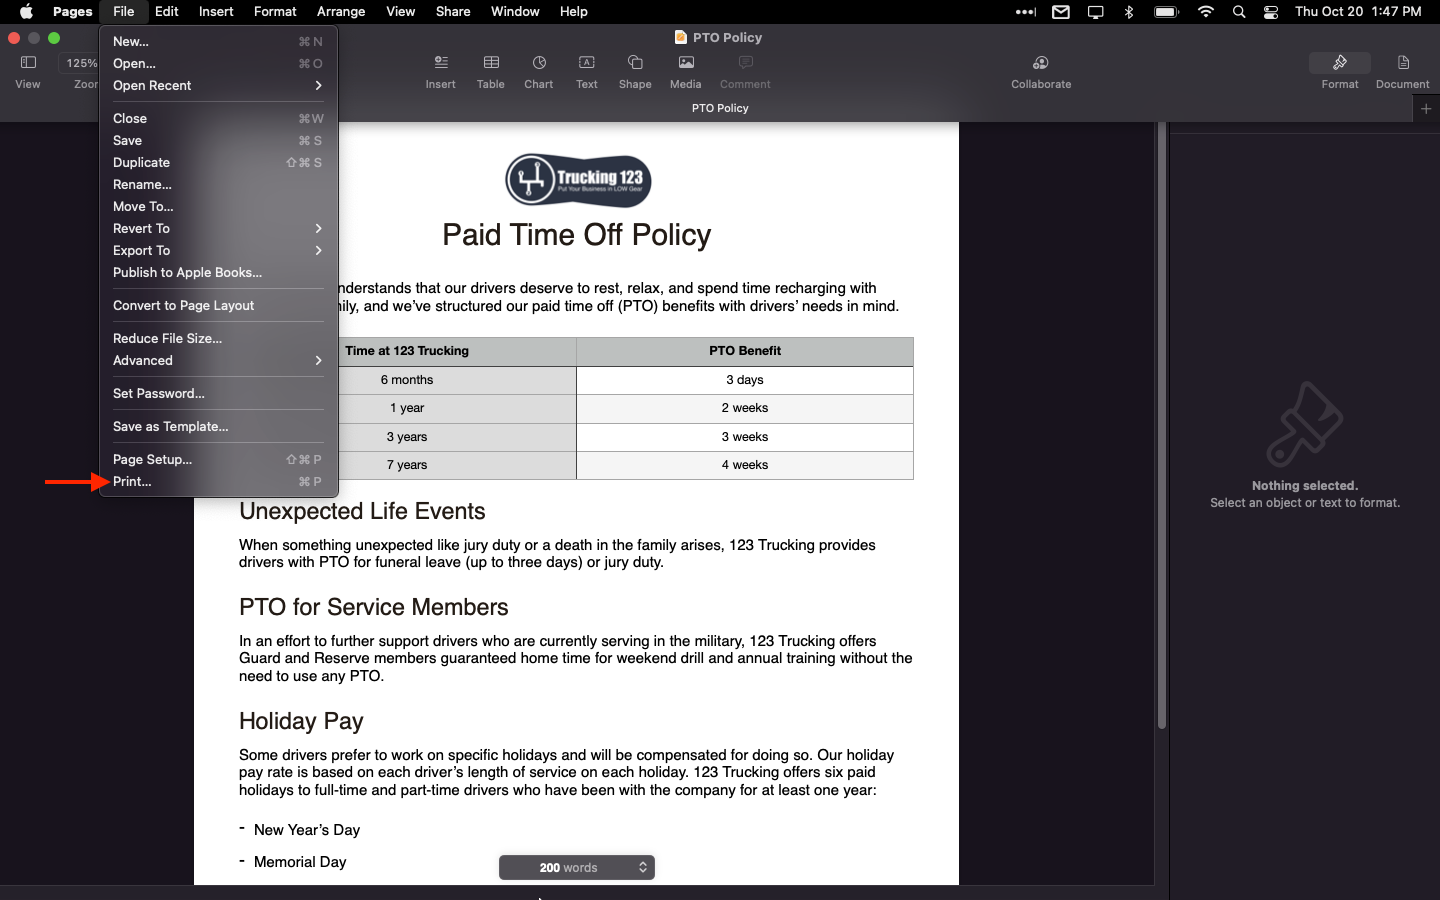
Select "Print" from the drop-down choices under the "File" heading.
Step 3
-
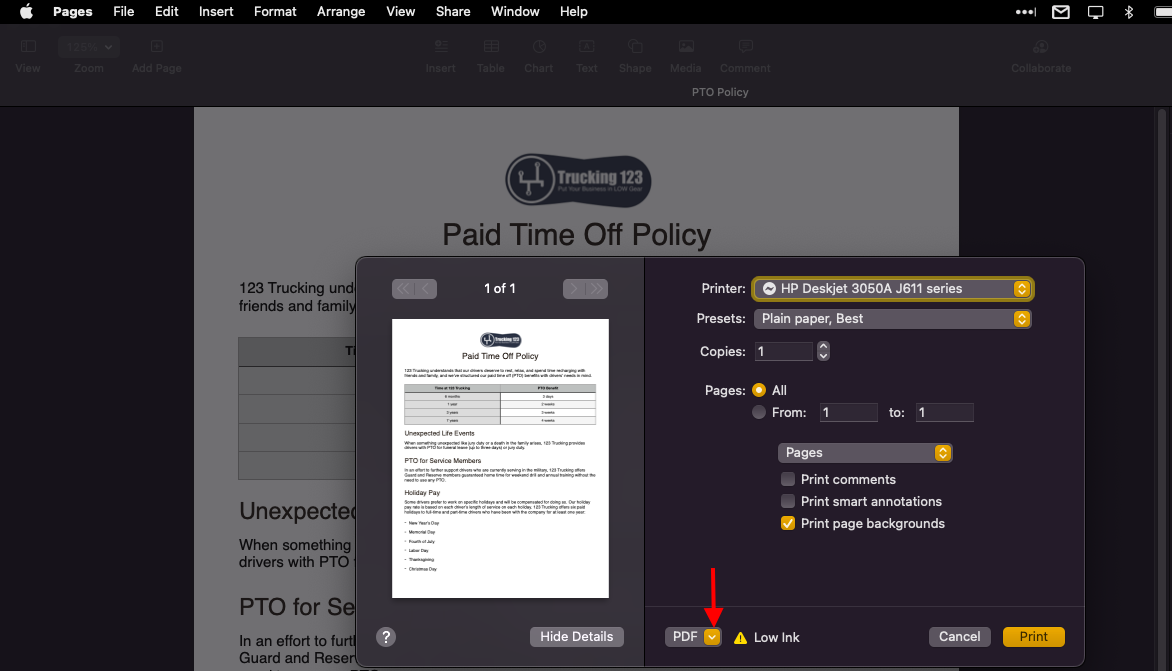
Within the pop-up window that appears, select the PDF drop-down menu.
Step 4
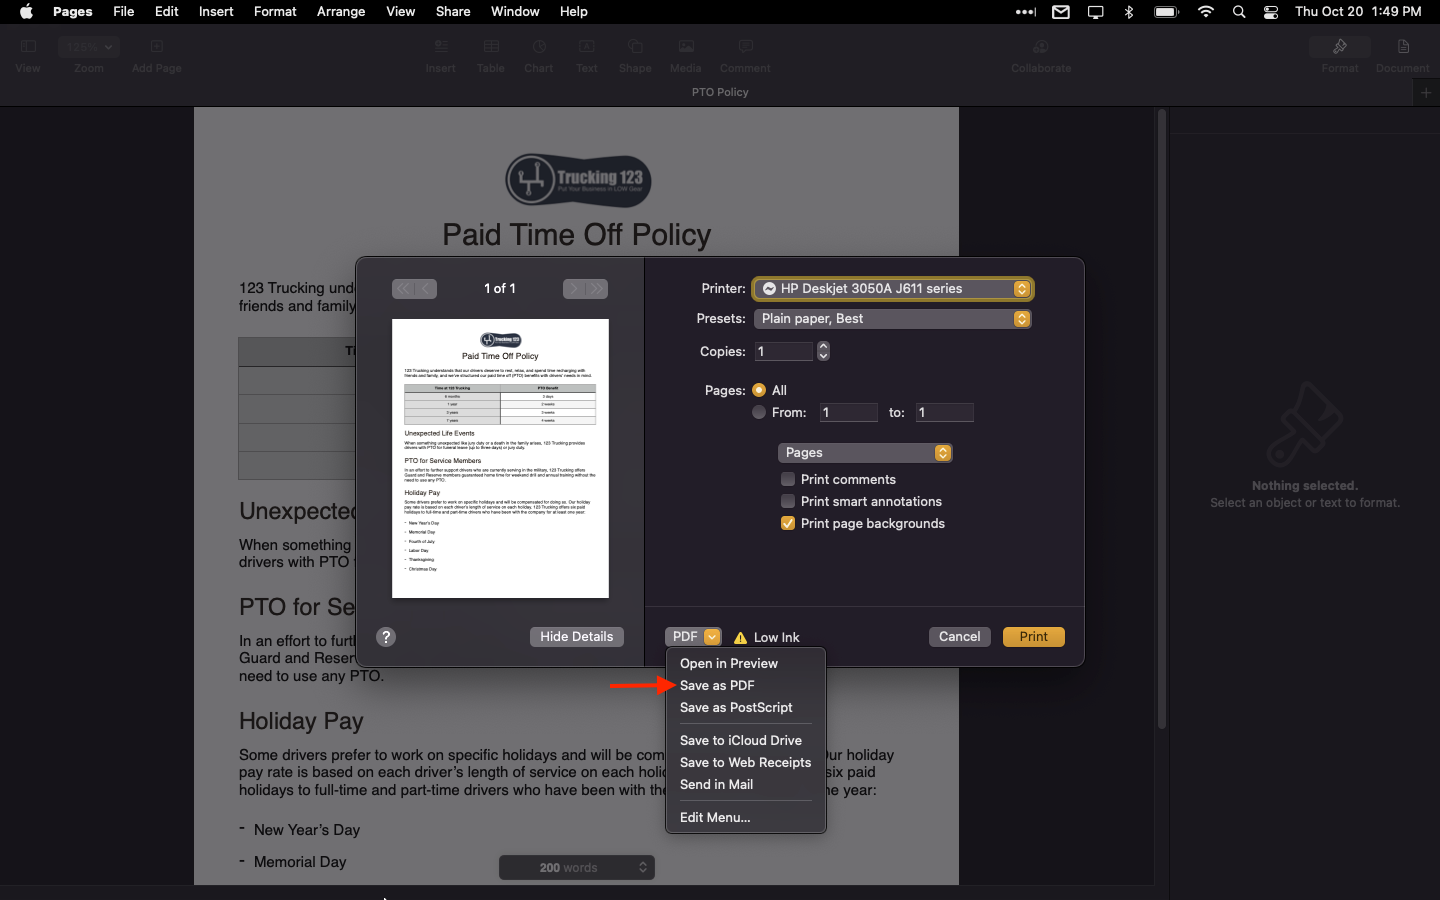
Select "Save as PDF" from the list of drop-down choices.
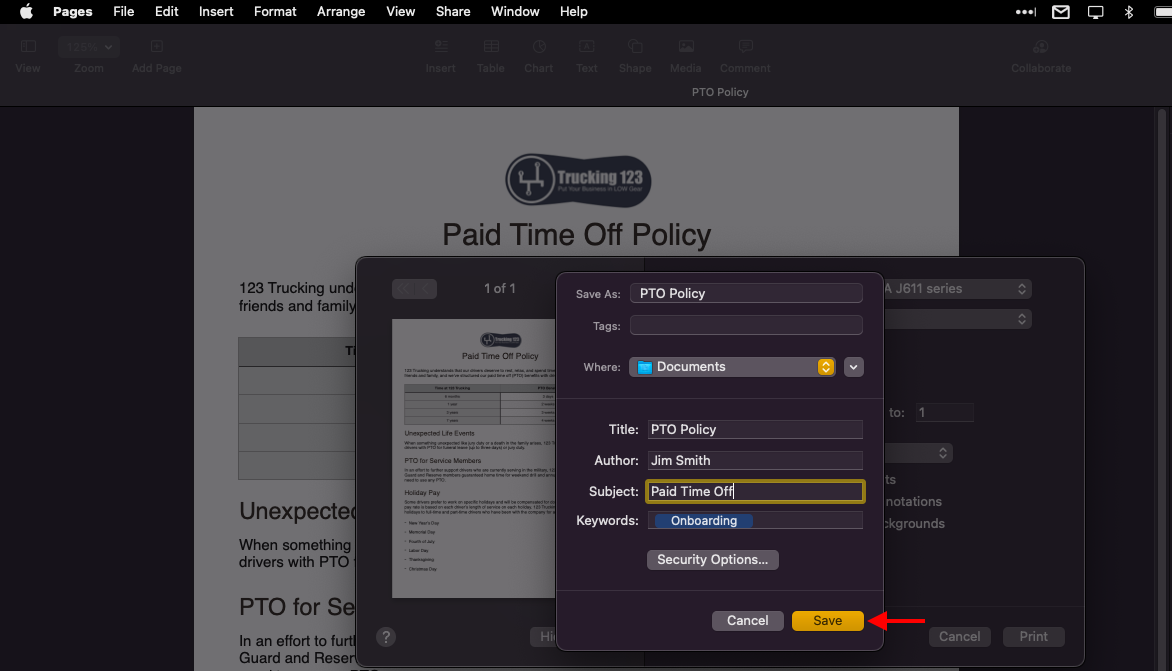
 Step 5
Choose a name and location for the PDF file and edit any information necessary in the title, author, subject, and keyword fields; then click "Save". The PDF version of this document may now be uploaded during the eDocs creation process.
Windows Instructions
Step 1
In Windows, open the document that will be saved as a pdf. From the menu along the top of the screen, select "File" and then "Print" from the drop-down choices. Alternatively, the shortcut of holding down the "Control" button while pushing the "P" button on the keyboard will also open the print window.
Step 2
Click on the current printer’s name so that a drop-down menu appears. 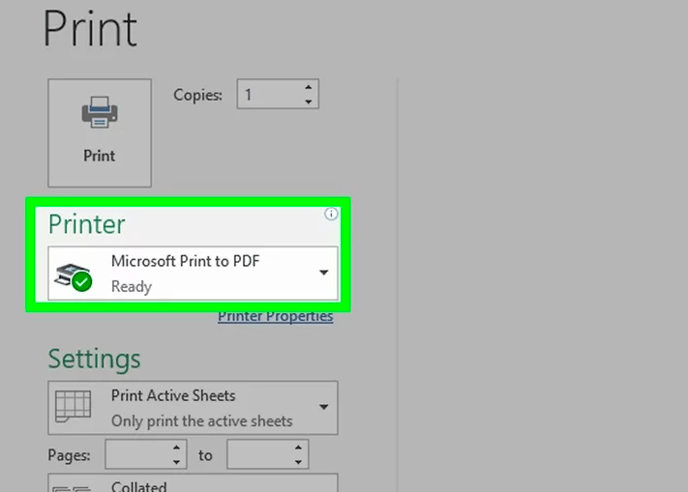
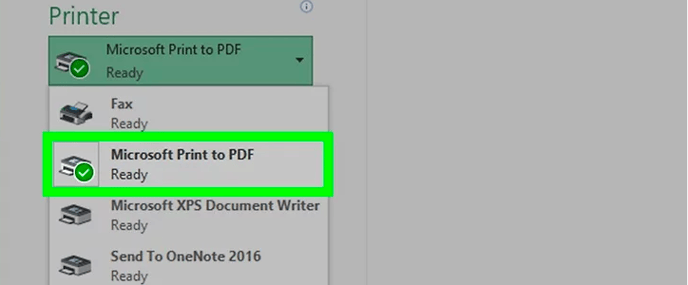
Step 3
Many options will appear, and some programs use different wording, but select the choice that references "PDF". In the case below, the selection reads "Microsoft Print to PDF", but it could also be "Adobe PDF" or another phrase with the file name "PDF" contained therein.
Step 4
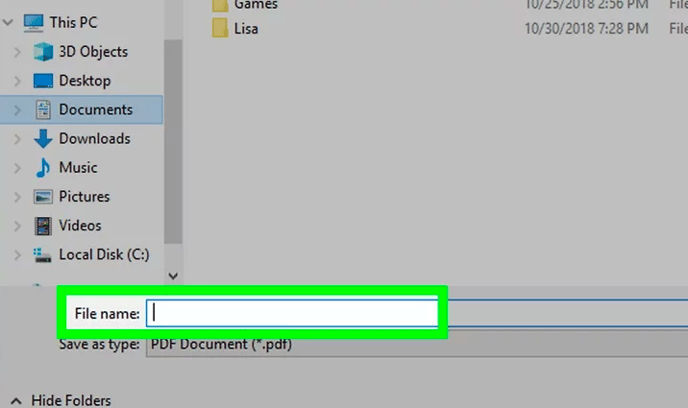
Select “Print”, which will open up a save menu. Enter a name for the document in the "File name" field.
Step 5
Select where to save the PDF version of this file.

Step 6
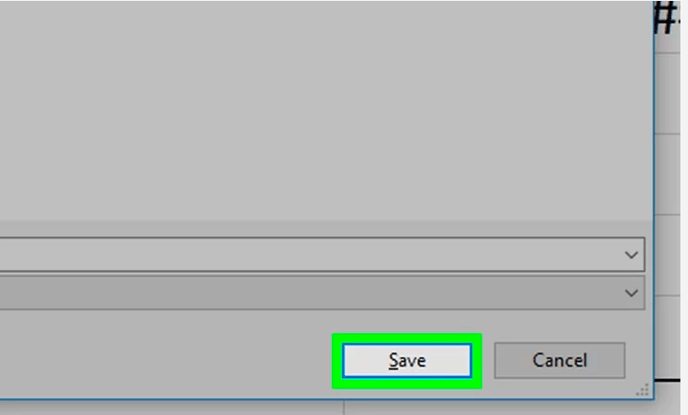
Click the "Save" button. The PDF version of this document may now be uploaded during the eDocs creation process.
Removing Password Security from a PDF
Removing password security from a PDF is possible if the user has the permissions to do so. If the PDF is secured with a server-based security policy, only the policy author or a server administrator has permission to remove security.
Those with permission may remove password security by opening the PDF file and selecting Tools > Protect > More Options > Remove Security.
The type of password security attached to the document dictates the next steps. If the document is protected by a "Document Open" password, simply click "OK" to remove that password from the document. If the document is protected by a "Permissions" password, type that password into the "Enter Password" box and then click "OK". Click "OK" once again to confirm the action.