This article explains how to control access to sensitive driver documents in DriverReach. You'll learn how to create a user role called "Safety-Sensitive" and restrict document viewing/editing for users without this role.
Many documents stored in DriverReach, such as medical cards, drug screening results, and background checks, contain sensitive driver information. To ensure this information is only accessible to authorized personnel, DriverReach offers a "safety-sensitive document" feature. This feature allows you to restrict access to specific document types by creating a dedicated user role with limited permissions.
This article will guide you through the process of setting up the "safety-sensitive document" feature. We'll cover how to create a new user role called "Safety-Sensitive" and then assign this role as a requirement to view and edit critical documents, including:
- DOT Physicals
- Medical Cards
- Drug Screening Results
- Criminal Background Check Results
- Clearing House Results
- I-9s
- Any other document types your company deems sensitive in nature
Setting Permission Types to Access Safety-Sensitive Documents
⬇️ Jump to: Choosing Safety-Sensitive Documents
⬇️ Jump to: Background Check package & Safety-Sensitive Documents
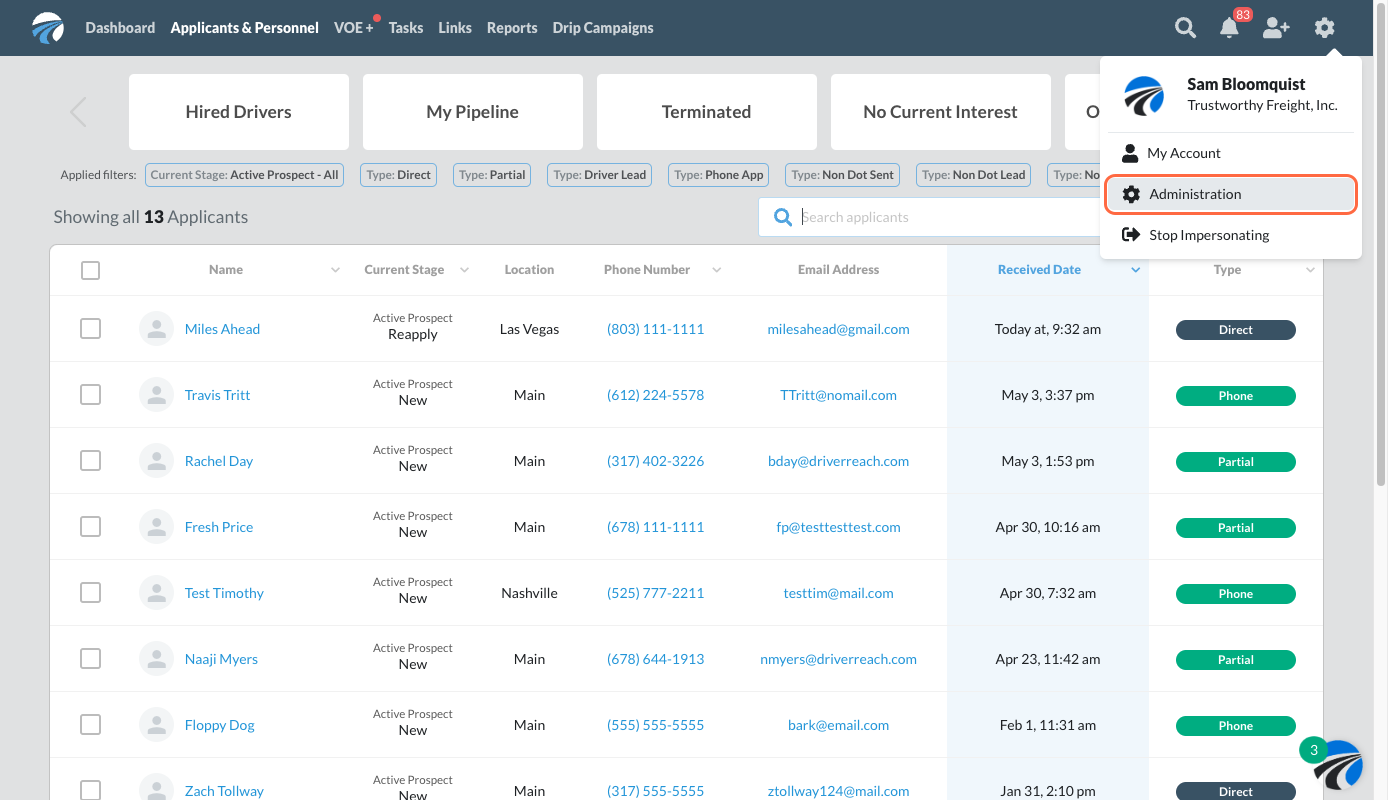
1. In the Dashboard, click on the cog icon in the top right corner. Select “Administration”.

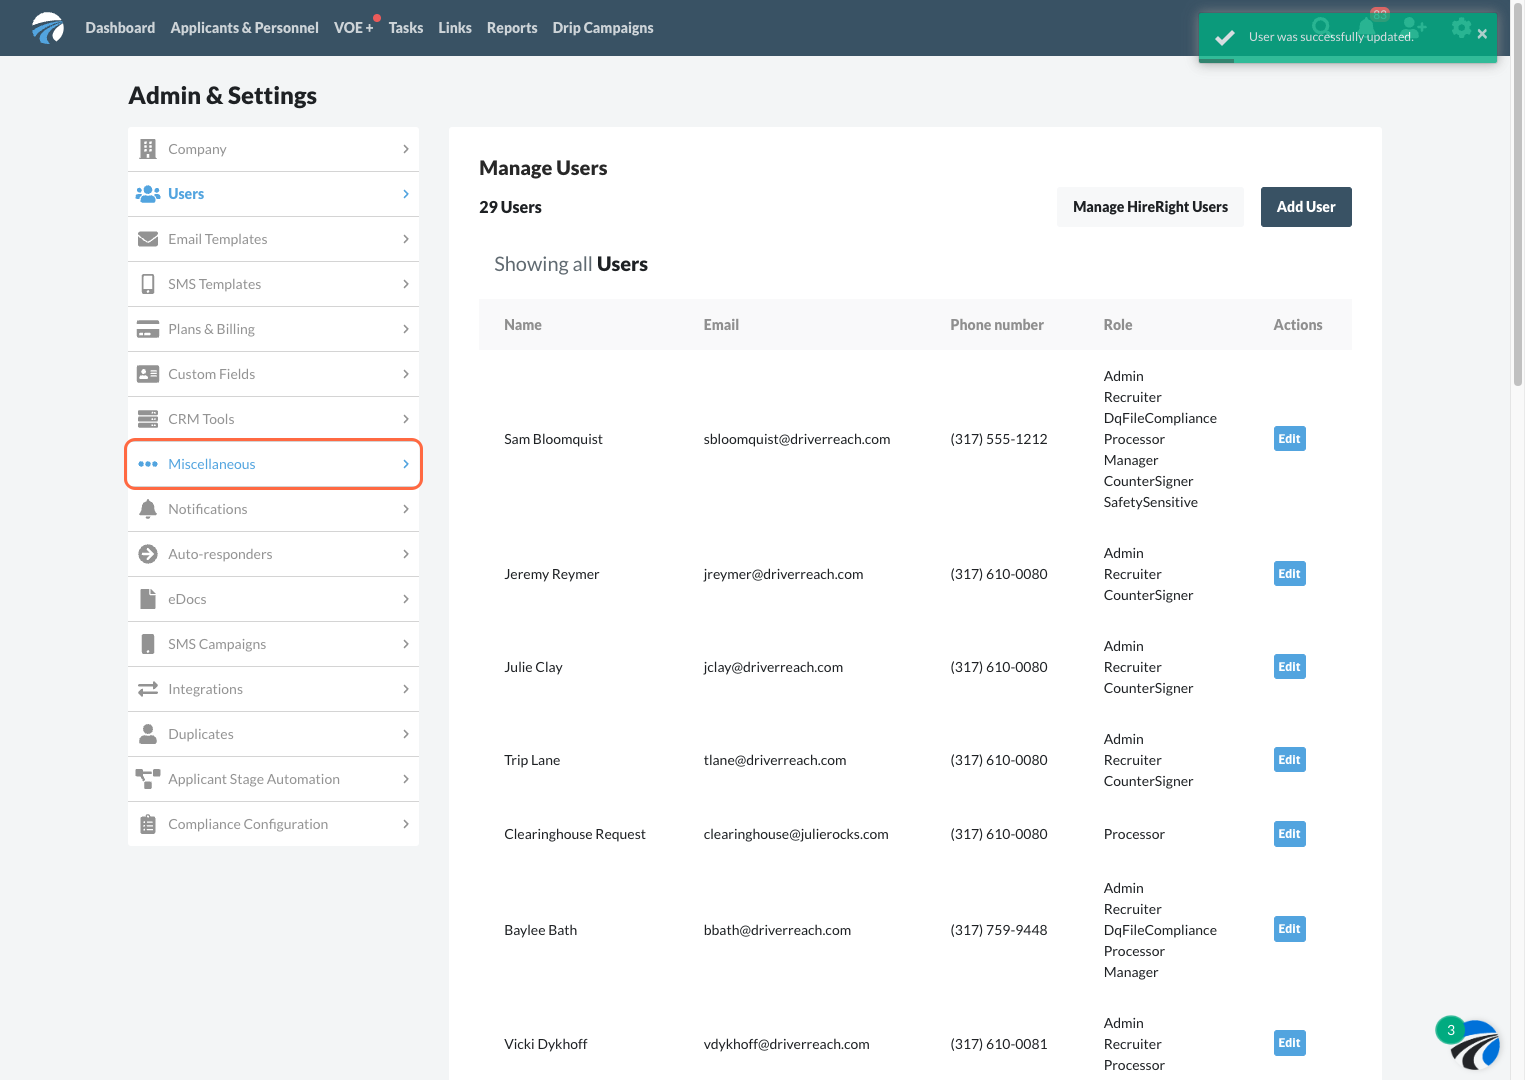
2. In the Admin & Settings section, click Users on the left side panel. You’ll now see a list of all users and their permission types.

3. Select the user you wish to grant permission to see safety-sensitive documents. Click Edit to adjust permissions.
NOTE: Safety-Sensitive is a relative term! You can dictate which documents are visible to users in the next section.

4.Use the downward arrow to see list of all role types, and select Safety Sensitive


5. Click the Save button. This user now has the Safety-sensitive role applied to their DriverReach access.

Once you've created the "Safety-Sensitive" user role and assigned it to the appropriate users, documents containing sensitive information will be restricted for those without the necessary permissions. Here's a breakdown of where these limitations will occur:
- Applications:
- Documents tab: Accessible. The View and Edit action buttons are not clickable for sensitive documents.
- DQ File tab: Accessible. The View and Edit action buttons are not clickable for sensitive documents. The Print DQ File button will also be unclickable if the resulting file contains sensitive documents.
- DQ Checklist tab: Individual requirement document list - The Edit action button is not clickable for sensitive documents. The filename will be plain text, instead of a link to view the document.
- Background Checks:
- Uploaded documents list: The View and Edit action buttons are not clickable for sensitive documents.
- Onboarding & Orientation:
- Entire Criminal Record section: Removed from view completely.
- Driver's License section:
- If the photo is marked as sensitive, it will only display the filename instead of the image. A link to edit the information will not be available.
- Sensitive sections (Med Card, Drug Screen, Payroll, Orientation, Road Test, Miscellaneous): The View and Edit action buttons are not clickable for sensitive documents.
- Pre-Adverse/Adverse Actions: Recruiters can still view associated sensitive documents only if they have the ‘safety sensitive’ role.
Implementing these restrictions ensures that only authorized personnel can access sensitive driver information within DriverReach.
Choosing Safety-Sensitive Documents
After creating the "Safety-Sensitive" user role, let's go through the process of identifying which documents in your DriverReach system should be restricted using this functionality.
1. In the Admin & Settings section, navigate to the Miscellaneous section
2. Scroll down to Sensitive Document Varieties to see a list of documents in your DriverReach account to tag. Use the down arrow on the right side of the drop down to make your selections. In this example below, we’ve selected “Background Check Authorizations.”
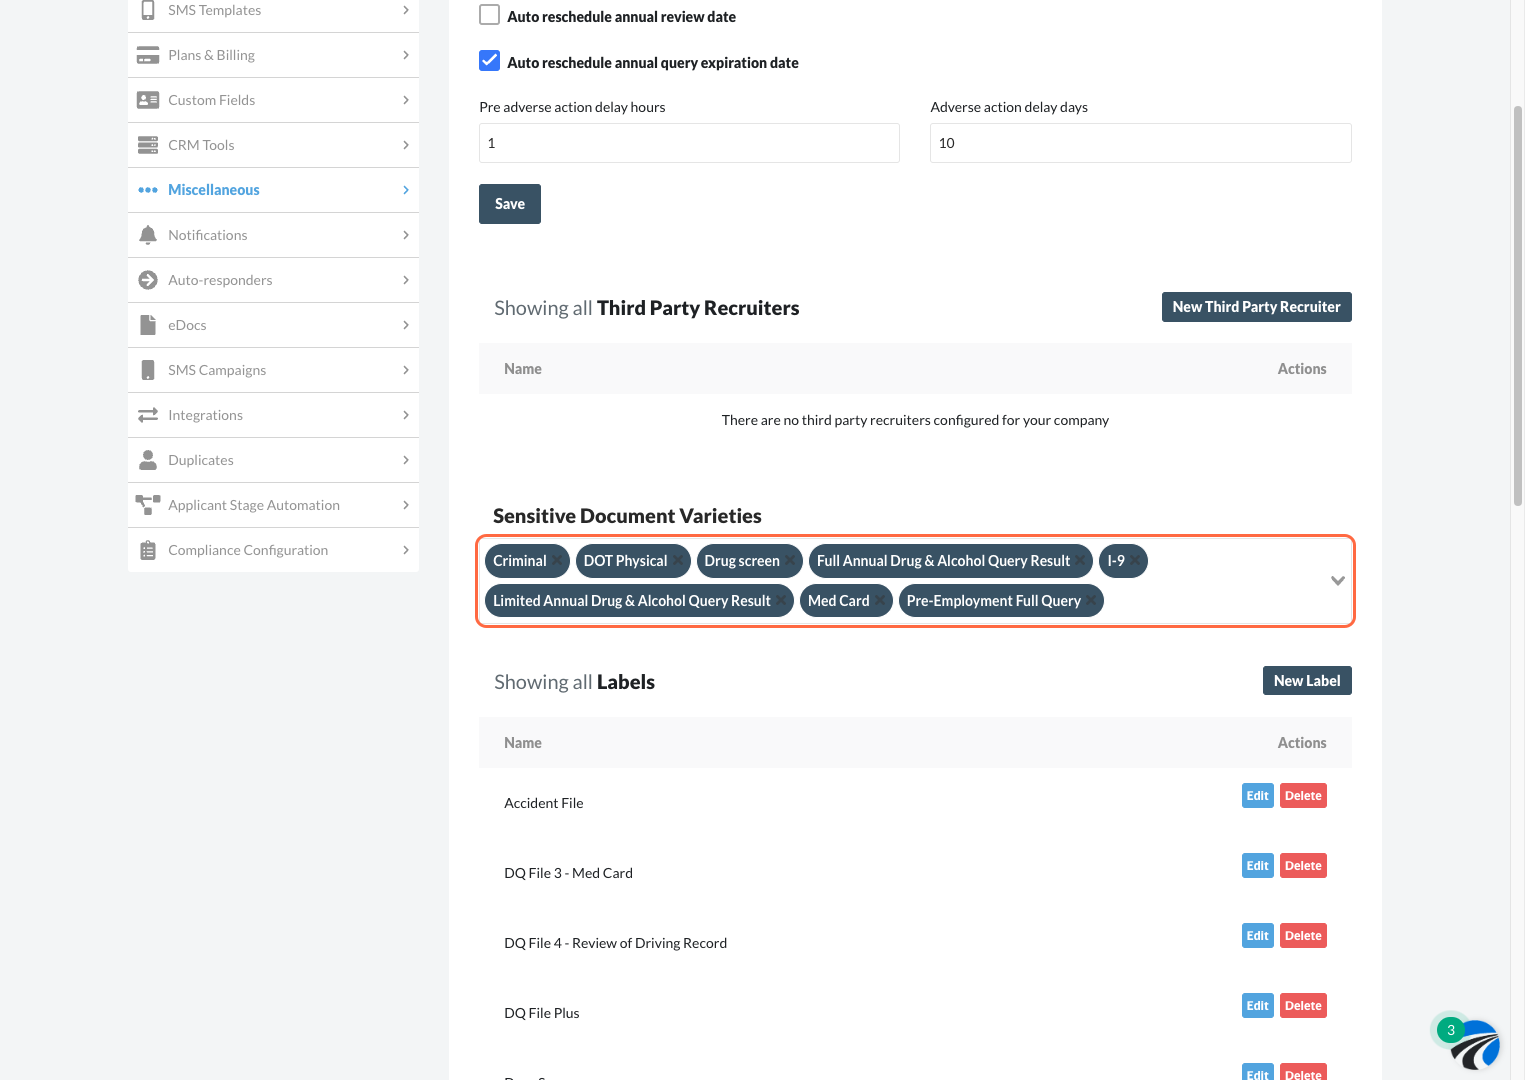

3. Clicking on any of these documents will add them to the list of Sensitive Document Varieties. To remove a document from the list, simply click the tiny “x” next to the document name.
🎉 You've now successfully set up your account to handle viewership of safety-sensitive documents!
Background Check package & Safety-Sensitive Documents
Automatic Detection of Sensitive Documents
When your company receives a background check from providers like HireRight or DriverIQ, it often comes as one file with different types of reports (e.g., driving history, employment verification, drug test results). DriverReach can now automatically detect if these reports contain sensitive information, like driving records (MVR) or criminal history, based on your company’s settings.
The system checks two things:
- Package Name: This is the name of the background check package (like "Driver Package"), but sometimes it’s too general to know exactly what’s inside.
- Document Description: This provides more details (like “MVR Express” or “CDLIS”). The system looks for keywords in this description to figure out if the document is sensitive. For example, terms like "MVR" or "CDLIS" will be flagged if your company considers them sensitive.
New Label-Based Access Control
We’ve added another layer of protection using labels. These labels help control access to specific documents more precisely.
Here’s how it works:
- If your company has marked the MVR document variety as sensitive, and a document has the MVR label, only users with safety-sensitive permission will be able to access it.
- We’ve also introduced a new Sensitive label. If a document has this label, it will automatically be restricted to users with safety-sensitive permission.
This extra labeling system gives you more flexibility. For example, if the system doesn’t automatically catch a document that should be restricted, you can manually add the Sensitive label to lock it down while we investigate why it wasn’t flagged.