This article explains how to change the user assigned to an applicant within the DriverReach platform using two different methods: by making the change within the applicant profile, or by making the change using the bulk actions feature. Please note that only those with Admin and Manager roles have the authority to change the assigned user for an applicant.
Method 1: Making the Change Within the Applicant Profile
Step 1
There are several ways to access the applicant record for which you would like to change the assigned user. From any screen, find the desired applicant by typing in his or her name into the global search area after clicking on the magnifying glass icon located on the right side of the top blue menu bar. Alternatively, from the “Applicants & Personnel” page, you may employ any filters you would like to use for your search and then type some or all of the individual’s name into the “Search applicants” box on the right above the applicant table.

Step 2
Once the appropriate record has been located, click on the applicant’s name.

Step 3
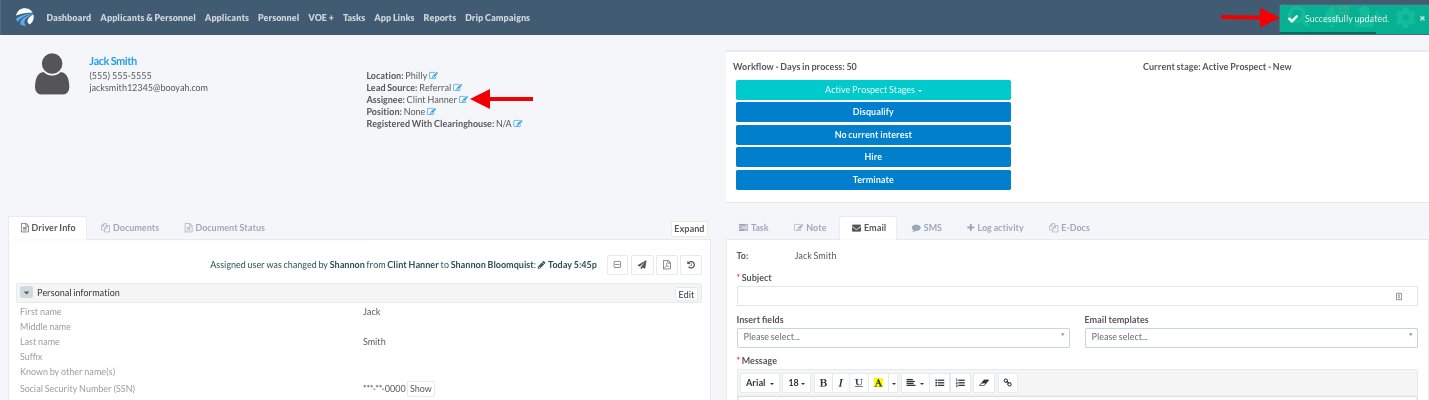
Within the applicant’s profile, find the column of data to the right of the applicant’s name and contact information. Click on the small blue edit button next to the “Assignee” listing for that applicant.

Step 4
Within the drop-down menu that appears, locate and click on the name of the new individual you wish to assign to the applicant.

Step 5
Briefly, a green notification will appear in the upper right corner of the screen confirming the change.
Step 6
When you next view the applicant’s record, you will find the new “Assignee” listed on the applicant’s profile page.

Method 2: Making the Change Using the Bulk Action Feature
Step 1
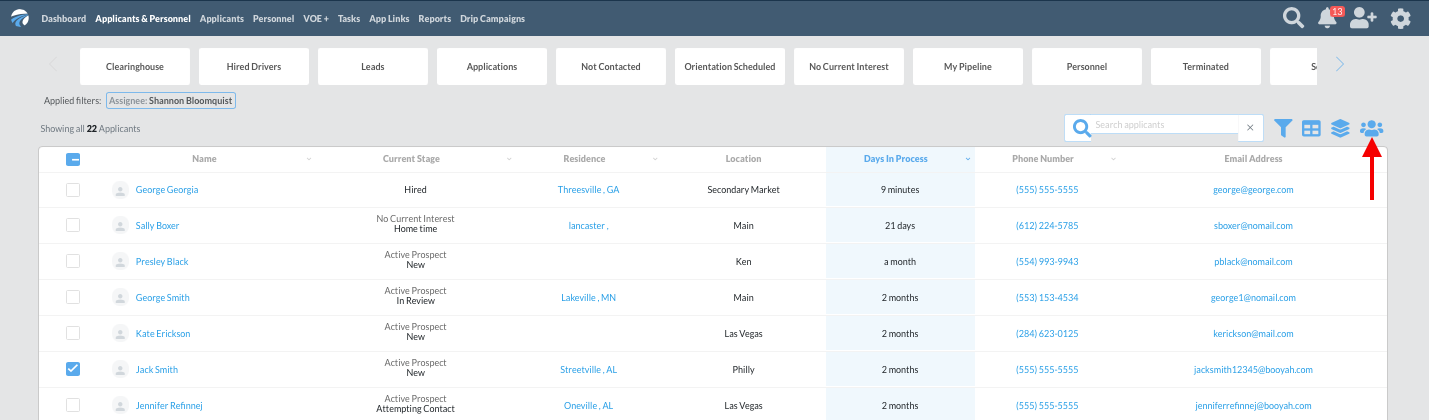
There are several ways to access the record for which you would like to change the assigned user. From any screen, find the desired applicant by typing in his or her name into the global search area after clicking on the magnifying glass icon located on the right side of the top blue menu bar. Alternatively, from the “Applicants & Personnel” page, you may employ any filters you would like to use for your search and then type some or all of the individual’s name into the “Search applicants” box on the right above the applicant table.

Step 2
Once the selections have been made, click on the blue "bulk action" icon above the right corner of the Applicants & Personnel table.
Step 3
A drop-down menu will appear; select “Set assigned user” from the list of options.

Step 4
Click on the new assigned user to select it from the drop-down menu.

Step 5
Click the blue “Save” button.

Step 6
Briefly, a green notification will appear in the upper right corner of the screen confirming the change.

Step 7
When you next view the applicant’s record, you will find the new “Assignee” listed on the applicant’s profile page.